2. Repeat step 1 for the other power supply and the right bay.
3. When both power supplies are in position, press down the locking tab near the back edge of
the power supply housing (see magnified view in figure above).
4. Temporarily remove the retaining brace from the edge of the racking shelf.
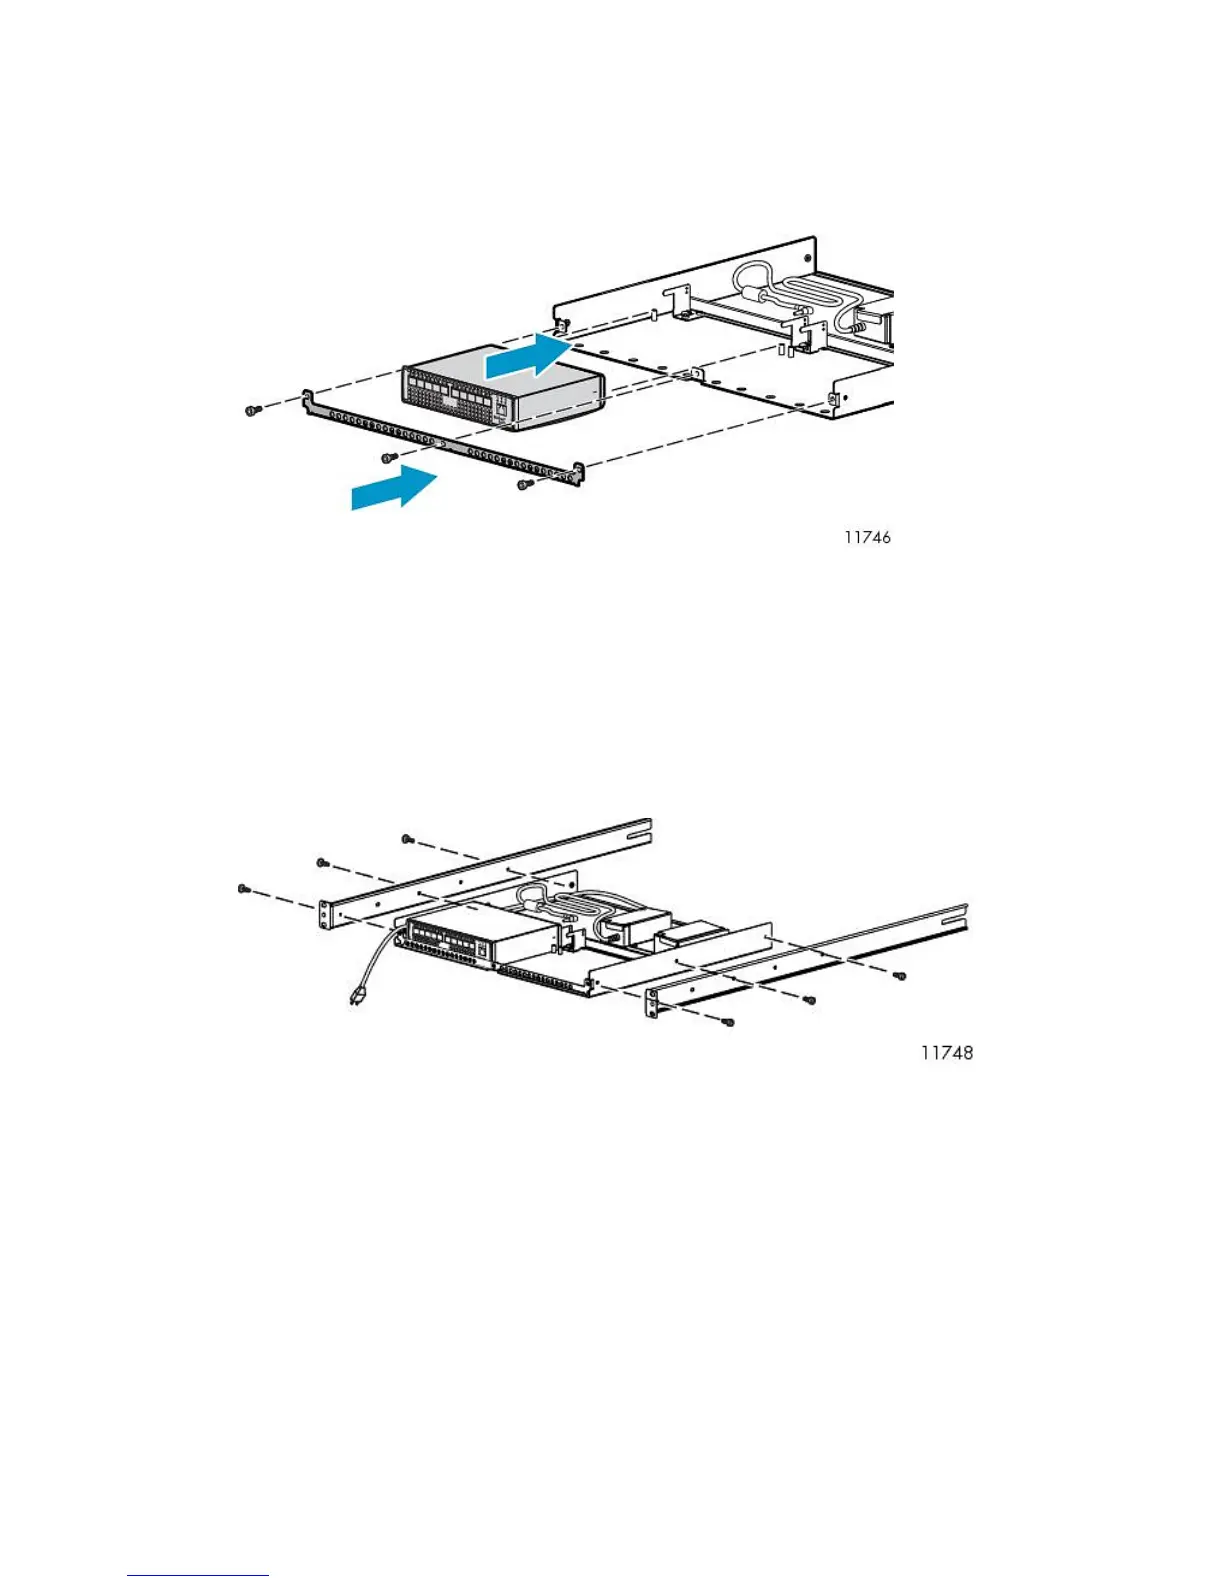
5. Slide one switch onto the left side of the racking shelf, and then slide the second switch onto the
right side of the racking shelf.
Use the guide posts on the bottom of the racking shelf to align the switches and ensure that the
prongs on the backstop engage the slots on the back of the switch.
6. When both switches are in position, replace the retaining brace.
7. Connect the DC cord of the power supply to the back of the switch and then secure.
8. Connect the AC power cord to the back of the power supply.
9. Attach the rails to the sides of the shelf assembly, using screws provided with the racking shelf.
Attaching Rails to Fibre Channel Switches 4/16q
1. Locate the following items and set them aside on a stable work surface:
• Two Fibre Channel switches 4/16q and two AC power cords
• 1 U rails, adjustable mounting flanges, two 1U cover plates, and hardware to secure the rails
to the rack
• Screws to secure rails to the switch
2. Connect the two AC power cords to the two power supplies on the rear of both 4/16q switches.
HP StorageWorks 43