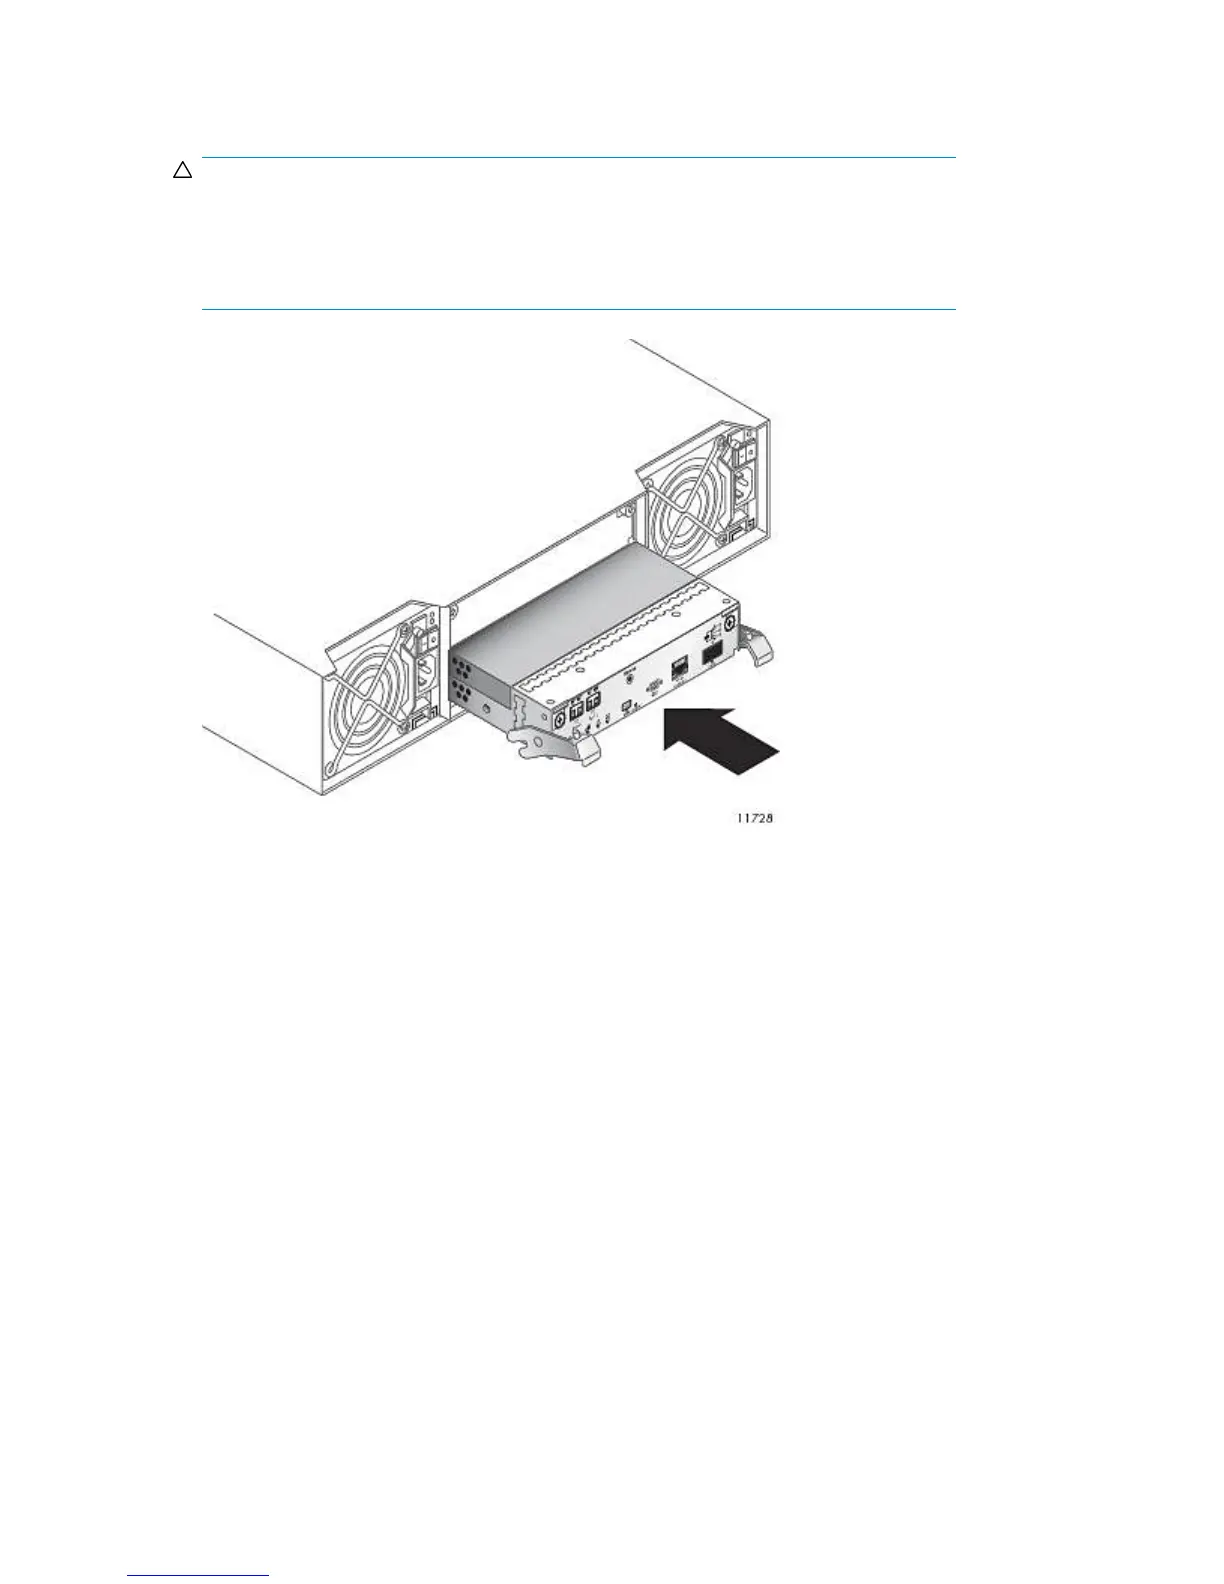
6. Position the controller with the latches toward the top and slide the controller into a slot as far as
it will go.
CAUTION:
When replacing a controller, ensure that less than 10 seconds elapse between inserting the
controller into a slot and fully latching it in place. Failing to do so might cause the controller
to fail. If it is not latched within 10 seconds, remove the controller from the slot and repeat
the process.
Figure 88 Installing the disk array controller
.
7. Press the latches upward until they are flush with the top edge of the controller, then turn the
thumbscrew on each latch clockwise until they are finger-tight.
The controller begins initializing.
The Power On/OK LED illuminates green when the controller completes initializing and is online.
8. Connect the cables to the new controller that were disconnected from the old controller.
9. If you are replacing a RAID controller, restore the failed path:
a. In Command View VLS, access the System tab.
b. Select Storage LUNs from the navigation tree.
c. Select View to display the storage LUN details.
d. Select Fix Primary Paths from the task bar to display the Fix Primary Paths Wizard.
e. Select Apply to set all paths back to their primary paths.
Component Replacement272
 Loading...


