v 1.4 — September 2015 Altanium Neo2
102 Replacing a Neo2 Display
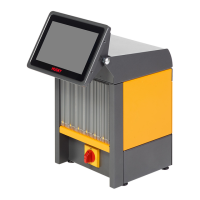
12.3 Replacing a Neo2 Display
In some cases the Neo2 will not come on if the display module is defective.
To remove the display module:
1. Turn the main input power disconnect switch to the OFF position.
2. Disconnect the controller from the power source.
3. Attach a lock and tag to the main input power disconnect switch.
4. Face the front of the system and rotate the display in the full forward position.
5. Using a 4 mm hex wrench, remove the two M5 screws that hold the Neo2 display to the
mainframe.
6. Carefully pull the display away from the mainframe. This exposes the cable connectors
between the mainframe and the display.
7. Disconnect all cables connecting the display to the mainframe.
8. Install the replacement display module by reversing the above steps.
9. Plug in the controller.
10. Turn the main input power disconnect switch to the ON position.
12.4 Calibrating the Thermocouple Inputs
The system has been factory-calibrated and in most cases it is not necessary to recalibrate
until Neo2 has been running for one year. If calibration is necessary, contact your nearest
Husky Regional Service and Sales office for calibration instructions.
IMPORTANT!
There are no user serviceable parts inside this Display Module and all warranties are void if it
is opened by anyone other than factory personnel.
DANGER!
Hazardous voltage – risk of electrical shock or burns. The controller must be
disconnected from the power source before maintenance is performed. Make sure the
controller is turned off and unplugged. Lock out and tag the controller in accordance
with local codes. Make sure the work area is blocked off and a Danger sign is posted at
all entry points. Always maintain control of the work area and the power plug.
IMPORTANT!
It is recommended that a second person provides assistance.