Changing the Alarm Band 45
User Guide v 1.4 — September 2015 Making Adjustments
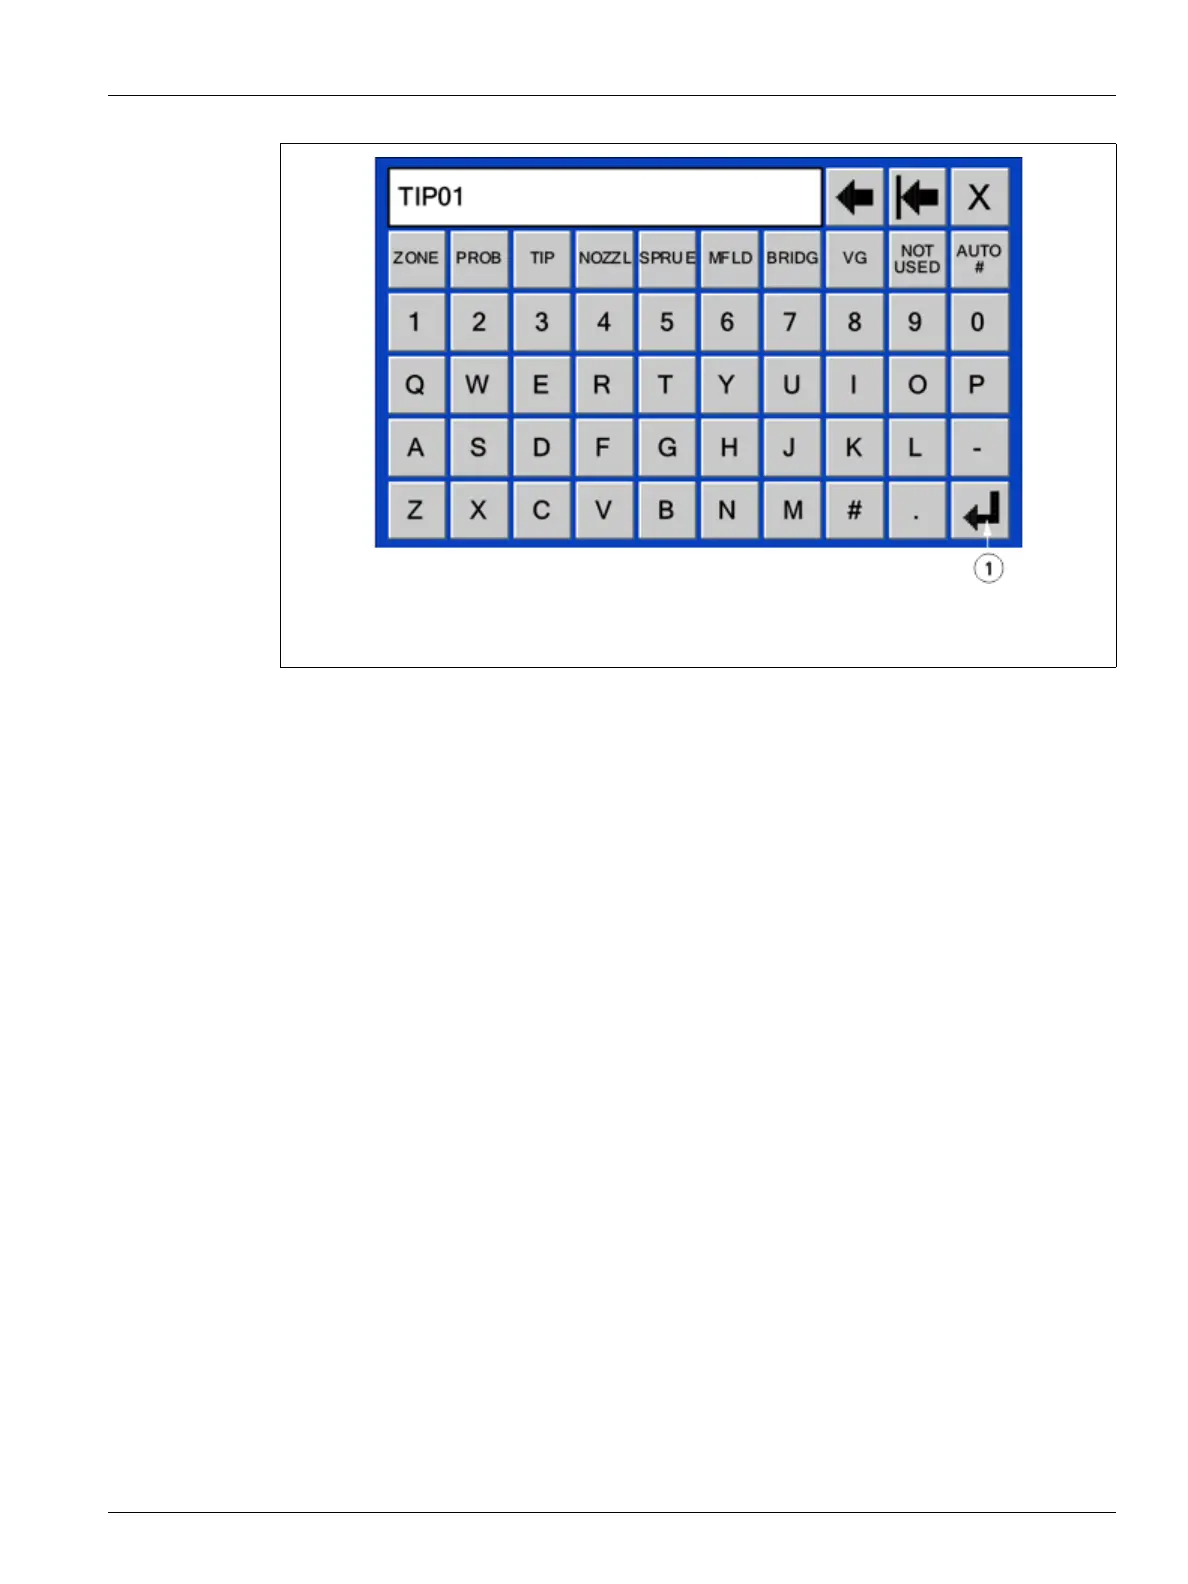
4. Enter the name or select one of the predefined names.
A maximum of 12 characters are available.
5. To automatically number, touch AUTO #. Using this button will save the name and
automatically number the selected zones.
6. Touch OK.
7.3.2 Changing the Alarm Band
The number of degrees over or under setpoint must be specified for an alarm is initiated. The
default setting is 17 °C (30 °F).
NOTE:Neo2 must be in Advanced mode to change this setting. Refer to Section 4.2.1.
To change the alarm band:
1. On the Quick Set screen, touch the zone to adjust.
To select more than one zone, touch the additional zones and they will be selected.
2. Using the Parameter Scroll buttons, scroll to ALARM.
3. Touch ALARM and a numerical key window appears.
4. Enter the new value, and then touch Enter.
The operator can also add or subtract from the current value by entering the number
and then touching the + or - button. For example, to add 4 degrees to the selected zones
Alarm Band, touch the 4 button followed by the + button.
Alarm Example: Setpoint = 350 °F, ALARM = 30 °F
At 381 °F or 319 °F the alarm will be initiated. If the normal setpoint is changed to 400 °F, the
ALARM will be initiated at 431 °F or 369 °F. The setting is always represented as an amount
above and below the present setpoint.
Figure 7-8 Keyboard Window
1. Enter Button