Home
IBM
Desktop
Aptiva
IBM Aptiva Hardware Handbook
5
of 1
of 1 rating
166 pages
Give review
Manual
Specs
To Next Page
To Next Page
Hardware Handbook
bi2
gntce.b
k : bi
2gedit
.doc Page 1
Saturday
, June 3, 1
995
6:54 AM
2
Table of Contents
Default Chapter
3
Table of Contents
3
Notices
9
Safety Information
9
Hardware and Software Assistance
10
Trademarks
10
About this Book
11
How this Book Is Organized
11
Related Information
12
Part 1: Reference Information
13
Chapter 1: First Steps
15
Monitor Setup and Use
15
Using the Tilt/Swivel Stand
15
Adjusting Monitor Controls
16
Contrast and Brightness Controls
16
Image Controls
17
Push Button Image Controls
18
Rotary Image Controls
18
Digital Image Controls
19
Monitor Settings
20
Power Saver Feature
20
Selecting the Monitor Horizontal Frequency
21
Setting up Your Monitor
21
Selecting Monitor Settings
22
Performance Tips
24
Using Rapid Resume Manager
25
How Rapid Resume Stores Information
25
Normal Operation of Rapid Resume Manager
26
Installing a Printer Driver
27
Installing a Printer Driver in OS/2 Warp
27
Installing a Printer Driver for Windows Programs
29
Controlling the Volume on Multimedia Systems
31
Adjusting the Speaker Volume
31
Adjusting the Headphone Volume
31
Chapter 2: Input/Output Device Information
33
About Sound Cards
33
About Television Cards
33
About Mwave Cards
34
Mwave Hardware Jumper Settings
34
Changing the I/O Address
34
Changing Jumper Settings on the Mwave Card
35
Disabling the Joystick Port
36
Connecting Your Modem to the Telephone Network
38
Operating Your Modem
38
Using the Auto Answer Feature
39
Using the Telephone with Your Modem
40
Disabling Call Waiting
40
How Modems Work
41
Modem Connection Process
41
Data Modems
41
Connecting to Other Data Modems
42
Fax Modems
43
Choosing Fax Software Applications
43
Modem Commands
46
Modem Return Codes
49
S Registers
50
Chapter 3: Troubleshooting
55
Problem Solving Steps
55
Troubleshooting Tables
59
Error Codes, Descriptions, and Corrective Actions
72
Chapter 4: Working with the Setup Utility
81
Using the Setup Utility
81
Starting the Setup Utility
81
Making Changes with the Setup Utility
82
The Setup Utility Main Menu
82
Working with Setup Utility Screens
83
Example of Using the Setup Utility
84
Saving and Restoring Settings
84
Features of the Setup Utility
86
System Information
86
Video and Monitor
86
Disk Drives
87
Input/Output Ports
88
Rapid Resume
89
Plug and Play
91
Startup Options
92
Advanced Options
93
Date and Time
93
Model Information
93
Part 2: Installing Options
97
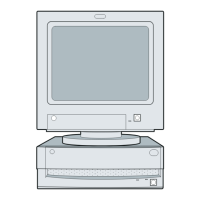
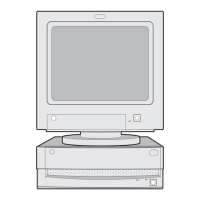
Desktop System
97
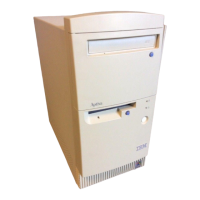
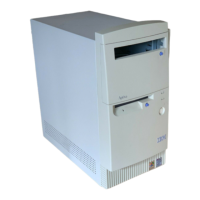
Minitower System
97
Chapter 5: Working with Your Desktop System Unit
99
How to Begin
99
Identifying Parts of the System Unit
100
Specifications of the System Unit
101
Preparing to Install Adapter Cards
102
Adapter Card Specifications
102
Adapter Card Settings
102
Video Adapter Cards
103
Installing Adapter Cards
104
Preparing to Install Drives
105
Deciding Which Drive Bay to Use
105
Removing a Drive Bay Panel
106
Replacing a Drive Bay Panel
106
Installing Additional Drives
107
IDE/AT Interface Drives
107
Guidelines for Attaching Additional IDE/AT Interface Drives
108
Diskette Interface Drives
108
Connectors and Settings for Additional Drives
109
Installing and Removing a Drive in Bay 1
110
Installing and Removing a Drive in Bay 2
112
Installing and Removing a Hard Disk in Bay 3
114
Installing and Removing a Hard Disk in Bay 4
116
Chapter 6: Working with Your Minitower System Unit
119
How to Begin
119
Identifying Parts of the System Unit
120
Specifications of the System Unit
121
Preparing to Install Adapter Cards
122
Adapter Card Specifications
122
Adapter Card Settings
122
Video Adapter Cards
123
Installing Adapter Cards
124
Removing Adapter Cards and Riser Card
125
Preparing to Install Drives
127
Deciding Which Drive Bay to Use
127
Installing Additional Drives
128
IDE/AT Interface Drives
128
Guidelines for Attaching Additional IDE/AT Interface Drives
129
Diskette Interface Drives
129
Connectors and Settings for Additional Drives
130
Installing and Removing a Drive in Bay 1
131
Installing and Removing a Drive in Bay 2 or 3
132
Installing and Removing a Drive in Bay 4
133
Installing and Removing a Hard Disk in Bay 5
134
Installing and Removing a Hard Disk in Bay 6
135
Chapter 7: Working with Your System Board
137
How to Begin
137
Identifying Parts of the System Board
139
Specifications for the System Board
140
Installing an Upgrade Processor
141
Installing Cache Memory
143
To Install 256K
144
To Install 512K
144
To Upgrade from 256K to 512K
145
Resetting the Jumper When Installing Cache Memory
145
Installing and Removing Memory Modules
147
Installing Memory Modules
148
Removing Memory Modules
149
Upgrading Video Memory
150
Reinstalling Video Drivers in OS/2 Warp
151
Replacing the Battery
152
Appendix A: Reference Tables
153
Memory Module Placement
153
Memory Map
155
System Input/Output (I/O) Addresses
156
System Board Interrupts
158
DMA Channel Assignments
159
Index
161
Other manuals for IBM Aptiva
Manual
2 pages
Reference Guide
121 pages
Hardware Maintenance Guide
282 pages
Handbook
204 pages
5
Based on 1 rating
Ask a question
Give review
Questions and Answers:
Need help?
Do you have a question about the IBM Aptiva and is the answer not in the manual?
Ask a question
IBM Aptiva Specifications
General
CPU
Intel Pentium
RAM
8 MB to 64 MB
Operating System
Windows 95
Graphics
S3, ATI
Optical Drive
CD-ROM
Ports
Serial, Parallel, PS/2
Expansion Slots
ISA, PCI
Related product manuals
IBM Aptiva 2170
252 pages
IBM Aptiva 2172
252 pages
IBM Aptiva 2134
266 pages
IBM Aptiva 2158
222 pages
IBM Aptiva 2144
246 pages
IBM Aptiva Series
2 pages
IBM 2158240 - Aptiva E - 2158
187 pages
IBM A50
116 pages
IBM NetVista A40
150 pages
IBM A40I TYPE 2271
124 pages
IBM IntelliStation A Pro
106 pages
6269 - NetVista A20 - 64 MB RAM
150 pages