EasyManuals Logo

IBM Aptiva Hardware Handbook

IBM Aptiva
166 pages
To Next Page IconTo Next Page
To Previous Page IconTo Previous Page
Page #135 background imageLoading...
Page #135 background image
Installing and removing a hard disk in bay 6 123
Installing and removing a hard disk in bay 6
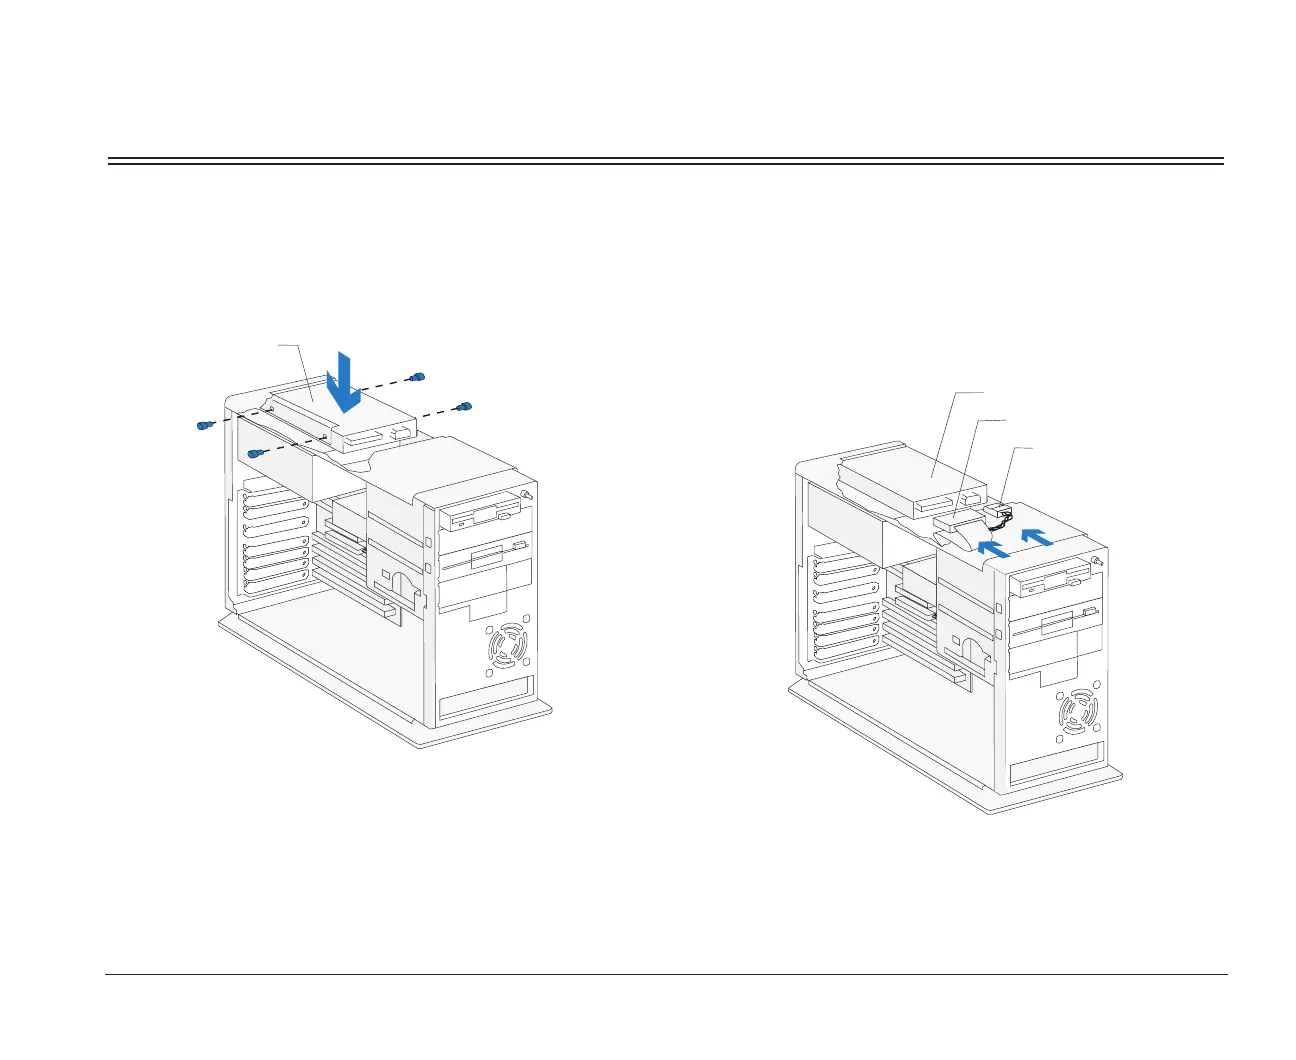
Bay 6 can hold a 3.5-inch slim hard disk. For hard disk removal, reverse these steps.
1. Insert the drive into the bay. Align the screw holes
and insert the four screws.
(Front View)
Hard Disk
2. Connect the power and signal cables. (To ensure
that your hard drive functions properly, read
“Installing additional drives” on page 116 before
connecting the cables.)
Hard Disk
Power Cable
Signal Cable
bi2gntce.bk : bi2gusy2.doc Page 123 Saturday, June 3, 1995 6:54 AM

Table of Contents

Other manuals for IBM Aptiva

Questions and Answers:

Question and Answer IconNeed help?

Do you have a question about the IBM Aptiva and is the answer not in the manual?

IBM Aptiva Specifications

General IconGeneral
CPUIntel Pentium
RAM8 MB to 64 MB
Operating SystemWindows 95
GraphicsS3, ATI
Optical DriveCD-ROM
PortsSerial, Parallel, PS/2
Expansion SlotsISA, PCI

Related product manuals