Installing an upgrade processor 129
Installing an upgrade processor
No upgrade processor is available at this time. When an
upgrade processor becomes available, instructions for
installing it should come packaged with it. Instructions
for removing your old processor are given in this part.
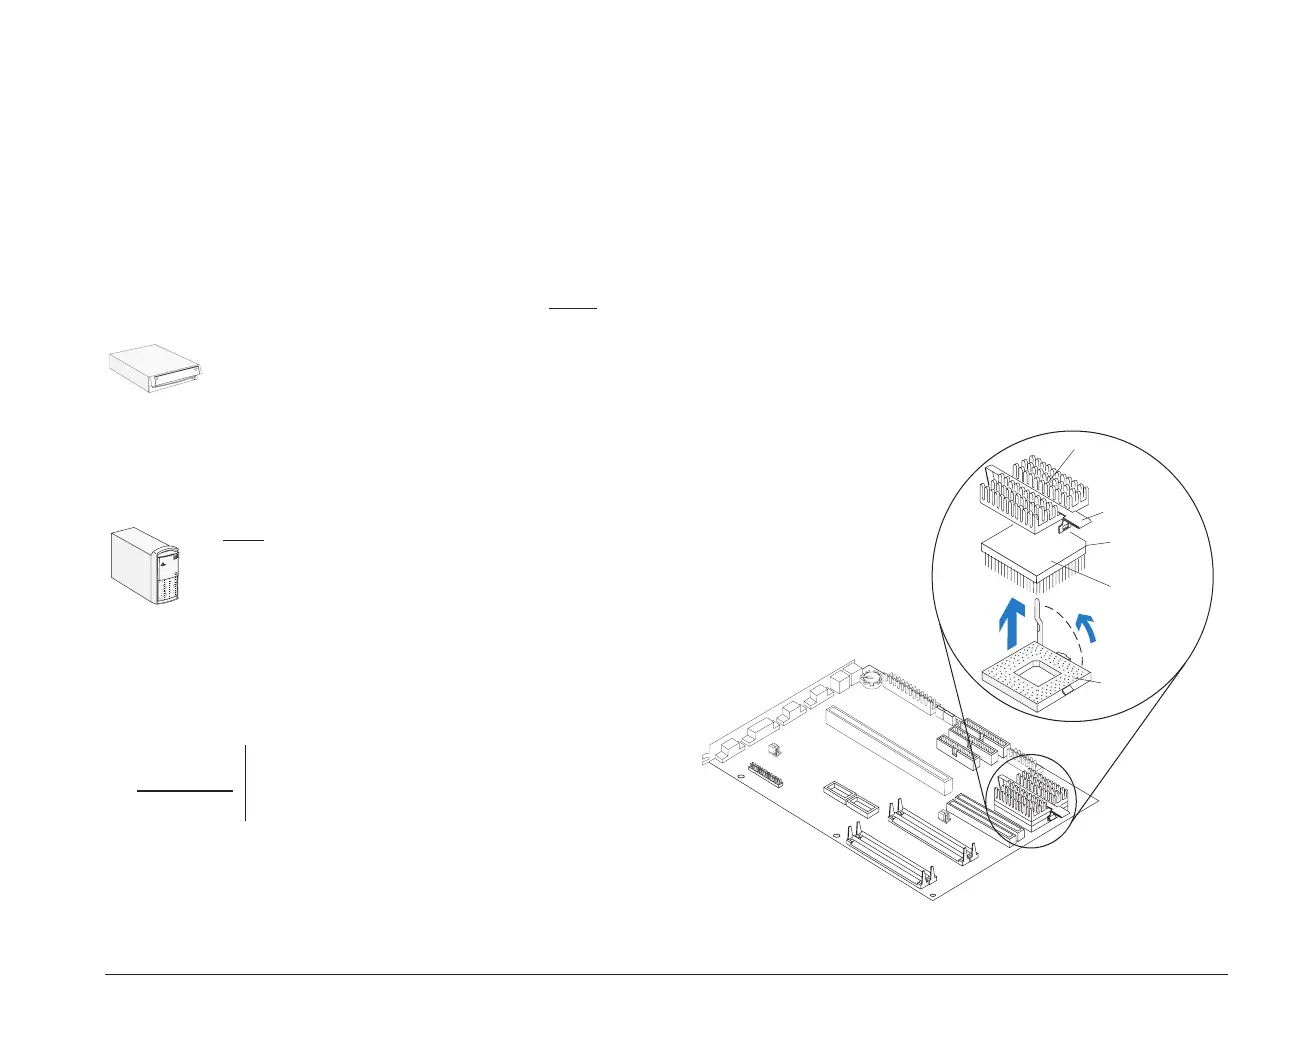
To remove the old processor:
1. Remove the heatsink retaining clip by pressing the
release tab (square end) of the clip. If pressing the
tab does not release the clip, press the tab while
using the tip of a thin bladed screwdriver or other
If you have a desktop system, you must
remove all drives and brackets installed in
bays 1 to 4, and you may have to remove
installed adapter cards. Instructions for
removing drives and brackets begin on
page 98. For instructions on removing
adapter cards, see page 92.
If you have a minitower system, you must
remove the drive installed in bay 5 and you
may
have to remove the drive in bay 4,
installed adapter cards and the riser card.
Instructions for removing drives begin on
page 115. Follow the instructions on
page 113 to remove the adapter cards and
the riser card.
Warning!
The heatsink retaining clip is under tension and
may disengage suddenly if not held while being
removed.
similar object to gently push out the leg that is
hooked on the catch underneath the tab. Take
extreme care not to push the leg too hard, or you
may accidentally damage surrounding parts
2. Remove the heatsink by lifting it straight up.
3. Unlatch the handle on the side of the processor
socket and lift it all the way up.
4. Lift the processor out of the processor socket.
(Steps continued on the next page).
processor
socket
processor
notch
heat
sink
retaining clip
3
2
bi2gntce.bk : bi2gbsys.doc Page 129 Saturday, June 3, 1995 6:54 AM

 Loading...


