Using the Setup Utility 73
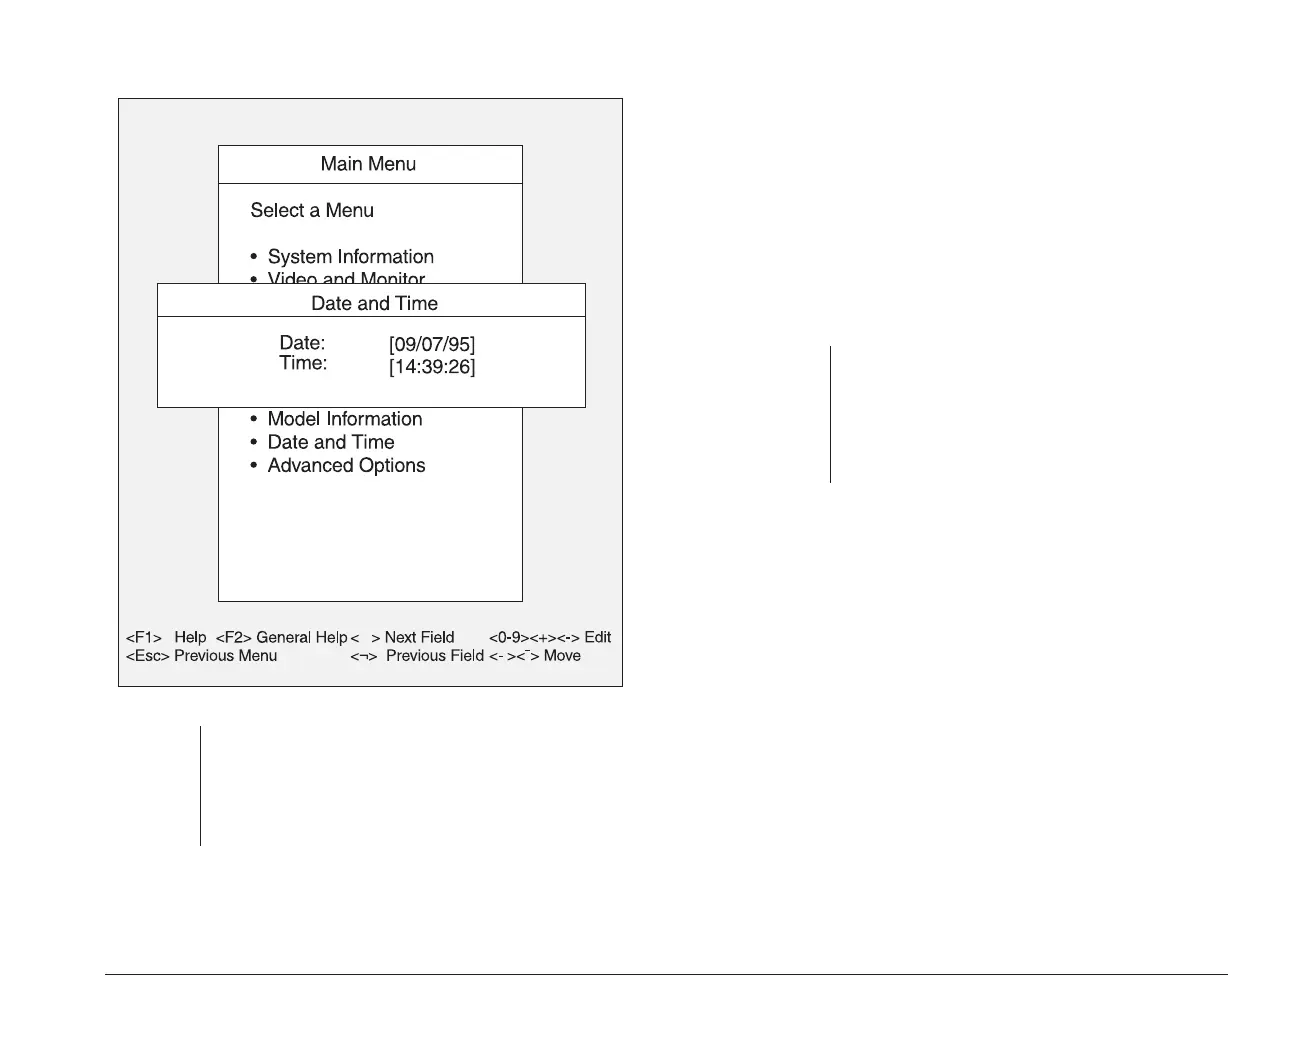
5. The Date and Time screen looks like this:
The Date setting should be highlighted when the
Date and Time screen appears (the date setting is
09/07/95 in the picture). To select the Time setting,
note:
When you enter the time in the Setup Utility, use the
24-hour format. For example:
• 12 midnight is 00:00:00
• 12 noon is 12:00:00
• 1:30 p.m. is 13:30:00
→
use the arrow keys on the keyboard to highlight it.
(The time setting is 14:39:26 in the picture).
To change the hours, press the + key to increase
the hour setting, or the – (minus) key to decrease it.
6. Press the right arrow key (→→) to move from the
hour setting to the minute setting. Press the + key
to increase the minute setting, or the – key to
decrease it. (If necessary, use the same method to
change the seconds.)
7. After you have entered the correct time, press the
Esc key to exit the Date and Time screen.
8. The Main Menu appears. From the Main Menu,
press the Esc key to exit the Setup Utility.
9. The Exit Setup window appears, select the option
“Yes, save and exit the Setup Utility” and
press Enter.
Now that you understand how to work with the Setup
Utility, read the rest of this chapter to learn about each
of its features.
note:
On the Date and Time screen, you use the right
and left arrow keys to move from one field to
another. On other screens, you use these arrow
keys to select a new setting. To determine which
keys to use on each Setup Utility screen, look at
the bottom of each screen.
bi2gntce.bk : bi2gcfig.doc Page 73 Saturday, June 3, 1995 6:54 AM

 Loading...


