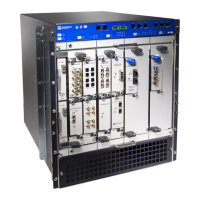
5. Lift the CFPC into place and carefully align first the bottom, then the top of the CFPC
with the guides inside the card cage.
6. Slide the CFPC all the way into the card cage until you feel resistance.
7. Pull the end of the ejector lever away from the CFPC faceplate, and hold the lever out
while continuing to push on the CFPC faceplate to further install it into the chassis.
8. When the CFPC is about 0.5 in (1 cm) from being fully inserted, release the ejector
level and gently push on the CFPC faceplate until you hear a click as the CFPC contacts
the midplane. The ejector lever engages and closes automatically.
9. Remove the rubber safety cap from the transceiver on the CFPC faceplate.
10. Insert the appropriate cable into the transceiver on the CFPC faceplate.
11. Use one of the following methods to bring the CFPC online:
•
Press and hold the CFPC online/offline button until the green STATUS LED next to
the button lights steadily, in about 5 seconds. The LEDs and online/offline button
for each CFPC are located directly above it on the craft interface.
•
Issue the following CLI command:
user@host>request chassis fpc slot slot-number online
For more information about the command, see the CLI Explorer.
CAUTION: After the OK LED lights steadily, wait at least 30 seconds before
removing the CFPC again or removing the CFPC from the other slot.
You can also verify correct CFPC functioning by issuing the show chassis fpc command
as described in “Maintaining M120 FPCs and CFPCs” on page 270.
147Copyright © 2018, Juniper Networks, Inc.
Chapter 18: Installing the M120 Without a Mechanical Lift

 Loading...