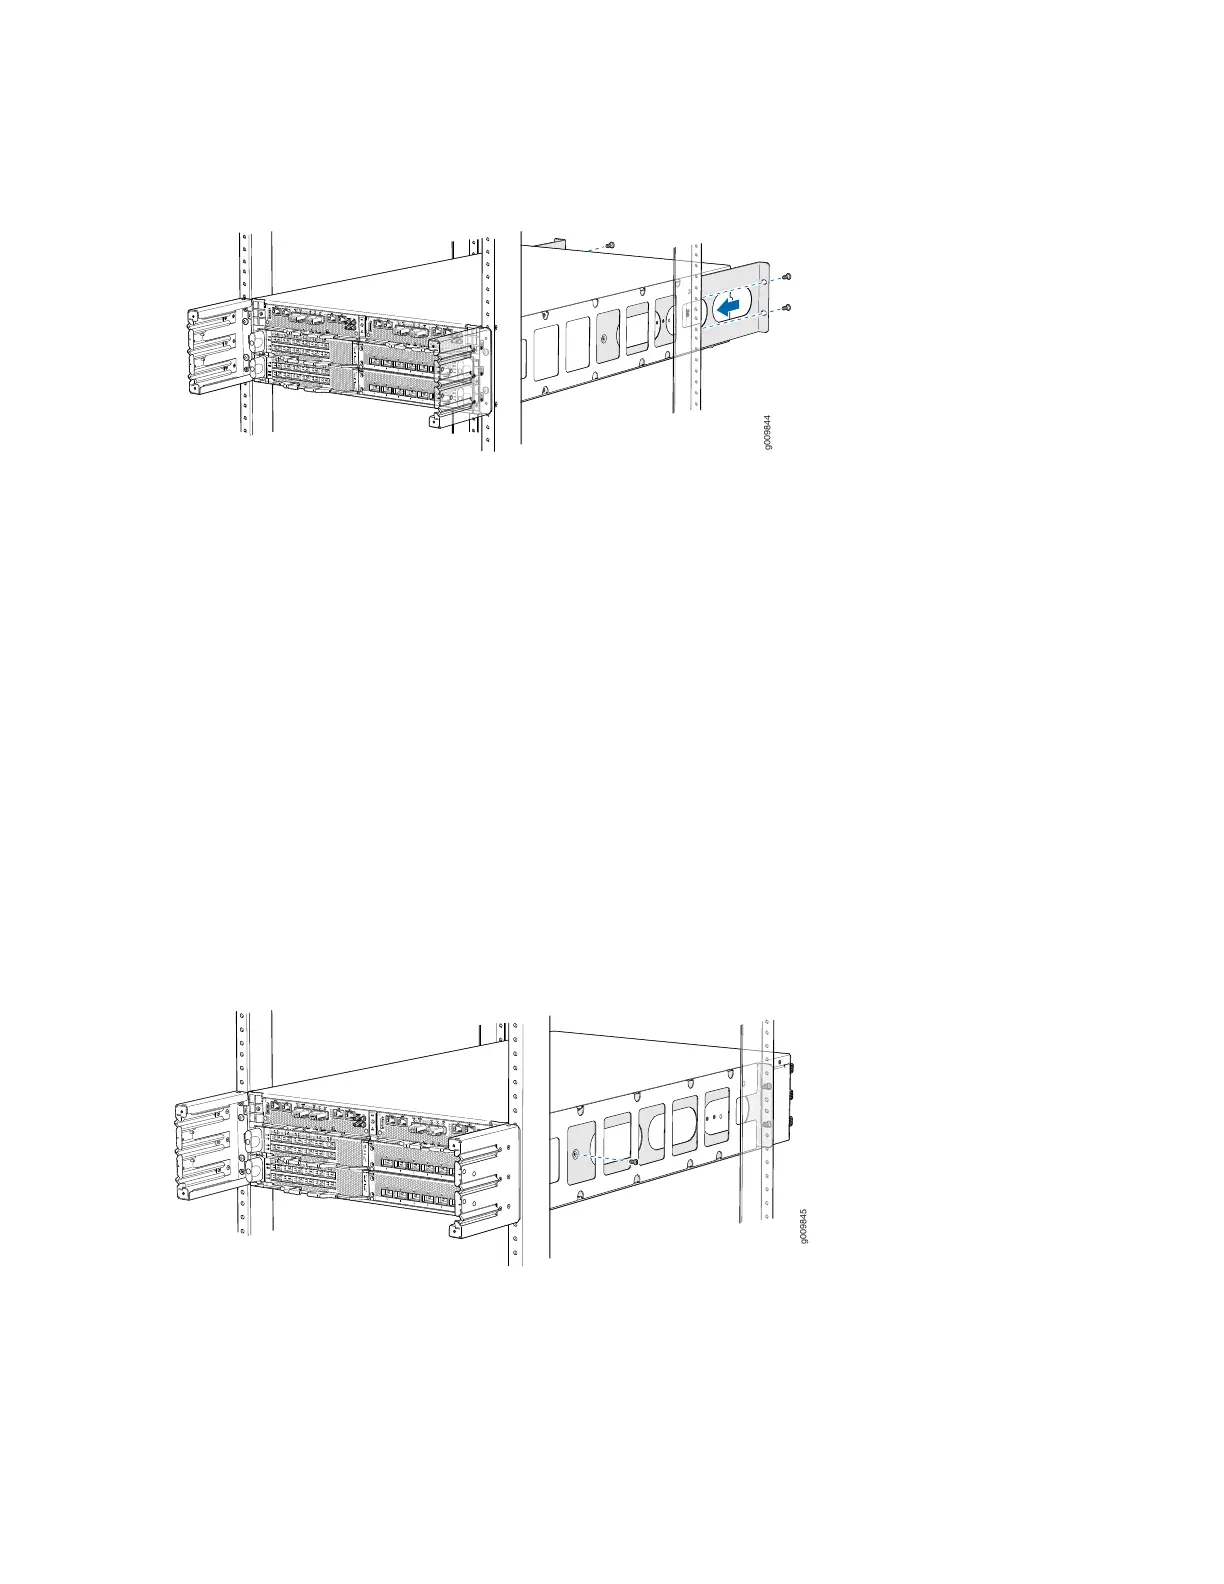
Figure 23: Installing the Router in a Four-Post Rack
7. Install mounting screws into each of the open front-mounting holes aligned with the rack, starting from
the bottom, and secure them tightly.
8. On the rear of the chassis, slide the rear-mounting brackets on either side of the chassis until the
rear-mounting brackets contact the rack rails.
9. Install mounting screws into each of the open rear-mounting holes aligned with the rack, starting from
the bottom, and secure them tightly.
10. Visually inspect the alignment of the chassis. If the chassis is installed properly in the rack, all the
mounting screws on one side of the rack are aligned with the mounting screws on the opposite side
and the router is level. Figure 24 on page 91 shows the router fully secured and installed in a four-post
rack.
Figure 24: Router Installed in the Rack
11. Install the air filter unit. See “Replacing the MX10003 Air Filter Unit” on page 117.
91