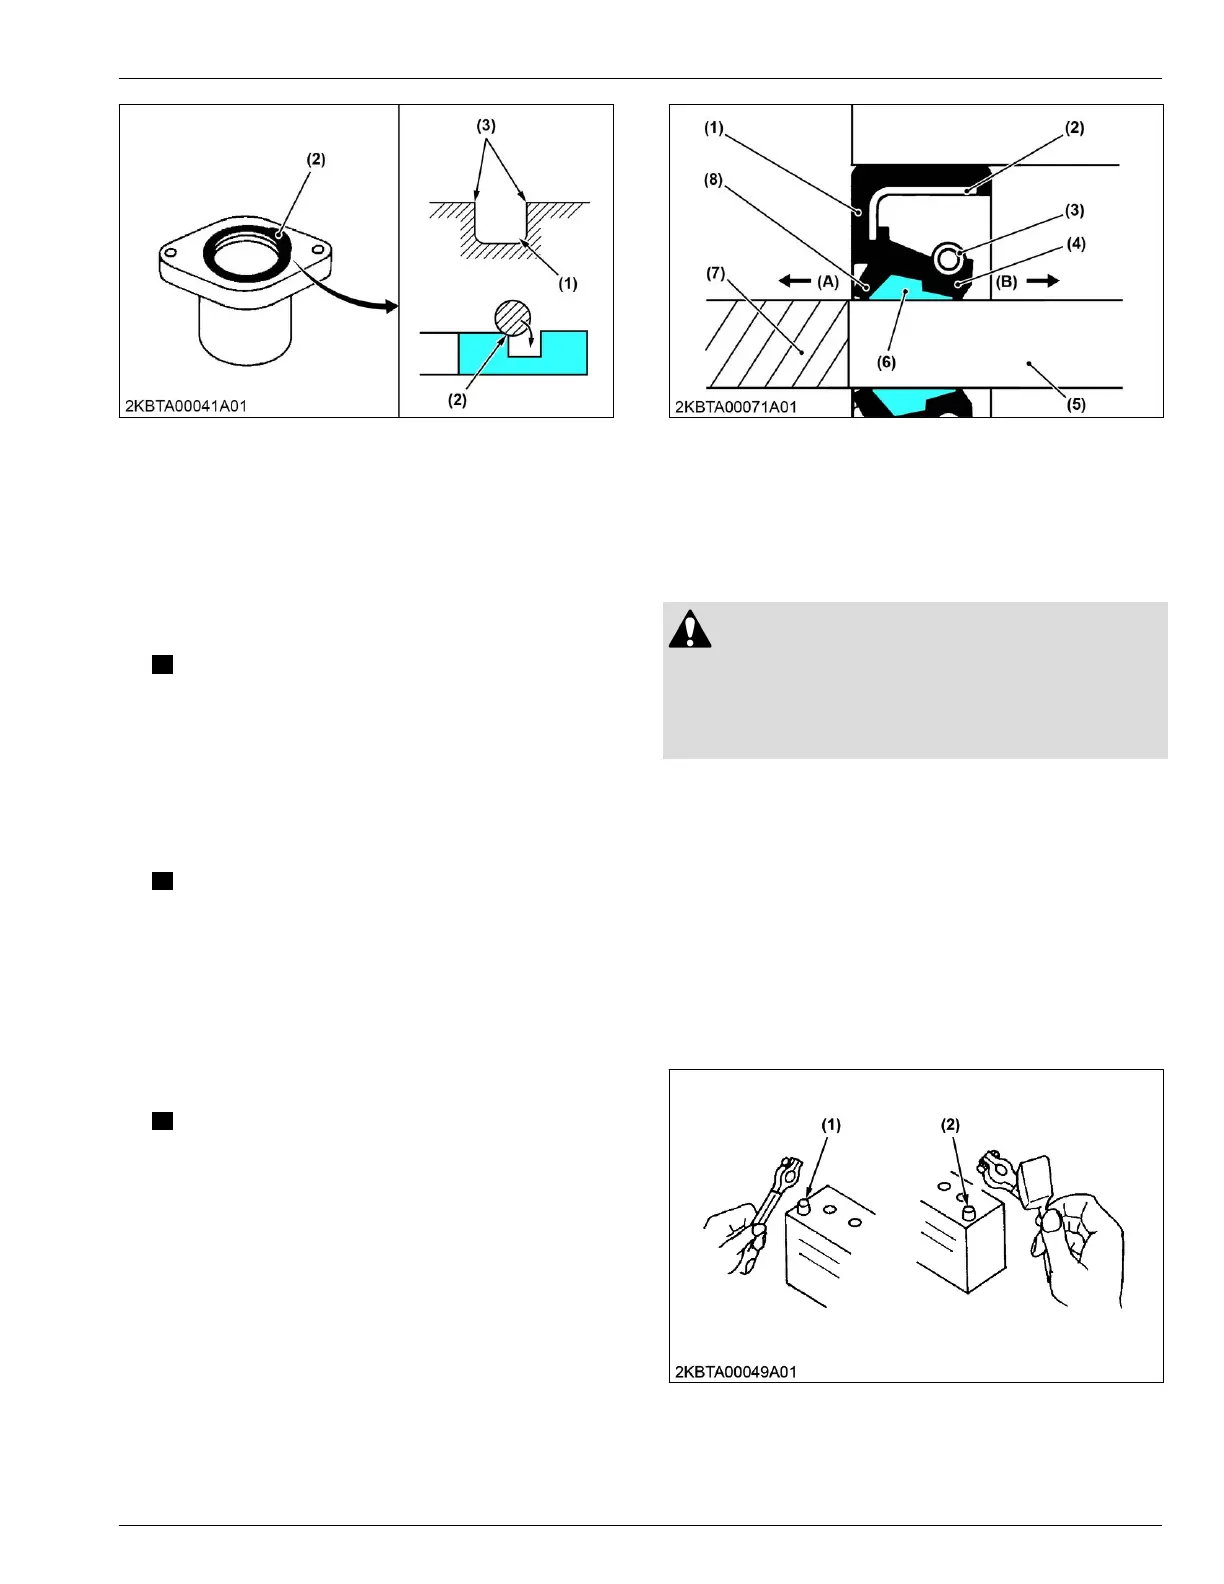
(1) O-ring groove
(2) O-ring
(3) Burr
6.
Replacing oil seals
1. If
there are burrs, scratches, or rust on the inner
surface
of
the housing hole, the chamfered part, or
the surface of the shaft through which the oil seal
passes, remove it with sandpaper.
NOTE
• If there is
a risk of splines or key grooves of
the shaft damaging the lip part of the seal,
wrap masking tape around those parts to
protect the seal.
2. Clean the inner surface of the housing hole and the
surface of the shaft.
3. Lubricate the seal lip and dust lip.
NOTE
• If the seal
has a dust lip, grease the gap
between the lips to prevent dry wear that
occurs when the machine starts.
• Use the specified grease or oil to lubricate
the lip.
4. With the seal lip facing the airtight side (B) of the
object, use a press to press-fit the oil seal until it is
fixed to the boss.
NOTE
• In cases when
installing an oil seal without a
press, place a wooden board on the seal
and gently tap the board with a hammer;
install the oil seal straightly and evenly.
(1) Packing
(2) Metal ring
(3) Spring
(4)
Seal lip
(5) Shaft
(6) Grease
(7) Masking tape
(8) Dust lip
(A) Air side
(B) Airtight side
7. Handling the battery
CAUTION
• When removing battery
cables, disconnect
negative (-) terminal first.
• When installing battery cables, connect positive
(+) terminal first.
• Do not install any battery with a capacity (Ah) other
than is specified.
• Securely attach the terminal covers on the cables
when connecting the cables to the battery terminal
posts. There is a danger of short-circuiting if the tip
of the cables attached to the battery terminal post is
exposed.
• Do not allow dirt and dust to collect on the battery.
• Connect the battery terminals after removing dust,
old grease, blue rust and others.
• Apply conductive grease thinly to the battery
terminal posts to prevent corrosion.
(1) Battery negative (-) terminal (2) Battery positive (+) terminal
GENERAL WORKING PRECAUTIONS
6. Replacing oil seals 2. GENERAL
05-E4B SERIES,05-E4BG SERIES
 Loading...