214327 161 Revision B
Figure 5.69: Knifehead
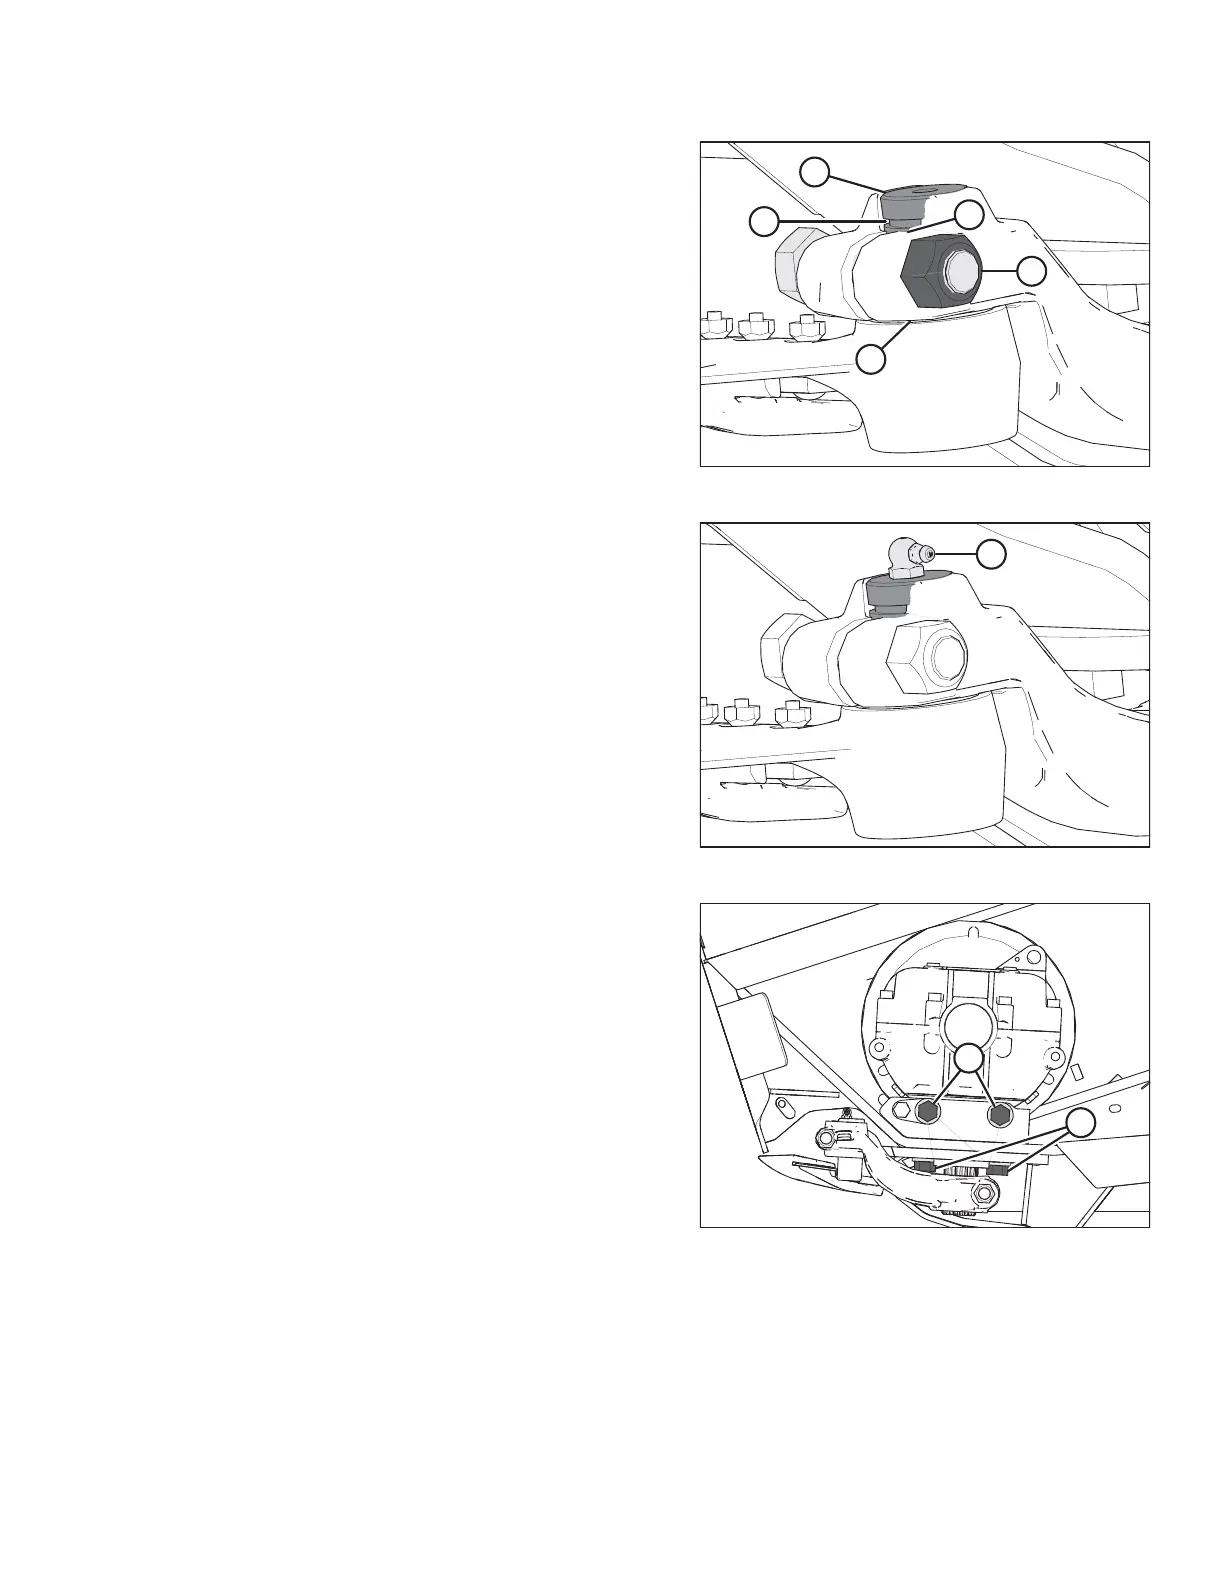
10. Install knifehead pin (A) through the output arm and into
the knifehead. Tap knifehead pin (A) down, and make sure
the pin is seated at the bottom of the knifehead.
11. Using a feeler gauge, check that the gap at location (E) is
0.25 mm (0.01 in.).
12. Set groove (B) in the knifehead pin 1.5 mm (1/16 in.) above
output arm (C). Secure it with 5/8 in. x 3 in. hex head bolt
and nut (D), and torque the hardware to 217 Nm
(160 lbf·ft).
Figure 5.70: Knifehead
13. Install grease fitting (A) into the knifehead pin, and turn the
grease fitting for easy access.
IMPORTANT:
Grease the knifehead just enough to start a slight
downward movement. Overgreasing will lead to knife
misalignment which causes the guards to overheat and the
drive systems to overload.
Figure 5.71: Knife Drive Box
14. Tighten the knife drive box side bolts (A) first, then tighten
bottom bolts (B). Torque to 271 Nm (200 lbf·ft).
15. Move the output arm to the midstroke position, and ensure
the knife bar doesn’t contact the front of the first guard. If
the knife drive box requires adjustment, contact your
MacDon Dealer.
16. Install and tension the knife drive belts. Refer to the
following topics depending on your header:
• For untimed belts, refer to Tensioning Untimed Knife
Drive Belts, page 165
• For timed belts, refer to Tensioning Timed Knife Drive
Belts, page 170
• For timed double-knife headers, also check the knife
timing. For instructions, refer to Adjusting Double-Knife
Timing, page 172
17. Close the endshield. For instructions, refer to Closing
Endshield, page 36.
MAINTENANCE AND SERVICING