214327 74 Revision B
Figure 3.60: Crop Divider
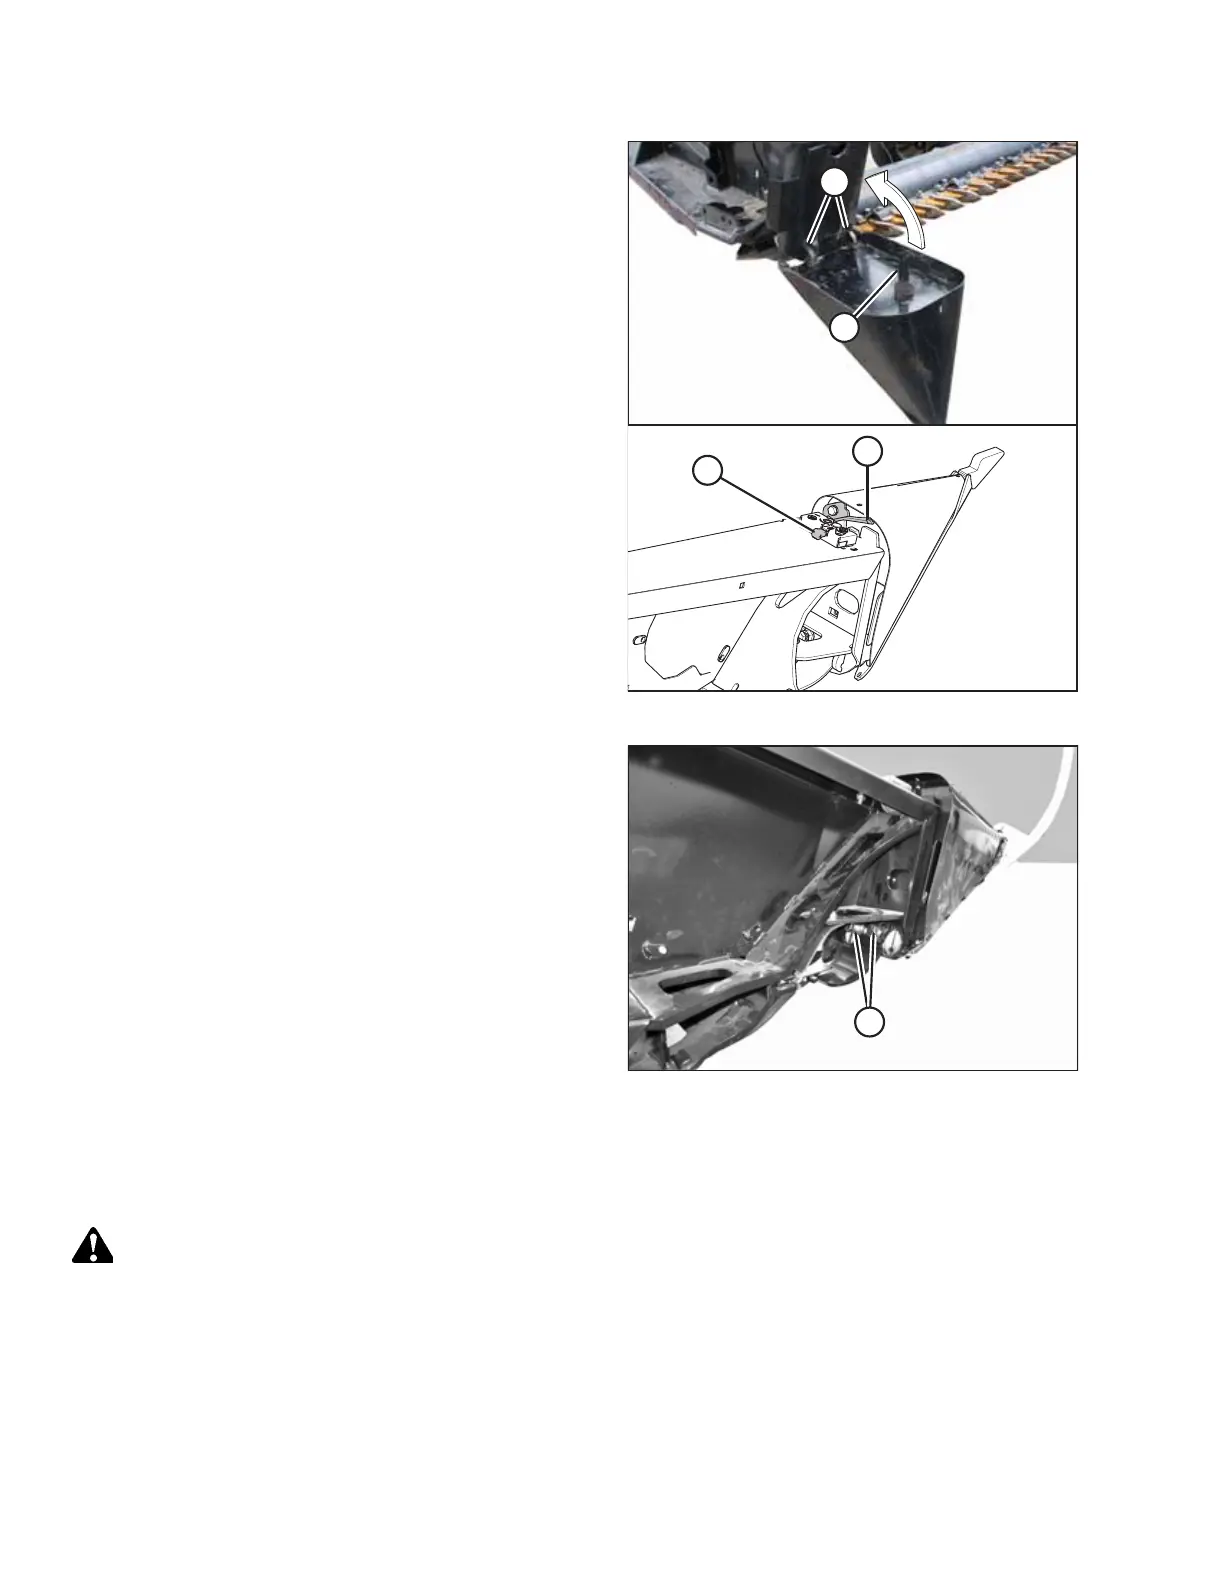
7. Position the crop divider as shown by inserting lugs (A) into
the holes in the endsheet.
8. Lift the forward end of the crop divider until pin (B) at the
top of the crop divider engages and closes latch (C).
9. Push safety lever (D) downward to lock the pin into
latch (C).
Figure 3.61: Crop Divider
10. Pull at the tip of the crop divider and ensure there is no
lateral movement. If necessary, adjust bolts (A) to tighten
the crop divider and eliminate lateral movement.
11. Close or install the endshields. For instructions, refer to
3.2.3 Endshields, page 35.
Installing Crop Dividers without Latch Option onto Header
To correctly install crop dividers without the latch option, follow the recommended installation procedure provided here.
DANGER
To prevent bodily injury or death from the unexpected start-up or fall of a raised machine, always stop the engine,
remove the key, and engage the safety props before going under the header for any reason.
1. Lower the reel.
2. Raise the header fully.
3. Shut down the engine, and remove the key from the ignition.
OPERATION