Medrad™ Intego™
PET Infusion System
60
Priming the SAS NOTE: Entering RP Assay and Saline Information, Installing the SAS, Installing the
Multi-Dose Vial, and Installing a PAS must be completed prior to Priming the
SAS. To prime the SAS:
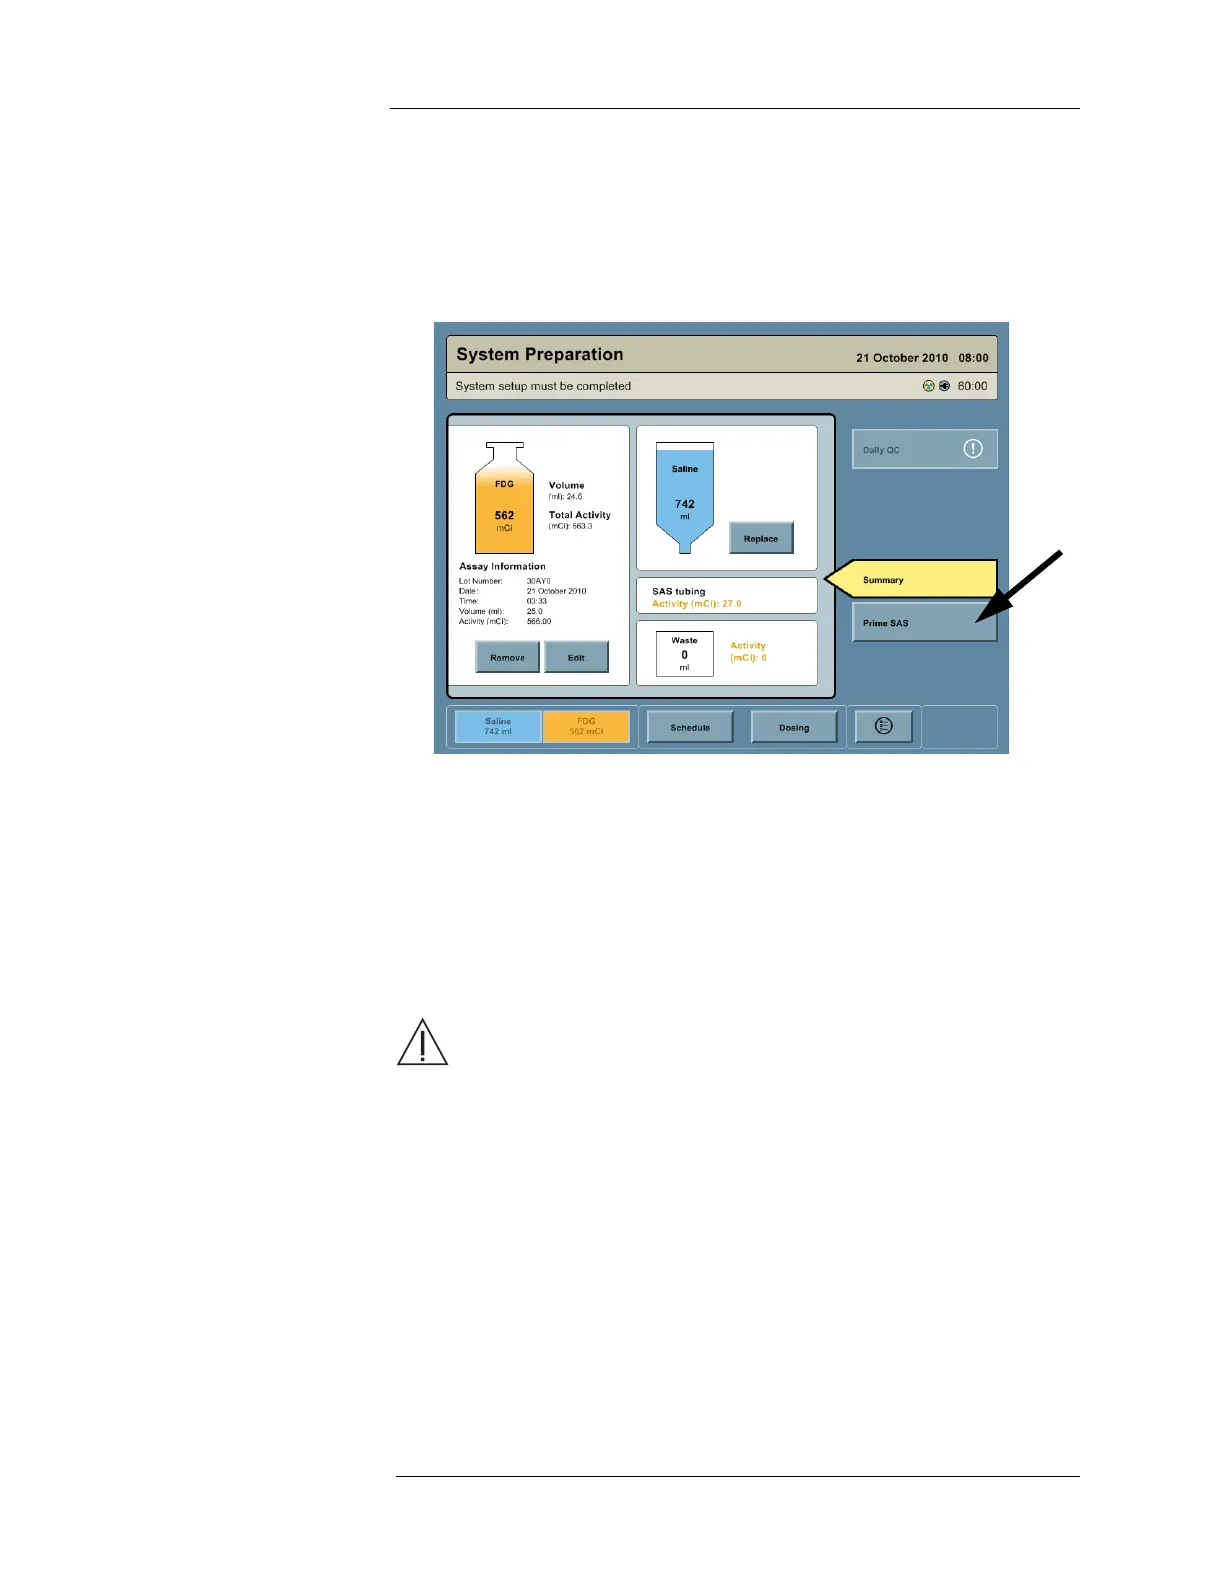
1. Access the System Preparation screen by pressing the SALINE or RP buttons on the
Navigation Bar.
2. Press the PRIME SAS button.
3. A dialog box appears with the following message: “Ensure that a PAS is connected to the
SAS. Continue?” Install a PAS if necessary, then press the YES button.
4. SAS priming proceeds in three phases.
a. Priming saline - The Intego™ PET Infusion System fills the Saline Tube, Pre-Coil
Tube, SAS Coil, Post-Coil Tube, Waste Tube, and Patient Tube with saline. All RP is
still contained within the Vial Shield at this point, allowing safe correction of SAS
installation errors detected during this phase.
b. Priming RP - The Intego™ PET Infusion System fills the SAS Needles and RP Tube
with RP.
WARNING. Radiation exposure hazard. Once RP priming commences RP is in the
SAS and no longer contained within the Vial Shield. To minimize radiation exposure,
opening the Shielded Chamber Lid should be avoided once RP priming commences.
c. Verifying Concentration - The Intego™ PET Infusion System measures RP activity
concentration to ensure RP assay information has been entered accurately.
NOTE: During each phase of SAS priming, the Status Bar indicates the phase being
performed and displays a progress bar showing progress to completion.
5. When SAS Priming is complete, the Intego™ PET Infusion System will beep and the
Status Bar will state “System is Ready.”
NOTE: The attached PAS is not primed during this process; it is primed when preparing
for the first patient infusion. Excess fluid used during SAS priming is collected
within the Waste Container inside the Shielded Chamber.
NOTE: To resolve any priming issues, refer to "Appendix C - Troubleshooting Tips."