Do you have a question about the MIMAKI JFX-1631/1615 and is the answer not in the manual?
Instructions for installing the printing device and selecting its location.
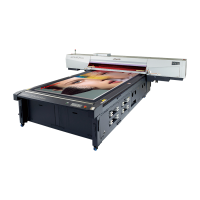
Details on the device's front and rear components and their functions.
Steps for connecting the USB 2.0 interface and power cables.
Explanation of the UV LED unit and its indicator lamp states.
Information on the types of ink and how to install ink cartridges.
Details on media sizes and precautions for handling printing media.
Overview of the sequence of operations from power on to shutdown.
Step-by-step instructions for powering on the device and initiating local mode.
Procedure for correctly placing and securing media onto the printer's table.
How to perform a test drawing to check for nozzle clogging and other print errors.
Performing head cleaning using different modes to resolve print quality issues.
Process for transmitting and starting the printing of an image from a computer.
Methods to change the drawing origin point using JOG keys or the FUNCTION menu.
Manually registering media thickness and adjusting head gap settings.
Configuration options for print quality, scan direction, and logical seek.
Adjusting the UV LED light intensity for curing and testing purposes.
Guidelines for operating the Post Cure Unit for UV ink curing.
Methods to enhance ink curing by re-irradiating lamp light on the printed media.
Procedure for replacing the UV LED lamp when the machine indicates it's time.
Regular maintenance procedures to ensure long-term accuracy and operation.
Procedures for replacing ink cartridges and handling ink packs.
Cleaning the head guard plate to prevent ink droplet issues during printing.
Setting up interval wiping and cleaning for the nozzle face.
Step-by-step guide for cleaning the printer's wiper assembly.
Procedures for maintaining the subtank to prevent errors or clogging.
Correcting ink drop position for bidirectional drawing when misalignment occurs.
Procedure to refill ink when image quality issues persist after cleaning.
Steps for replacing the water and antifreeze liquid in the heater tank.
Verifying UV ink curing and adjusting UV LED intensity if needed.
Initial steps and checks for diagnosing device malfunctions and error messages.
Corrective measures for issues like lines, thin spots, or large ink drops.
Steps to resolve nozzle clogging when head cleaning is insufficient.
Procedure to correct ink remaining amount when 'INK NEAR END' is shown incorrectly.
Guidance on interpreting and resolving specific error messages displayed on the LCD.
Technical specifications for the printer's hardware components and capabilities.
Details regarding ink types, colors, capacity, and storage requirements.
Visual representation of the device's operational flow and menu navigation.
| Print Resolution | 1200 x 1200 dpi |
|---|---|
| Ink Type | UV-curable ink |
| Number of Ink Colors | 6 colors + White + Clear |
| Interface | USB2.0, Ethernet |
| Power Supply | AC 200-240V, 50/60Hz |