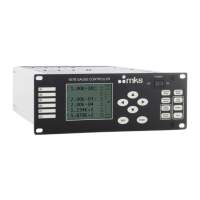
MKS 937B Operation Manual
43
Refers to the degas time set for a hot cathode gauge. The value can be set from 1 to 240
minutes with a minimum step of 1 minute. The default value is 30 min.
4. Sensitivity
Indicates sensitivity of the hot cathode gauge. Its typical value is 9 Torr
-1
for the MKS Low
Power Nude sensor, and 12 Torr
-1
for the Mini BA gauges. These default values will be
automatically selected based on the type of sensor being detected if no user-defined
sensitivity value is stored.
A user can change the sensitivity, and its valid range is 0.1 to 50 Torr
-1
. Once a user-defined
sensitivity is saved, this sensitivity value will be used as default value when powering up a
same type of hot cathode gauge.
If a user changes the sensitivity without a hot cathode gauge being connected, this user-
defined sensitivity value will be saved as the default sensitivity for all the HC sensor types.
5. EC
The Emission Current can be set to 20 uA, 100 uA, Auto20, or Auto100. When Auto is
selected, the emission current is either 20 uA or 100 uA when pressure is higher than 1x10
-4
torr, and automatically switches to 1 mA when pressure is below 1x10
-4
torr. The default
setting for the Emission Current is 20 uA.
6. Protect SP
The Protect Setpoint is used to turn off the hot cathode high voltage based on its own
pressure readings. The valid protect setpoint range for a hot cathode is 1.0x10
-5
torr to
1.0x10
-2
torr. The default value is 5.0x10
-3
torr. The Protect Setpoint is always enabled on
937B.
Once the Protect Setpoint is triggered, the Auto Control will be disabled. The
gauge can be turned on only manually (or by serial command) because the control
setpoint should normally act first. The tripping of the Protect Setpoint indicates that
the control setpoint is not functioning properly, most likely caused by an inappropriate
system configuration (control gauge and ion gauges are not connected to the same
volume), or a control gauge malfunction.
7. Relay
Relays for each channel are preset (4 per channel) as shown below, and auto-detected.
Sensor location A1 B1 C1
Relay assigned 1 & 2 & 3 & 4 5 & 6 & 7 & 8 9 &10 & 11 & 12
8. Enable
There are three ways to enable a relay:
SET: force the relay to activate (close) regardless of pressure and setpoint values
CLEAR: force the relay to deactivate (open) regardless of pressure and setpoint
values.
ENABLE: relay status is determined by the pressure, setpoint value, and direction.
 Loading...