EasyManuals Logo

Omron CP1L User Manual

Omron CP1L
763 pages
To Next Page IconTo Next Page
To Previous Page IconTo Previous Page
Page #577 background imageLoading...
Page #577 background image
543
LCD Option Board Function Section 8-6
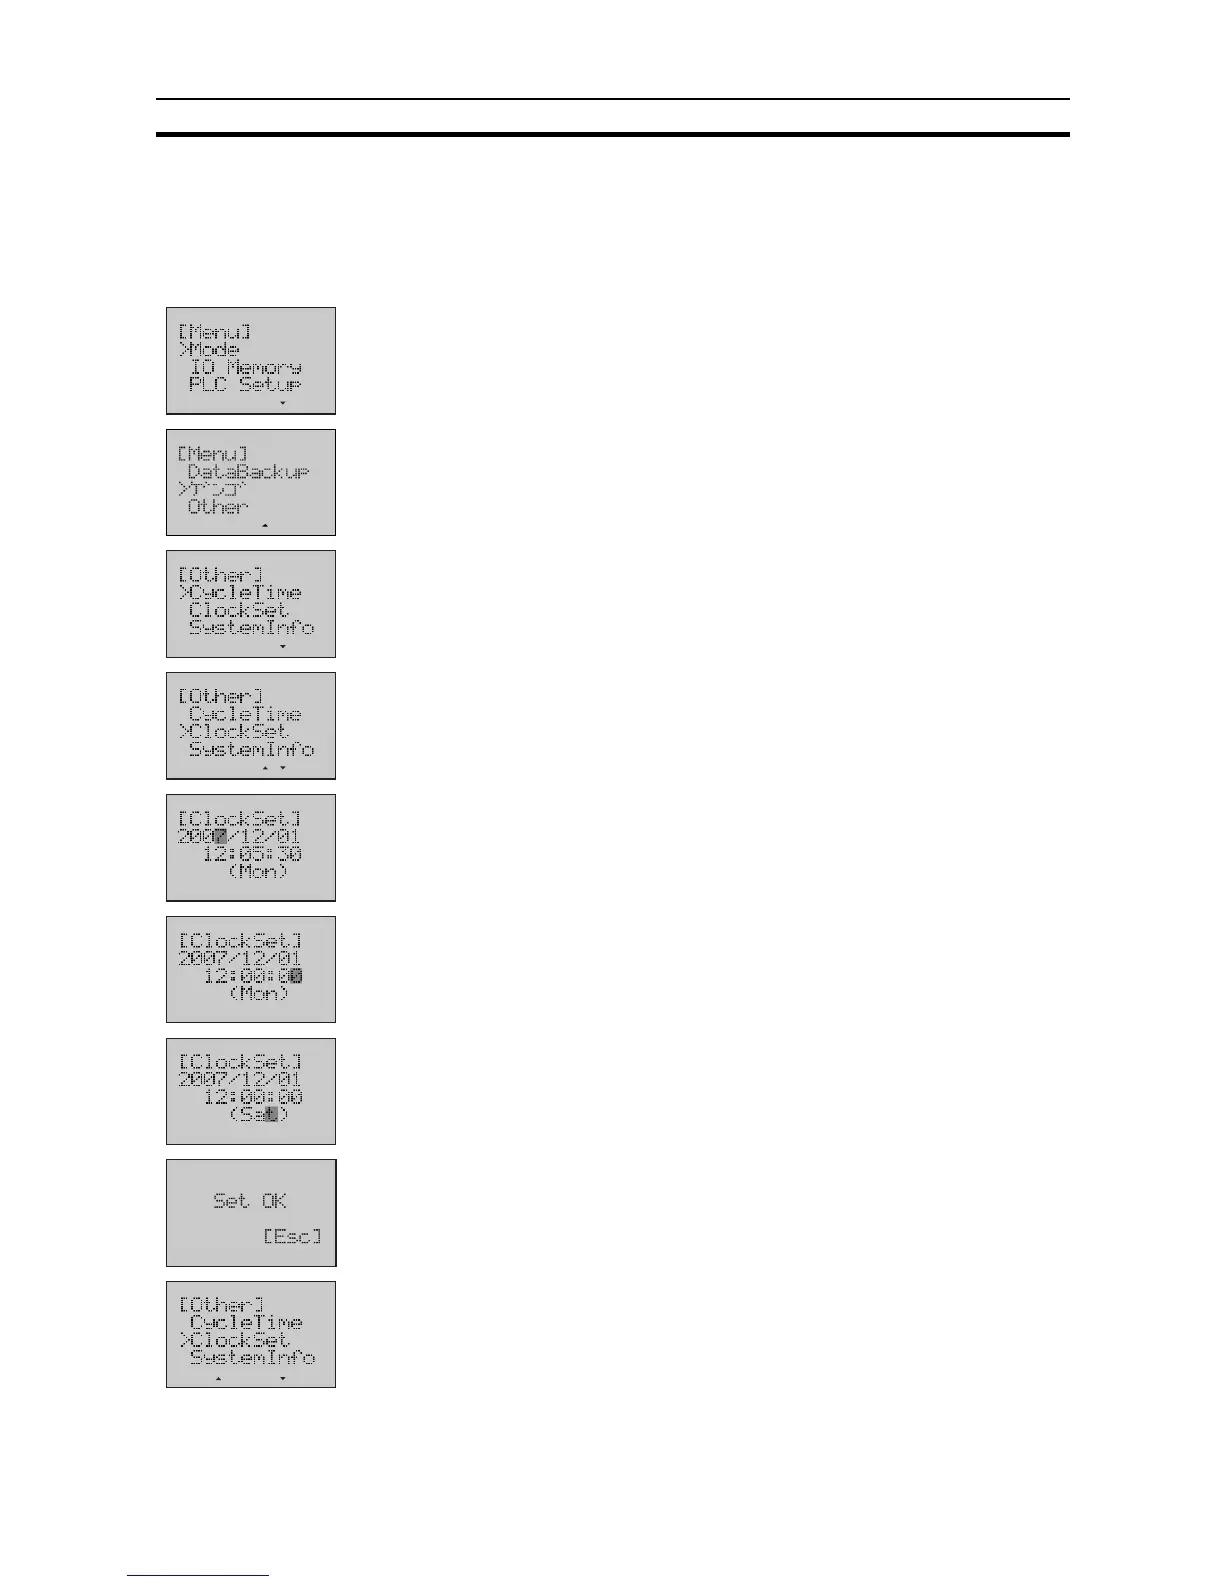
8-6-14 PLC Clock Setting
This function can change the setting of the built-in clock in the CPU Unit.
Example Change PLC time to 12:00:00, PLC week to Saturday.
1,2,3...
1. Switch to the Setup Mode.
2. Press the Down button to select
Other
.
3. Press the OK button to enter the Other menu.
4. Press the Down button to select
ClockSet
.
5. Press the OK button to enter the Clock Setup Screen.
The present date, time and week of the CPU Unit will be displayed.
6. Use the Forward button to move the column cursor to the position of PLC
time.
Use the Down or Up button to change the time to
12:00:00
.
7. Use the Forward button to move the column cursor to the position of PLC
week.
Use the Down or Up button to select
Sat
.
8. Press the OK button to save the setting.
9. Press the ESC or OK button to return to the previous menu.

Table of Contents

Other manuals for Omron CP1L

Questions and Answers:

Question and Answer IconNeed help?

Do you have a question about the Omron CP1L and is the answer not in the manual?

Omron CP1L Specifications

General IconGeneral
ModelCP1L
Data Memory Capacity32K words
Program Capacity10K steps
Communication PortsUSB, RS-232C
ExpansionI/O
Pulse Output100 kHz
Built-in I/ODigital I/O
Expansion SlotsSupports up to 3 expansion units
Operating Voltage100-240 VAC or 24 VDC (varies by model)
Operating Temperature55 degrees Celsius
Storage Temperature75 degrees Celsius
Vibration Resistance10 to 57 Hz, 0.075 mm amplitude
Shock Resistance147 m/s^2, 3 times in X, Y, and Z directions

Related product manuals