PART 2: CX-Server PLC Tools
OMRON CHAPTER 10 – Data Links
CX-Server PLC Tools_ Page 113
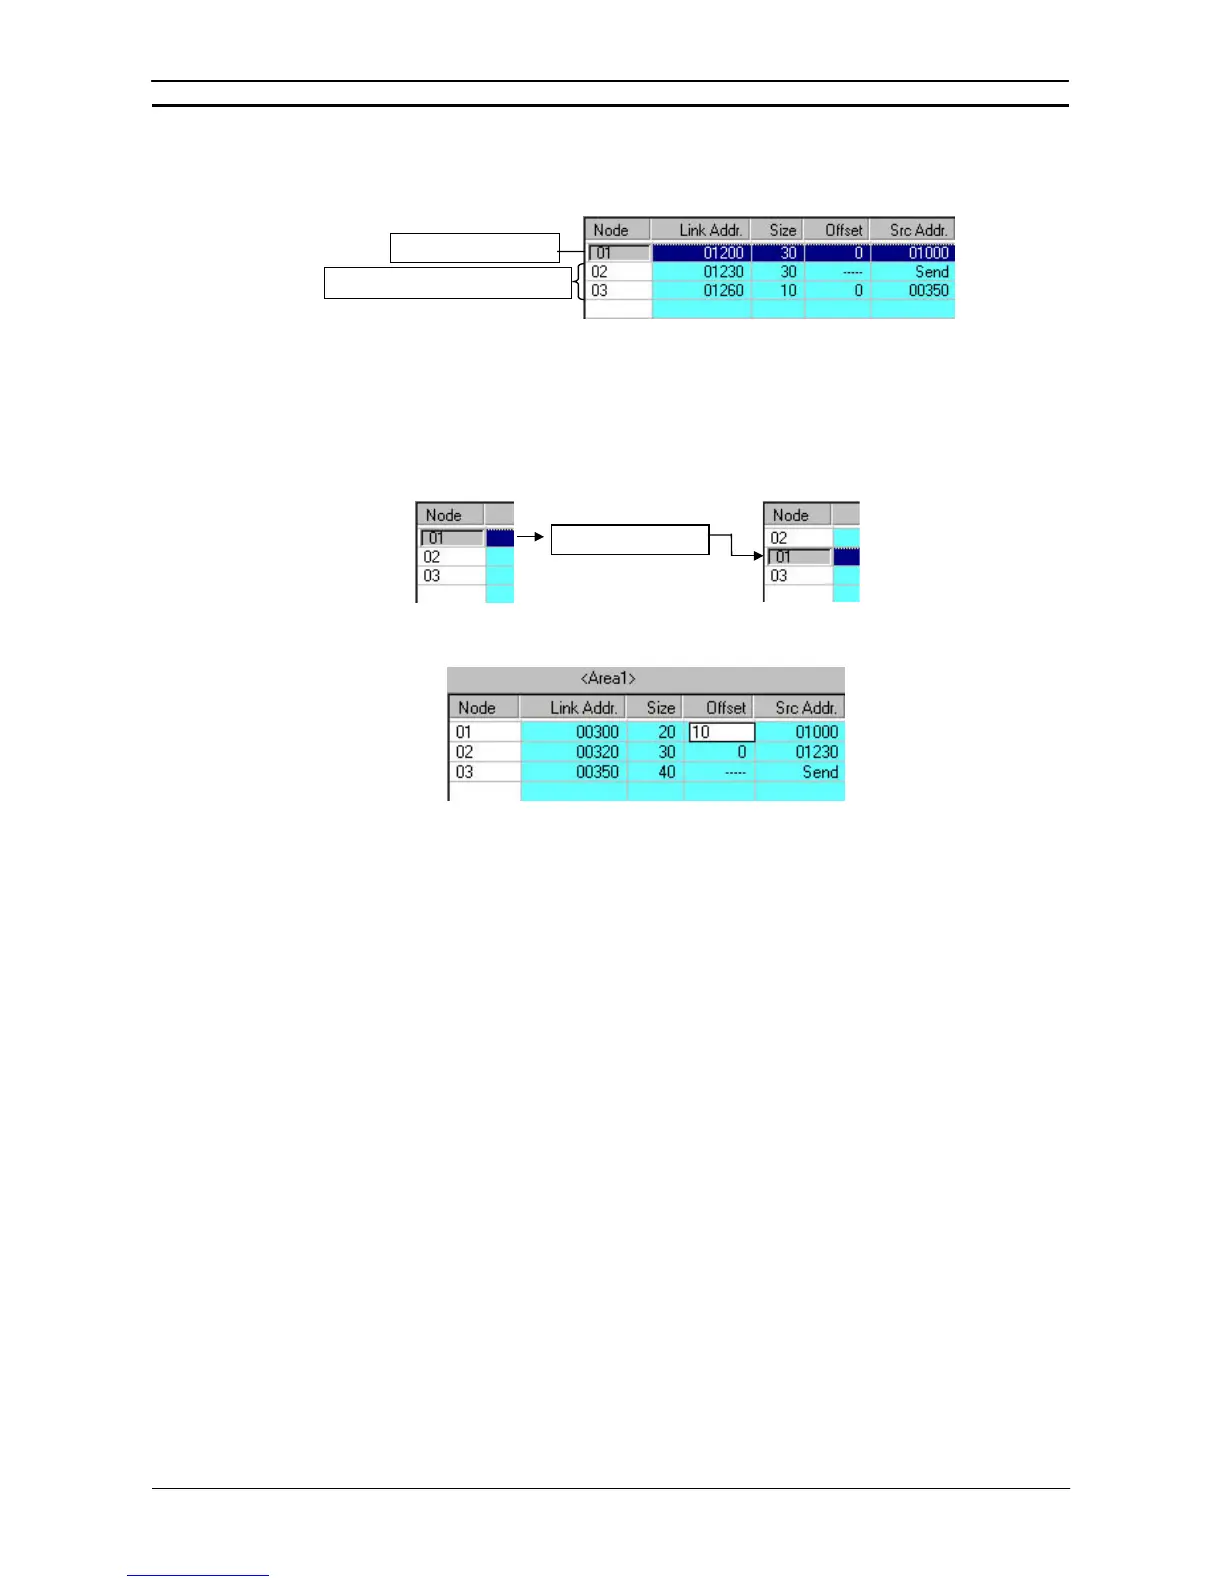
Setting Node Address 02
Node address 02 is set in the same way as node address 01.
Local node send area
Receive area from remote nodes
Setting Node Address 03 (Setting an Offset)
For node address 03, the procedure for setting the node refresh sequence and the offset is as follows:
1 Select node address 03 from the node address list on the left.
2 With node address 03, the node refresh sequence does not match the default, so the order of addresses must be
changed. Change the node refresh sequence by either clicking F4: Move Up Area or F5: Move Down Area in
the Function Bar, or pressing the F4 or F5 function keys.
F5: Move Down Area
3 Double-click on the Offset cell, and input the data size to be offset. In this example, set the offset size to 10
words.
With this setting, 20 words sent from node 01 will be received, starting from CIO 1000, and with an offset of 10
words (i.e., CIO 1010 to CIO 1030).
 Loading...


