10 Scan Tool User Guide
Software Descriptions
1: General Information
System Setup Functions
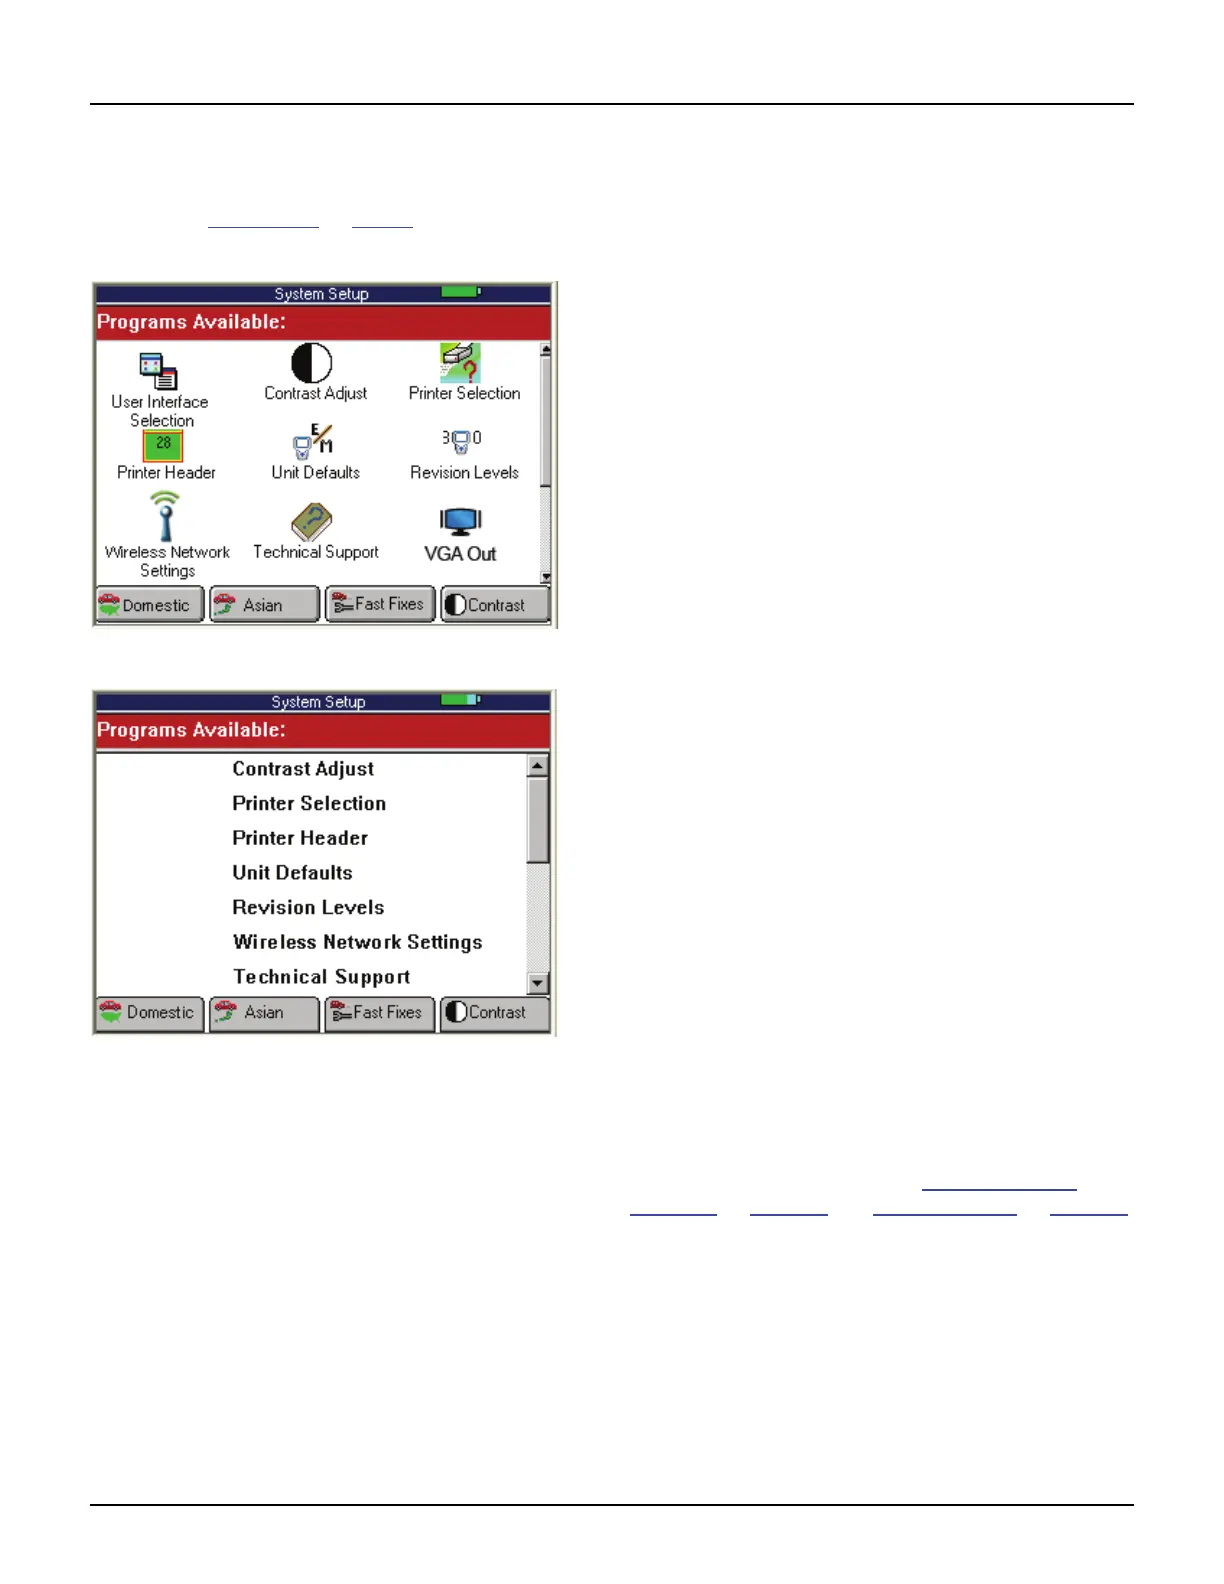
When you select System Setup from the Application Man-
ager screen (
Figure 1.20 on page 7), the System Setup
screen appears, as shown below.
Figure 1.26: System Setup Screen - Graphic User Interface
Figure 1.27: System Setup Screen - Classic User Interface
This screen contains options for viewing information
about the scan tool and adjusting default settings for
the scan tool as follows:
• VGA Out — set the scan tool to show the display on
a connected VGA monitor.
• Contrast Adjust
— adjust the contrast of the
LCD screen.
• Printer Selection
— select a printer for printing from
the scan tool.
• Print Header
— set up a heading for reports that you
print from the scan tool.
• Unit Defaults
— set the date, time, units-of-measure,
and automatic shut down time. It also lets you turn the
audible beep and print header functions on or off.
• Revision Levels
— view software version numbers.
• Wireless Network Settings (Classic only)
— set up
IP addresses for wireless communication between the
scan tool and a PC or external device.
• Technical Support
— view technical support informa-
tion.
• User Interface Selection
— set the scan tool main
screens to display options as either icons or menus.
• Color Scheme Selection
— set the color of the
background and text that appears on the screens.
• Function Key Assignment
— assign specific
applications or functions to the function keys at the
bottom of the Application Manager screen.
• Hardware Tests
— test the LCD screen, keypad keys,
backlight, beeper, and Smart Cable; view the time
clock and serial number for the scan tool; and view the
serial number of the Smart Card.
• Language
— set the default language for the scan tool
software.
• Disk Usage
— view details about the scan tool
memory size and usage.
• File System Check
— test the file system on the
memory card(s).
For more information, refer to Adjust Default
Settings on page 14 and System Setup on page 77.