16 Scan Tool User Guide
Test Startup and Vehicle Connection
3: Scan Diagnostics Applications
Test Startup and Vehicle Connection
This section includes the following steps:
Step 1: Enter the Vehicle Information (below)
Step 2: Connect the Cable
on page 18
Step 3: View the OBD II Quick Test Results on page
19
Step 4: Select the Diagnostic Function on page 20
Step 1: Enter the Vehicle Information
Use the following steps to enter vehicle information
and to determine which cable to use for the commu-
nication connection between the scan tool and the
vehicle’s DLC.
1 Press the On / Off button to turn the scan tool on;
wait for the Application Manager screen to appear.
NOTE: For quick access to the Global OBD II
application, hold down the Menu key while you turn
the scan tool on. If you do this, go to step 8
.
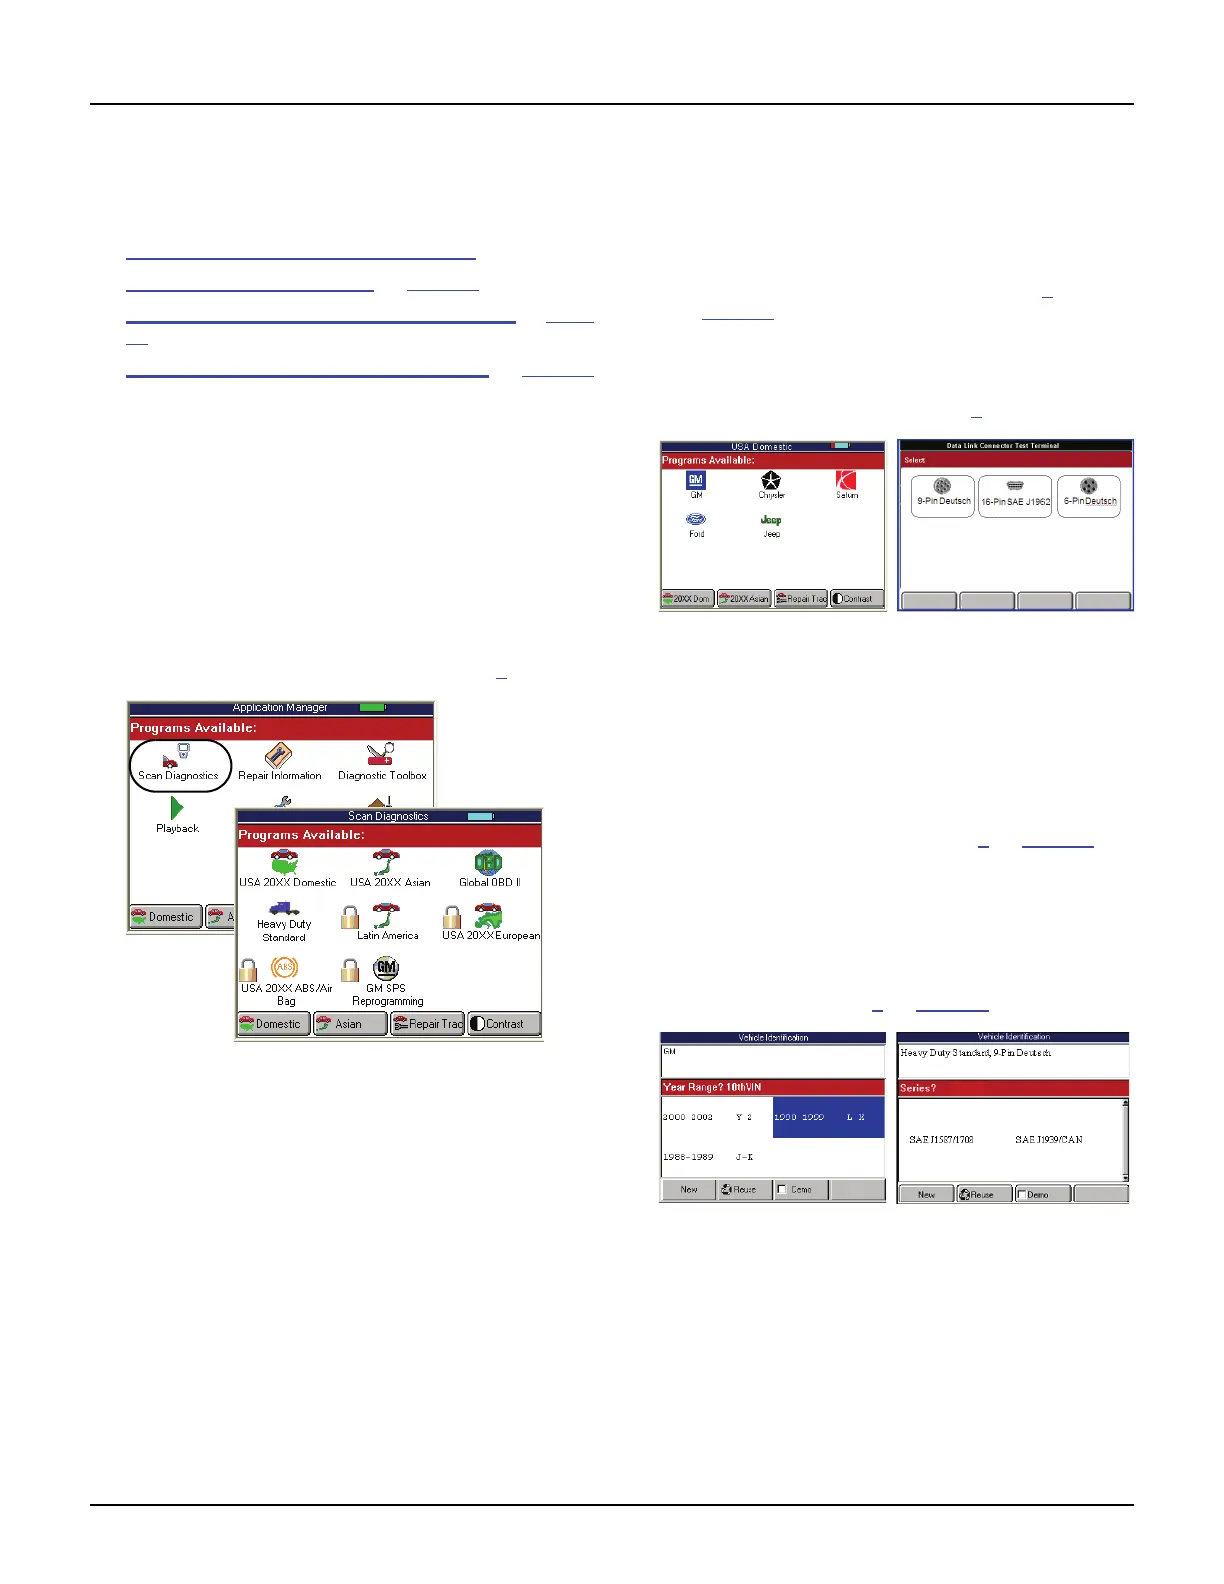
Figure 3.4: Application Manager Screen and Scan Diagnostics
Screen - Graphic User Interface
2 From the Application Manager screen, select Scan
Diagnostics and press the ENTER key. This displays
the Scan Diagnostics screen.
NOTE: If you have the application assigned to one
of the function keys at the bottom of the screen, you
can alternatively press the function key to start the
application.
3 From the Scan Diagnostics screen, select an
application and press the ENTER key.
• If you select Global OBD II, the Required
Cables illustration appears; go to step 8
on
page 18.
• If you select Domestic, Asian, ABS / Air Bag,
Latin America, European, or Heavy Duty
Standard, a series of screens appear for you to
identify the vehicle; go to step 4
below.
Figure 3.5: Vehicle Information Manufacturer Screen and Heavy
Duty Select Data Link Connector Screen - Graphic User Interface
4 Do one of the following:
• If the Vehicle Information Manufacturer screen
appears (shown above on the left), select the
manufacturer and press the ENTER key.
This starts System 3.0 and displays the next
screen for identifying the vehicle (shown below
on the left). Continue with step 5
on page 17.
• If the Heavy Duty Data Link Connection Test
Terminal screen appears shown above on the
right), select the DLC connector and press
the ENTER key. This starts System 3.0 and
displays the next screen for identifying the
heavy duty vehicle (shown below on the right).
Continue with step 5
on page 17.
Figure 3.6: Vehicle Identification Screen Examples
IMPORTANT: Many heavy duty vehicles are changing
from the older J1587 communication standard to the
new J1939 communication standard. As a result, both
communication standards (J1587 and J1939) may be
available on vehicles equipped with the 9-Pin
Deutsche connection. In cases where no diagnostic
trouble codes are found or some of the data items
appear suspect in the J1939 standard, try the J1587
standard to verify the results.