Scan Tool User Guide 77
17: System Setup
The System Setup functions let you adjust default
settings and view information about the scan tool.
Basic Procedure
To access the System Setup functions, follow
these steps:
1 Make sure the scan tool has power.
2 Press the On / Off button to turn the scan tool on; wait
for the Application Manager screen to appear.
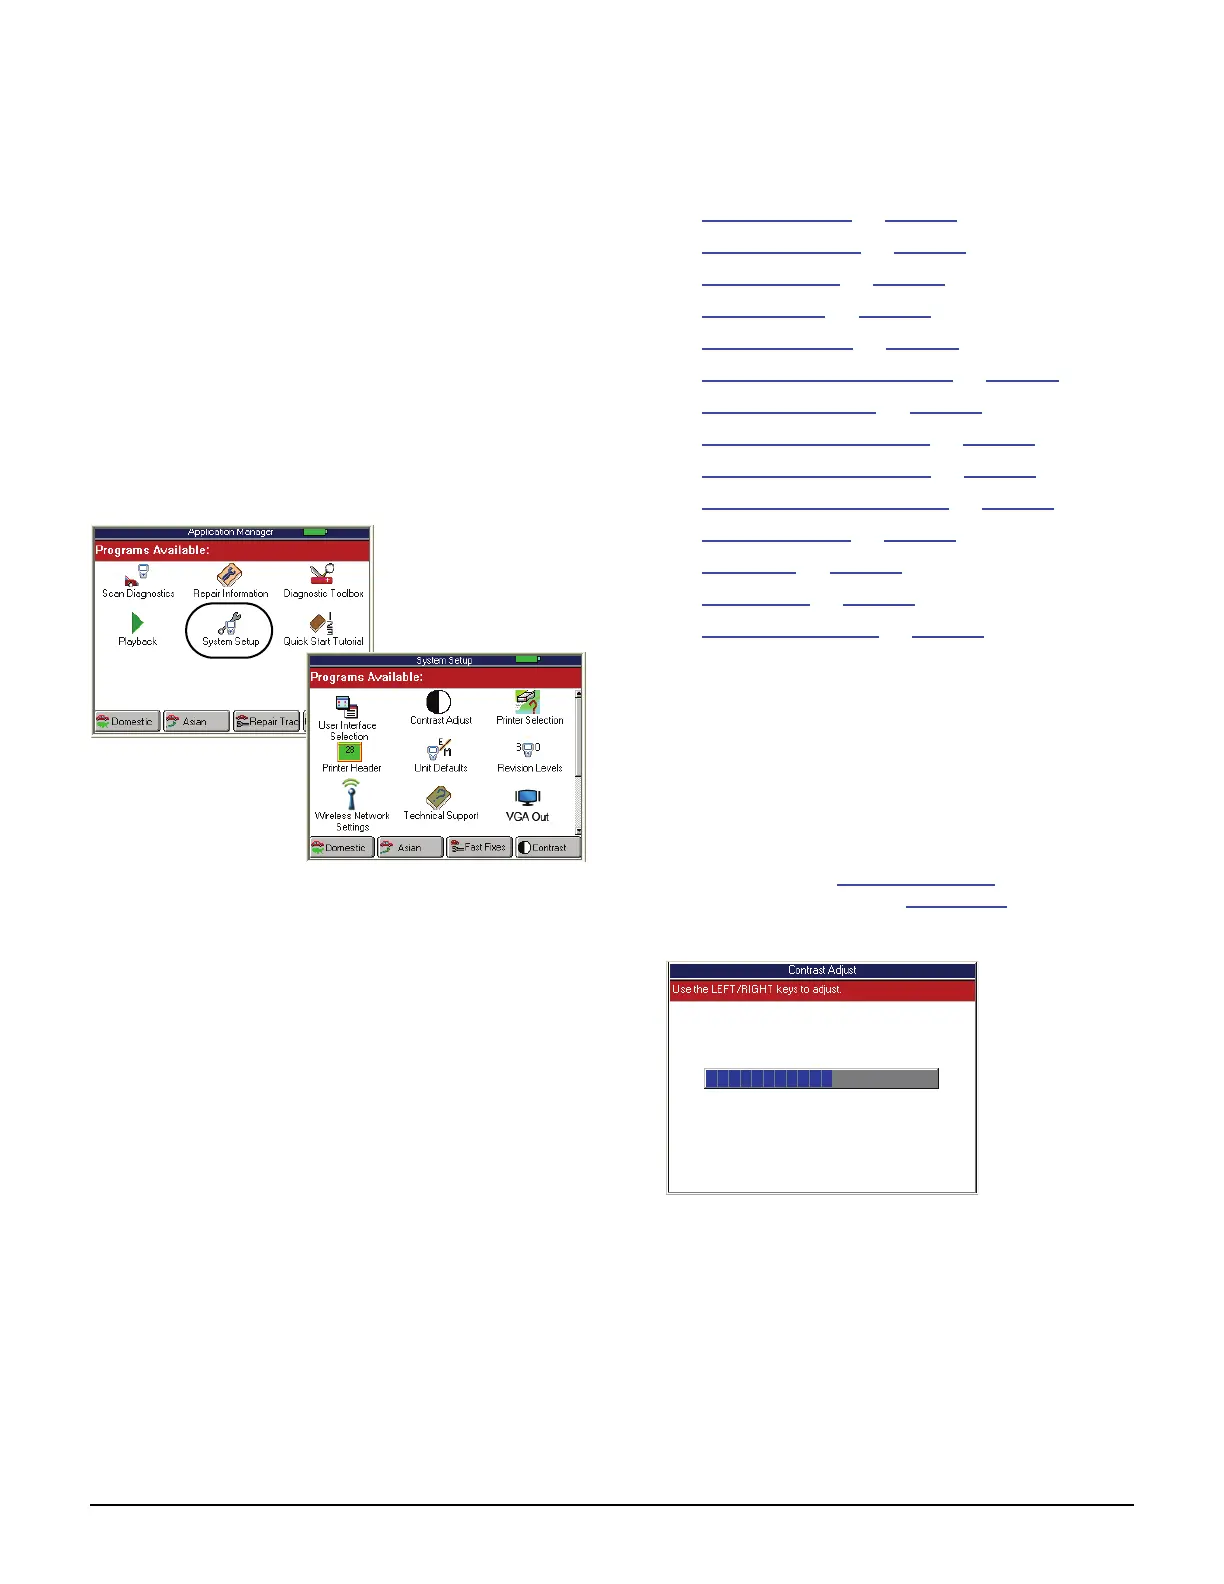
3 Select System Setup and press the ENTER key. This
displays the System Setup screen.
Figure 17.1: Application Manager and System Setup Screens
4 Select the item to adjust and press the ENTER key.
5 Refer to the following sections:
• Contrast Adjust
on page 77
• Printer Selection on page 78
• Printer Header on page 78
• Unit Defaults on page 79
• Revision Levels on page 79
• Wireless Network Settings on page 79
• Technical Support on page 80
• User Interface Selection on page 80
• Color Scheme Selection on page 80
• Function Key Assignment on page 80
• Hardware Tests on page 81
• Language on page 81
• Disk Usage on page 81
• File System Check on page 81
Contrast Adjust
The Contrast Adjust function lets you adjust the
contrast of the LCD screen.
NOTE: Temperature or lighting may affect the brightness
of the scan tool screen. If necessary, use the Contrast
Adjust function to adjust the screen for working conditions.
1 Follow the steps in Basic Procedure
to display the
System Setup screen (see Figure 17.1
).
2 Select Contrast Adjust and press the ENTER key.
Figure 17.2: Contrast Adjust Screen
3 Use the Left and Right Direction keys to adjust the
contrast.
4 Use the EXIT key to return to previous screens.