46 Scan Tool User Guide
Datastream Functions
7: Datastream
Print
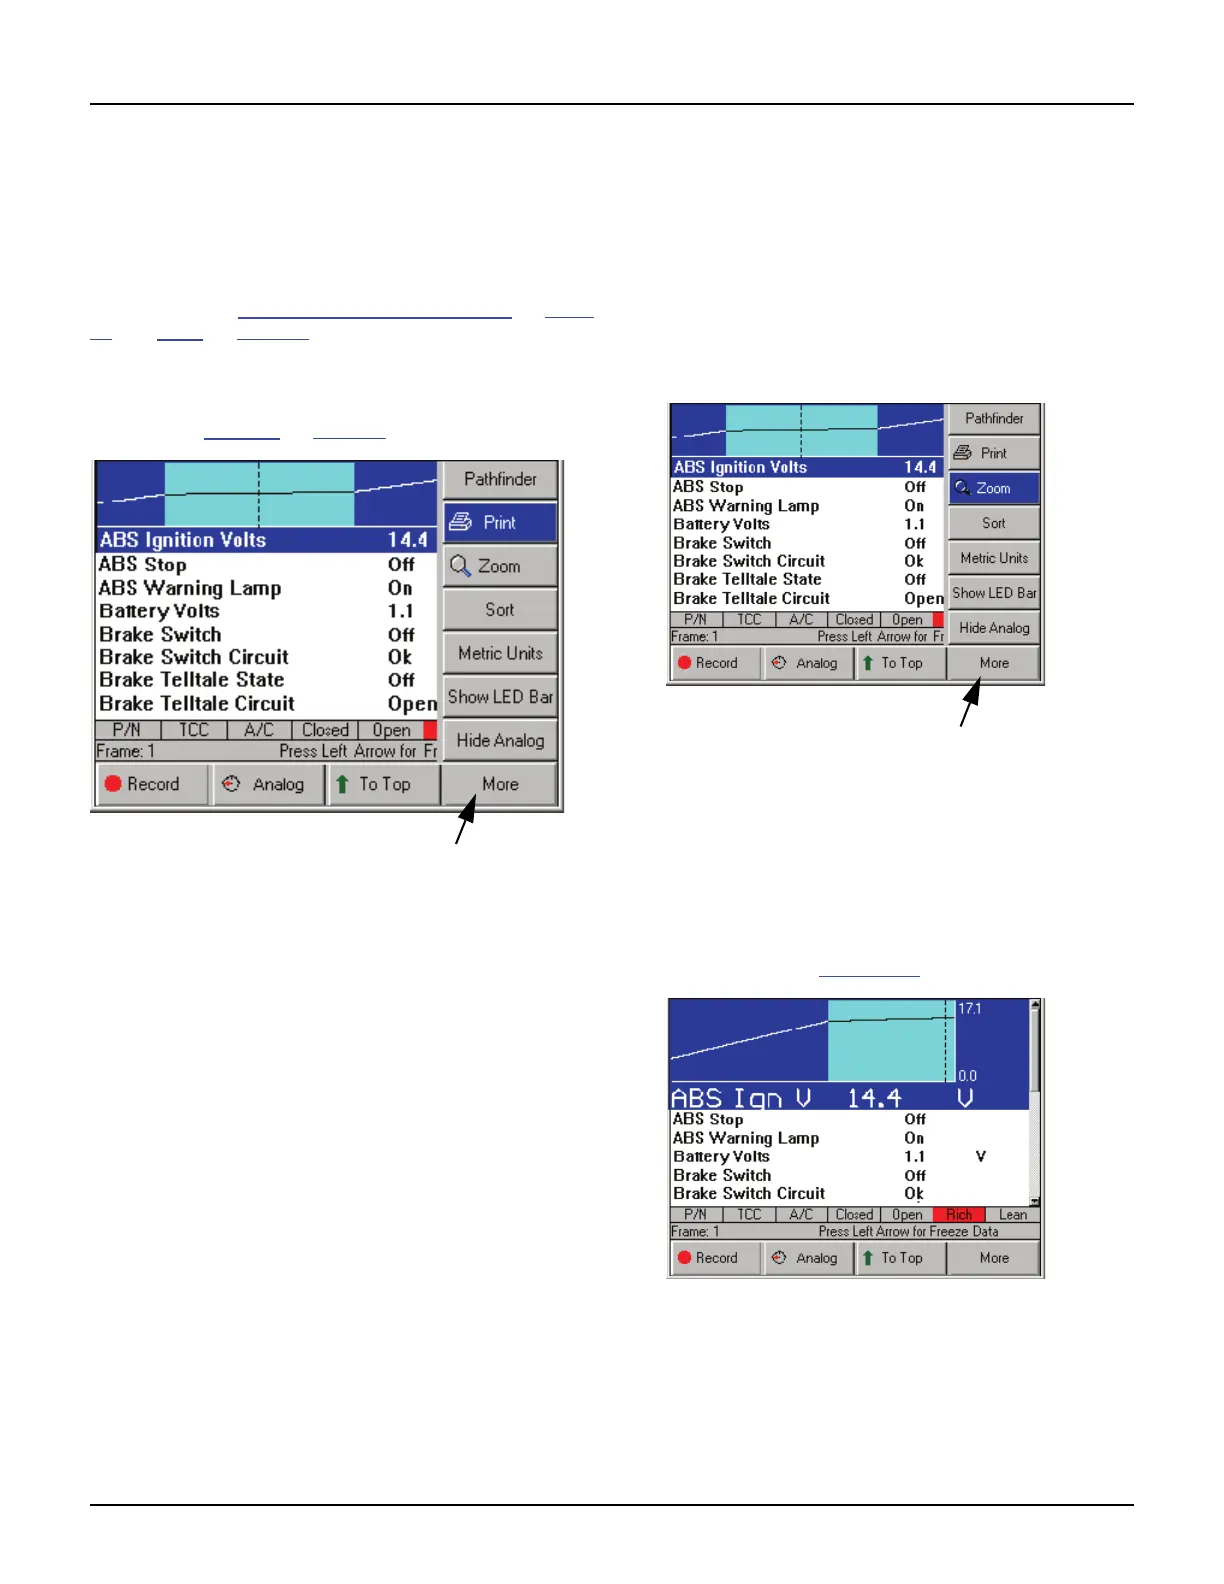
The Print function on the Datastream screen’s More
menu lets you print the data currently displayed on
the screen and any data below the viewable area of
the screen that is graphed or locked.
NOTE: Refer to Graph / Analog / LED / Digital on page
42 and Lock on page 44.
To print the data, follow these steps:
NOTE: Before printing, a printer must be set up for print-
ing. Refer to Printing
on page 83.
Figure 7.14: Datastream Screen - Print Function
1 With the Display Live Data screen displayed, press
the More function key.
2 Use the Down Direction key to select the Print
function.
3 The message “Print the current frame of data?”
appears on a Print screen. Press the OK function key.
Zoom
The Zoom function on the Datastream screen’s More
menu lets you magnify the view of each data line on
the Datastream screen.
NOTE: This function applies to digital, graph, and LED
display lines. The function can be used for the normal
display or for a “frozen” display.
To “zoom” the data lines, follow these steps:
Figure 7.15: Datastream Screen - Zoom Function
1 With the Datastream screen displayed, use the Up or
Down Direction key to select the digital, LED, or
graph line to change.
2 Press the More function key.
3 Use the Down Direction key to select the Zoom
function.
4 Press the ENTER key. This magnifies the selected
line, as shown in Figure 7.16
.
Figure 7.16: Datastream Screen - Zoom Function
5 Repeat steps 1 through 4 for each line to change.
6 To remove the “Zoom” view from a line, select the line
with the “zoomed” view and then select the More,
Zoom function again (see steps 2, 3, and 4).