36 Scan Tool User Guide
Read Codes
6: Diagnostic Trouble Codes
Read Flash Codes
Use these steps if a vehicle requires that you read
diagnostic trouble codes by visually viewing them as
“flash codes”. In these steps, you identify the vehi-
cle’s “flash code” numbers and manually enter the
numbers into the scan tool to see their descriptions.
NOTE: Flash codes are DTCs that you identify by:
1) grounding a pin on the vehicle’s check connector to trig-
ger a specific indictor light to blink, and then 2) viewing and
counting the number of times the indicator light blinks.
To read flash codes, follow these steps:
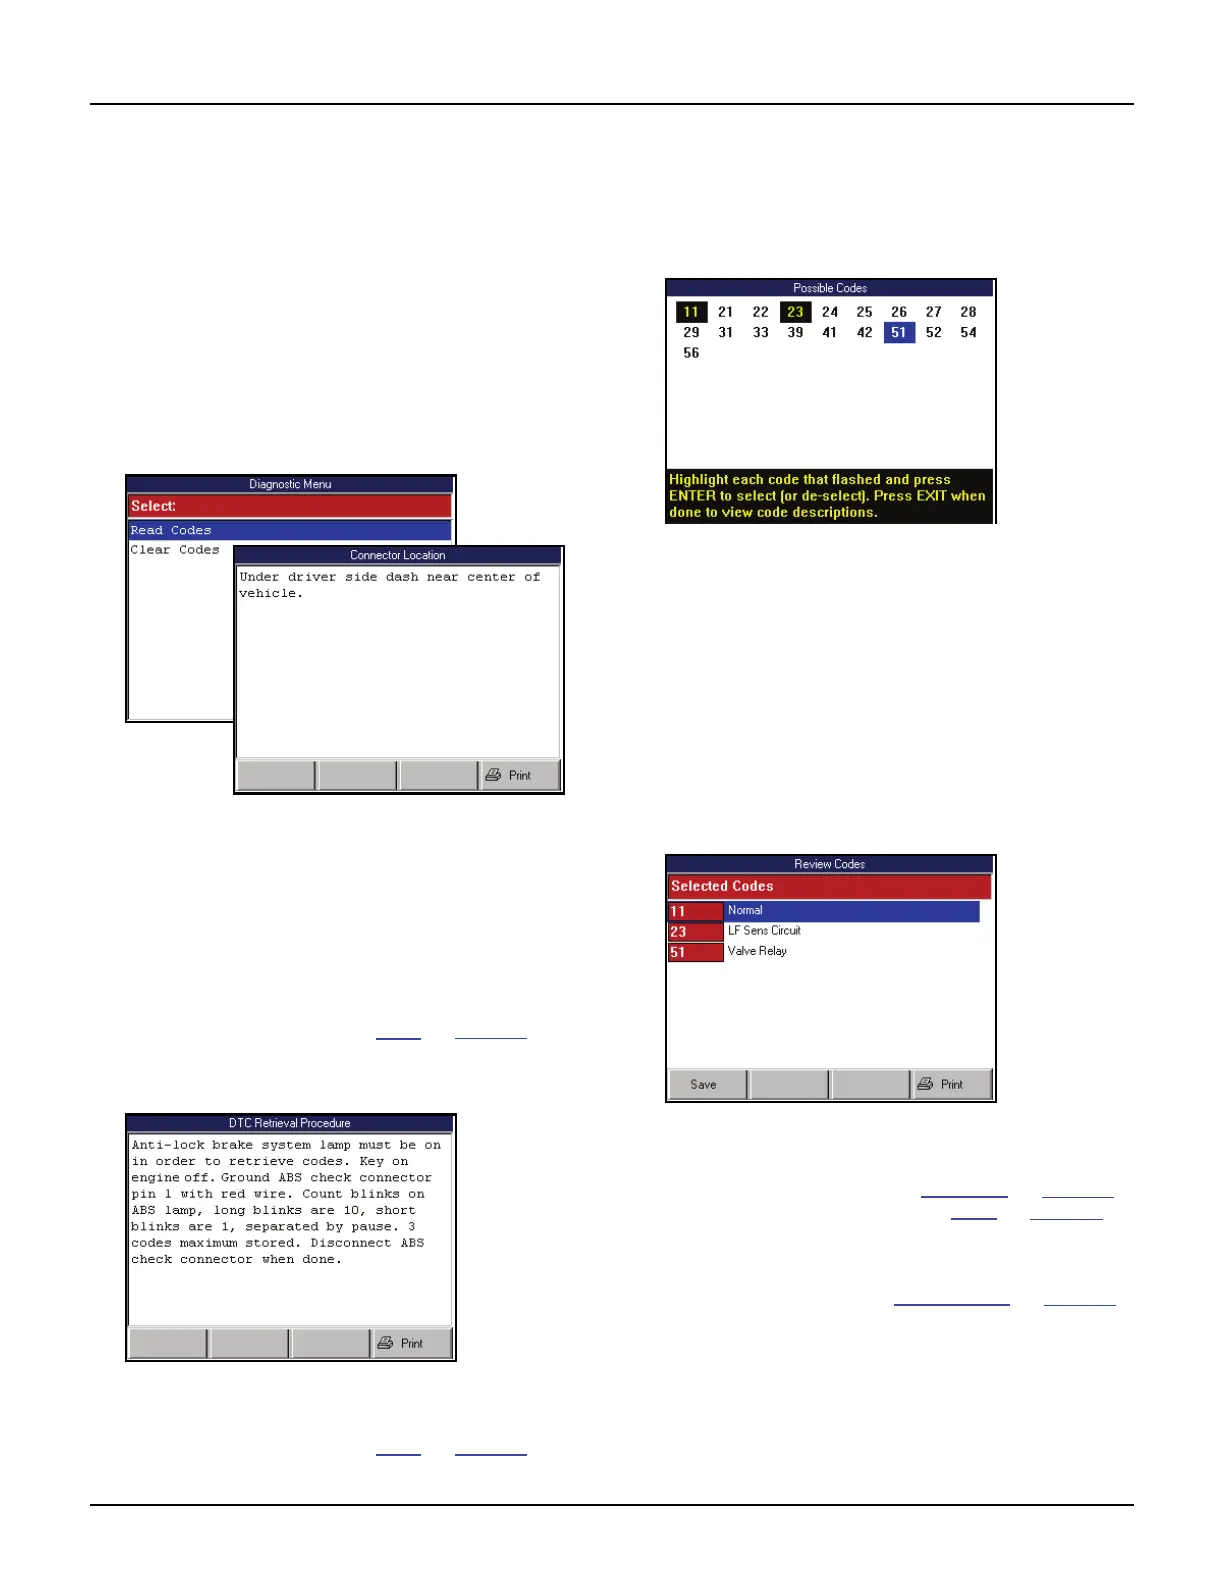
Figure 6.24: Diagnostic Menu Screen and Connector Location
Screen
1 From the Diagnostic Menu screen, select Read
Codes and press the ENTER key. This displays the
Connector Location screen (shown above).
NOTE: If the Connector Location screen does not
appear, go to Step 4.
2 View the information and print it, if necessary. For
printing information, refer to Print
on page 46.
3 Press the ENTER key. This displays the DTC
Retrieval Procedure screen.
Figure 6.25: DTC Retrieval Procedure Screen
4 View the retrieval procedure and optionally print it. For
printing information, refer to Print
on page 46.
5 Use the connector location and DTC retrieval
procedure to read the flash codes from the vehicle.
6 When you know the codes, press the ENTER key on
the scan tool. This displays the Possible Codes
screen.
Figure 6.26: Possible Codes Screen
7 Use the Possible Codes screen to enter the flash
codes as follows:
a Use the Direction keys to select (highlight) a
code number.
b With the number selected, press the ENTER
key.
c Repeat steps a and b until all the flash codes
are highlighted.
d Press the EXIT key to display the code descrip-
tions on the Review Codes screen.
Figure 6.27: Review Codes Screen
8 View the list and optionally save or print it.
To view a saved file, refer to Playback
on page 75.
For printing information, refer to Print
on page 46.
9 Press the EXIT key to return to the Diagnostic Menu
screen.
10 Clear the codes. Refer to Clear Codes
on page 38.