76 Scan Tool User Guide
Copy Files To / From USB Drive
16: Playback
Copy Files To / From USB Drive
The Copy Files function lets you copy saved files to
and from a portable USB Drive for either temporary
or permanent storage.
To copy files to or from a portable USB drive,
follow these steps:
IMPORTANT: Do not insert or remove the USB Drive
with the tool turned on; exit the application, turn the
tool off, and then insert or remove the drive.
1 Turn the Scan tool off.
2 Insert the portable USB drive into the port on the top
of the scan tool.
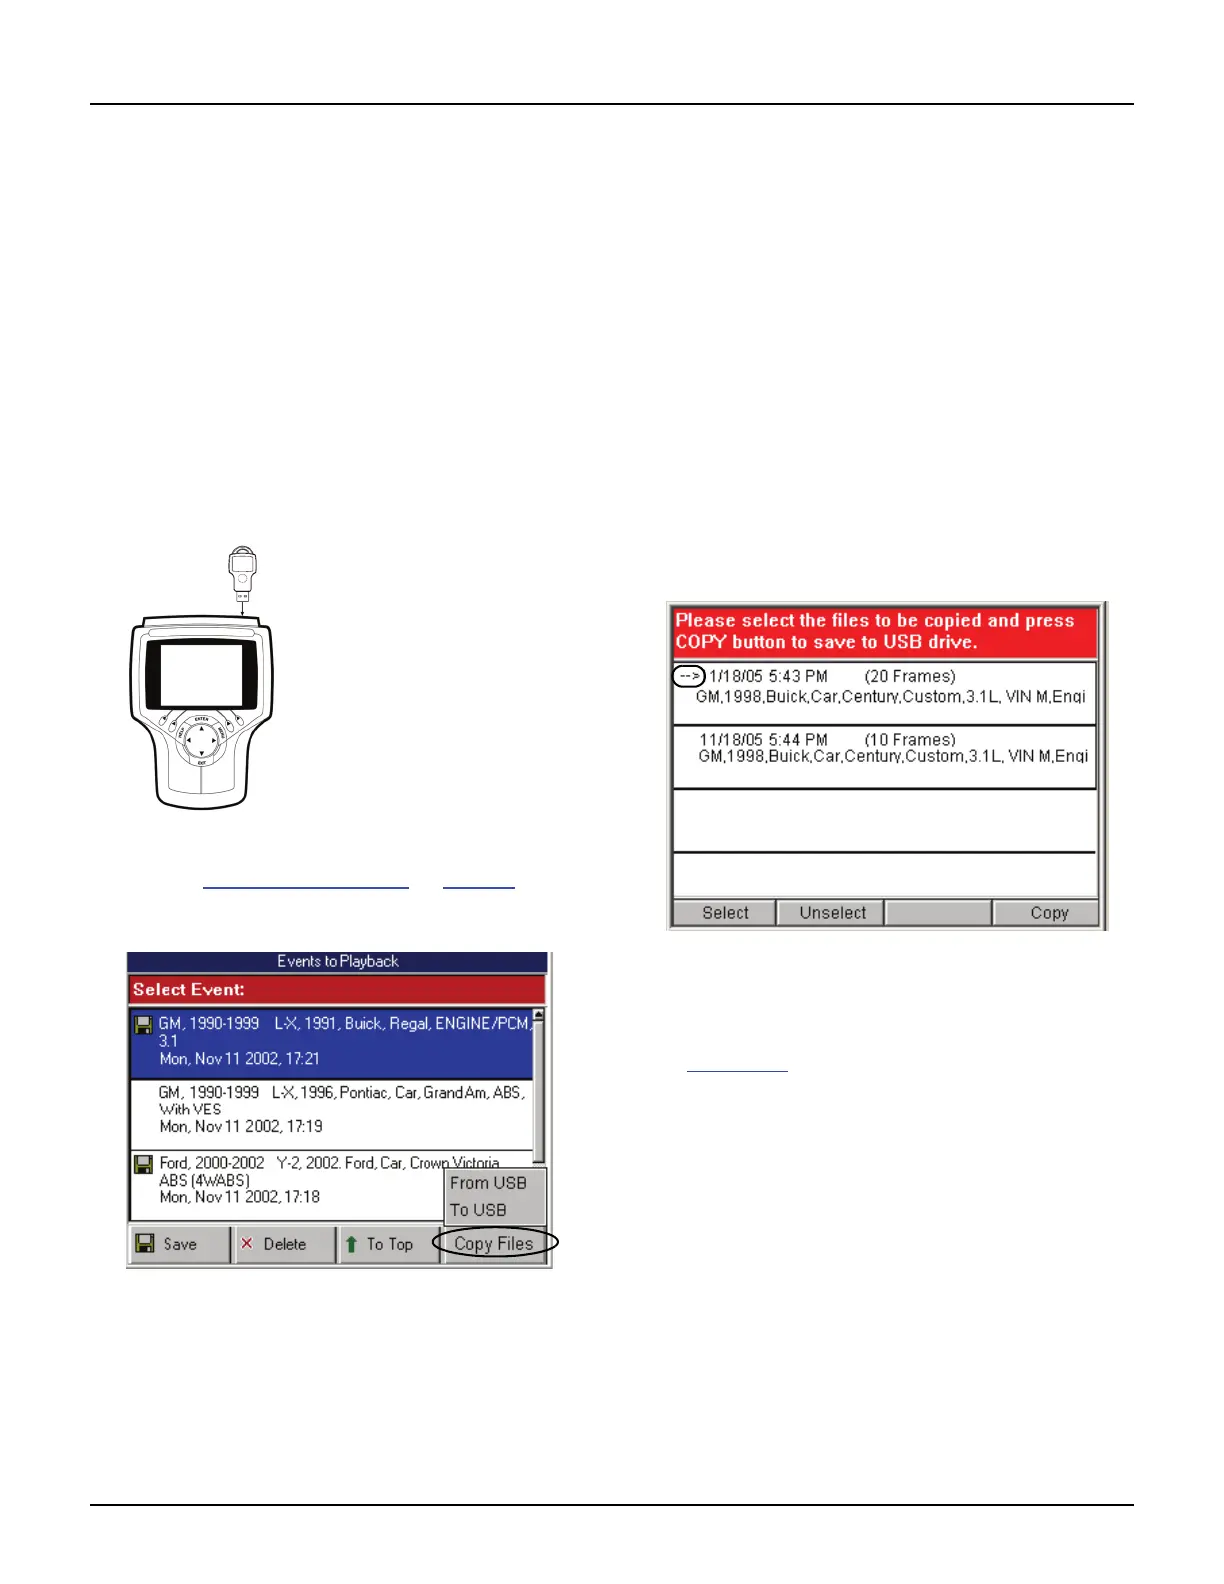
Figure 16.4: Connect USB Drive to Scan Tool
3 Refer to Playback Instructions on page 75 and
follow the steps to display the Events to Playback
screen.
Figure 16.5: Events to Playback Screen
4 Press the Copy Files function key. This displays the
copy files menu, shown above.
5 Select an option and press the ENTER key as
follows:
• Select From USB to copy files from the USB
drive to the scan tool.
NOTE: The tool holds up to 25 files. If neces-
sary, delete files from the tool to make room for
copying files from the USB drive.
• Select To USB to copy files from the scan tool
to the USB drive.
NOTE: The number of files you can copy
depends on the free space available on the
USB drive.
6 After selecting a copy option, a message screen
appears. If instructed, press the ENTER key to
continue. This displays a list of files to copy.
Figure 16.6: Copy Files Screen
7 For each file to copy, select the file and then press
the Select function key. This places a small arrow to
the left side of the file name, as shown for the top line
in Figure 16.6
.
NOTE: To deselect a selected file, select the file
and then press the Unselect function key.
8 After selecting files, press the Copy function key to
begin the file copy.
9 Wait for the files to copy and for a message screen to
display the results of the copy.
10 Press the EXIT key to return to previous screens.
11 Turn the scan tool off and remove the USB drive.