Page 5-17
SETTING PRODUCTION
MATERIALS
5
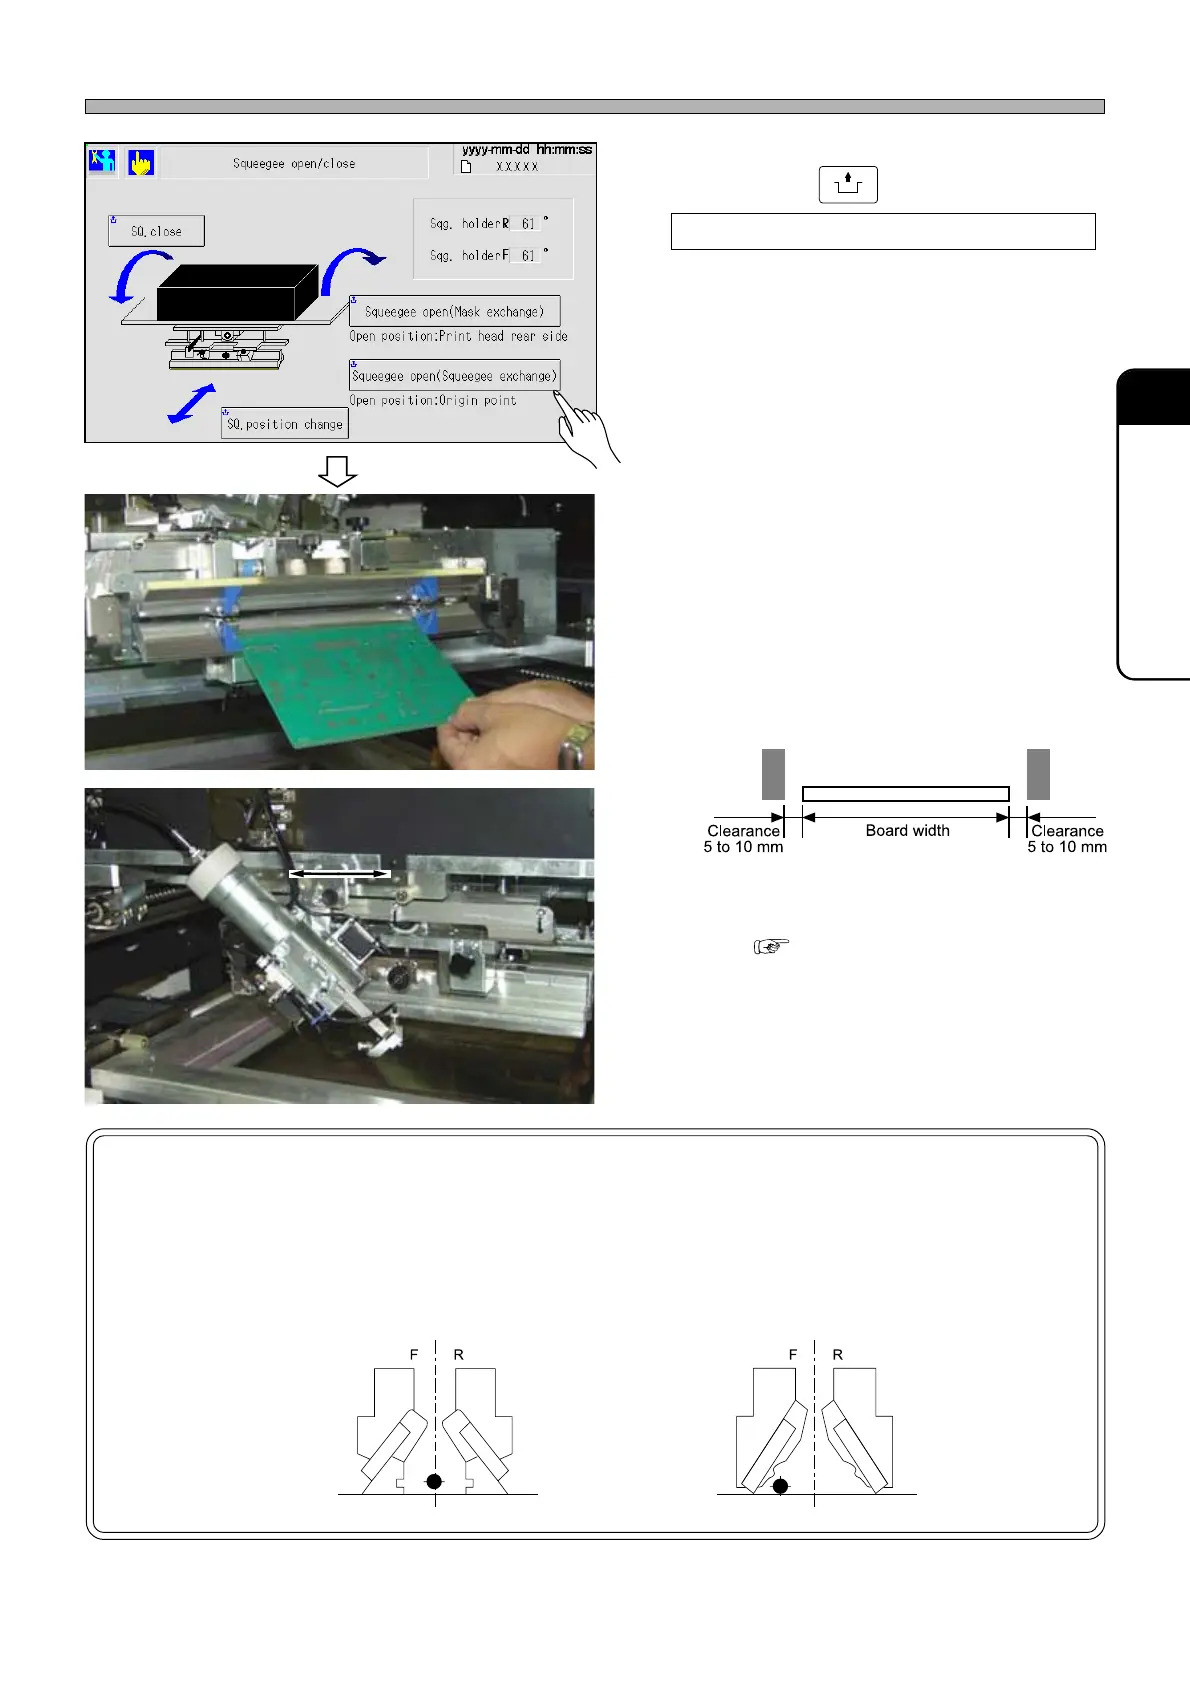
5. By pressing
UNLOCK
+
Squeegee open (Squeegee exchange)
, open the squeegee head.
6. Adjust the width of the solder-leakage
preventing blocks.
∗ The space between the blocks should be a little
wider than the board width. (See the following
figure for reference.)
∗ F and R block widths should be about the
same.
∗ To use the solder auto-dispensing feature,
enable ‘AutoSolderSupply’ of the software
switch.( 7-13 Soft switch )
And, slide the syringe holder to adjust the
nozzle in the vicinity of the center.
∗ The dispensing position can be adjusted a little,
to the position with large amount of solder to
be transferred to board.
NOTICE
Conventional squeegees and advanced squeegees are different in the remaining-
solder-on-mask detection sensor positions. (The mounting holes for the sensor
bracket need to be changed.)
∗∗
∗∗
∗ Be sure to locate the sensors at the correct positions.
Procedures for Using Advanced Squeegees (Option)
1E4C-E-OMA05-A01-00
1D3C-056P
1D3C-030E 1D3C-029E
1D3C-043E
1D3C-JEn-MaSo-001
1D3C-057P
Center between F and R squeegee
Solder rolling area of F-side squeegee
• Conventional squeegees
• Advanced squeegees