Pitco SSHLV (ROV) Gas Fryers
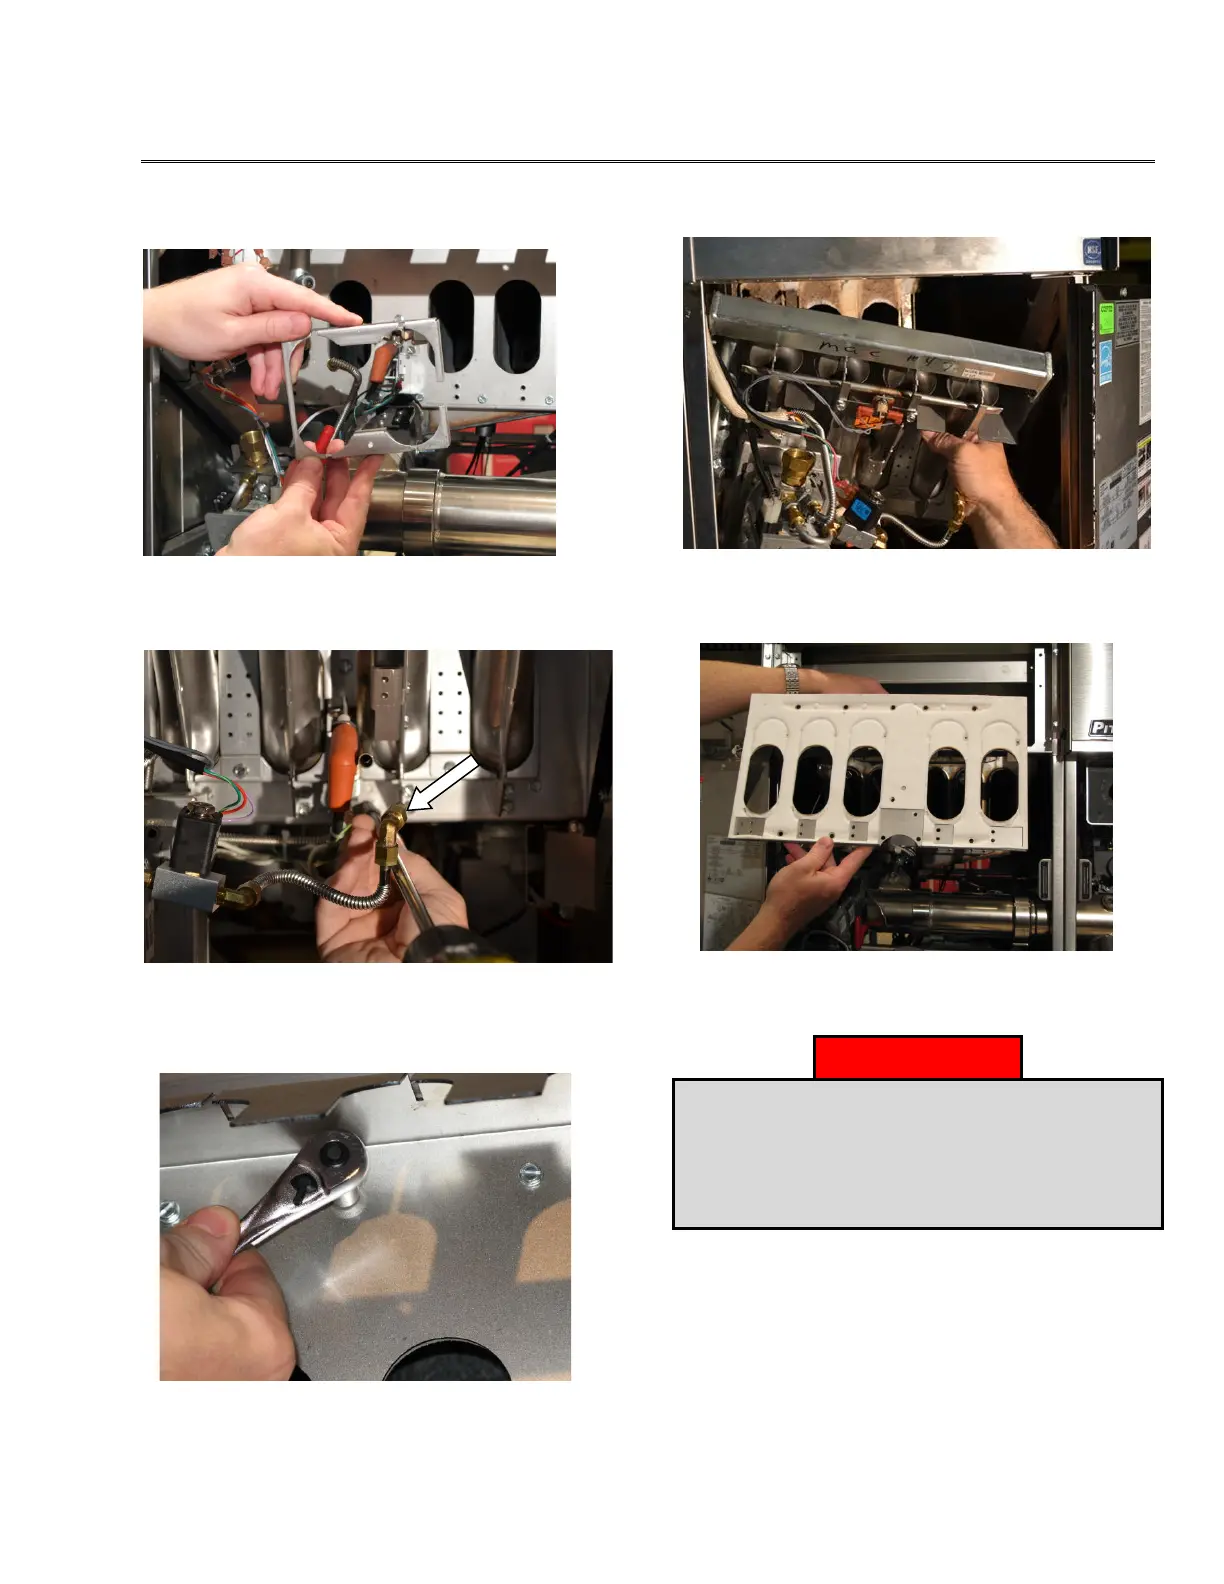
30.2 Replacing the Burner Assembly
See “Replacing the Burner(s)” in section 31.1.
1. Remove the burner shield.
NOTE: When reinstalling, the burner
shield opening should face toward the
pilot.
2. Remove the eight (8) screws (3 screws on
the top and 2 in the middle and 3 screws on the
bottom), which hold the burner rack, using a
5/16 inch socket.
3. Remove the burner rack by pulling it toward
the front of the unit.
4. If necessary, replace the insulation on the
back of the burner rack. (Please note insulation
may vary from this picture depending on model)
5. Reinstall a new burner assembly by
following steps 1 through 5 in reverse.
Check for gas leaks after installation or servicing
of a gas fryer. Apply a leak detection solution to
all connections and joints to ensure there are no
bubbles or leaks. Failure to check for and correct
any leaks could lead to fire and/or explosion,
property damage, injury and death.
L22-392 Rev 1 63