CHASSIS/BRAKES/FINAL DRIVE
5.14
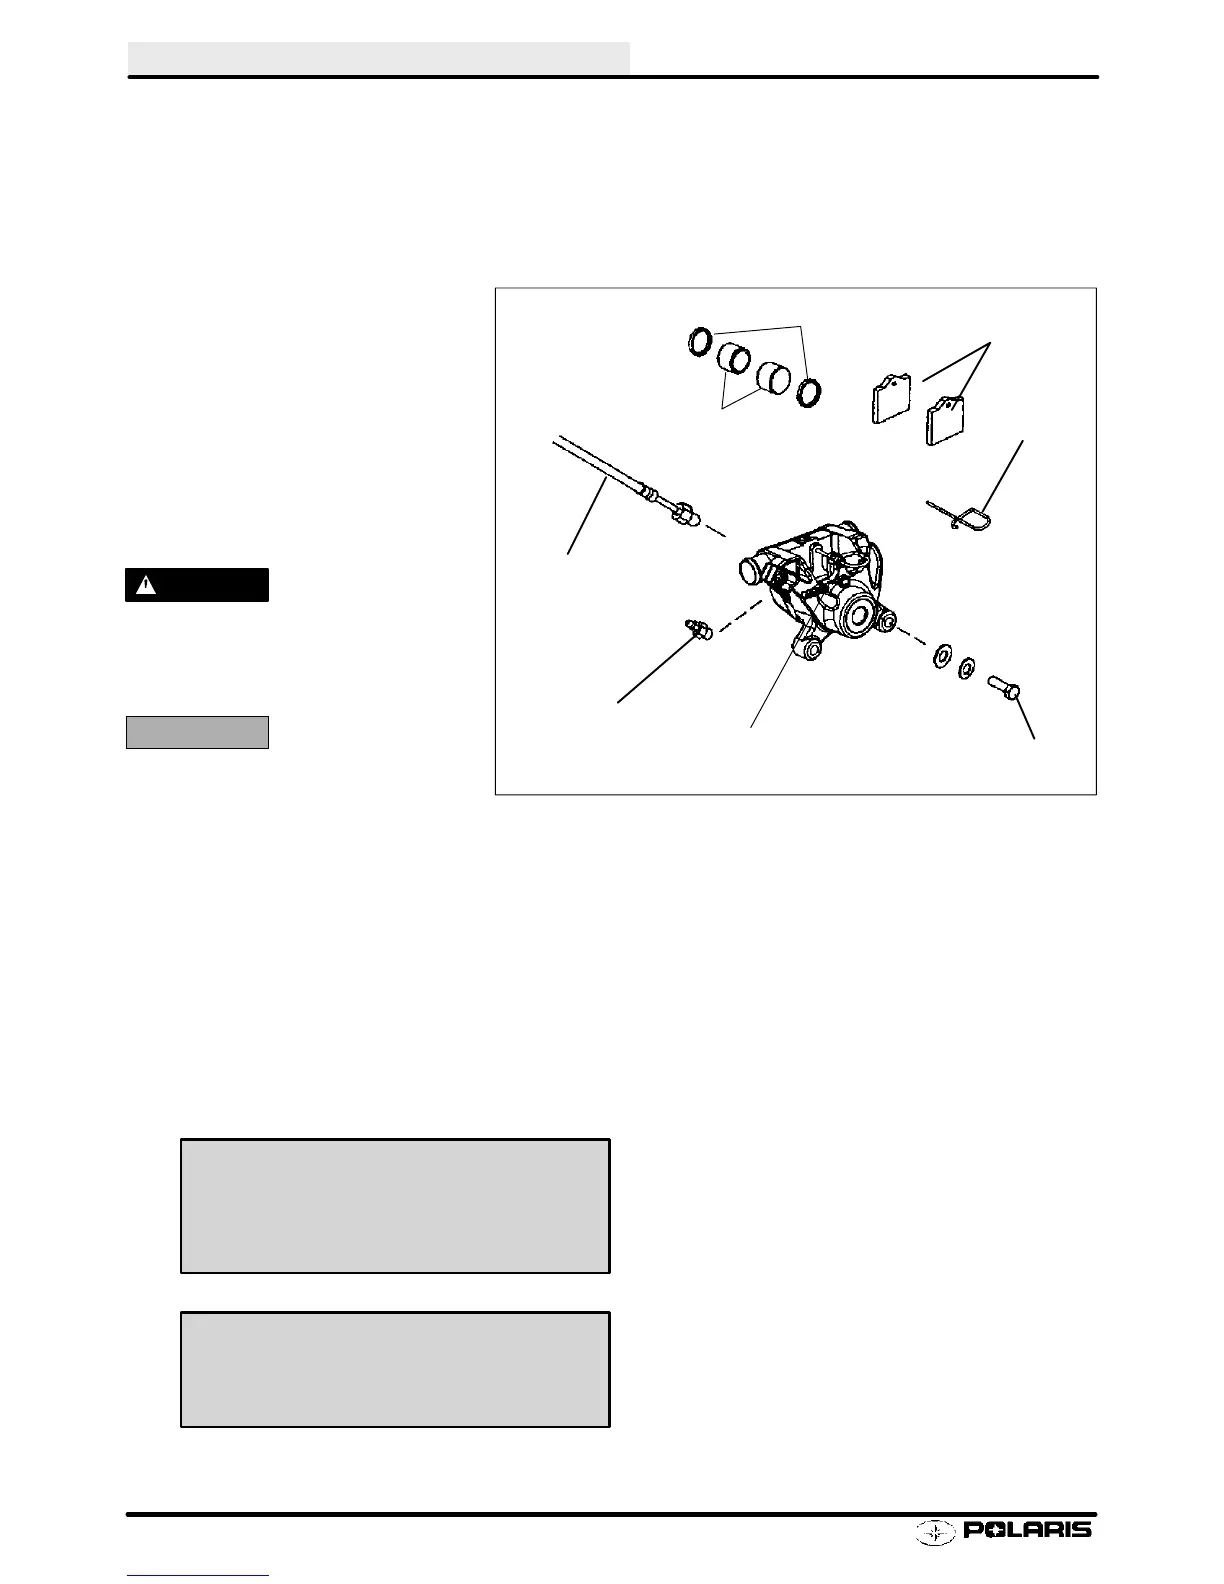
Liquid Cooled Brake System
Liquid Cooled Brake Pad Replacement
1. Carrier Bracket Attaching Bolts
2. Pistons
3. Piston Seals
4. Spring Clip
5. Brake Pads
6. Brake Line
7. Bleeder Screw
8. Caliper (Liquid Cooled)
WARNING
The rider’s safety depends on cor-
rect installation. Follow proce-
dures carefully.
CAUTION:
Protect eyes from brake fluid.
1. Remove spring clip.
2. Place new pads with friction material facing each other into housing.
3. If pads do not slide easily over the disc the piston is not compressed far enough into the caliper.
4. Hold pads in place and replace spring clip through the pad ears.
5. Actuate brake several times to set brake pads to proper operating position.
6. Check for proper fluid level in master cylinder and replace cover. Torque to specification.
7. Bleed brake system as outlined earlier in this chapter.
8. Field test at low speeds before putting into regular service.
Master Cylinder Fluid Level
1/4s -5/16s (.6 - .8 cm) below
top of master cylinder
Reservoir Cover Screw Torque -
15-18 in. lb. (1.7-2 Nm)
1
2
3
4
5
6
7
8
Enfocus Software - Customer Support
 Loading...