CLUTCHING
4.20
Spider Indexing
NOTE: Spider indexing affects clutch balance and belt
to sheave clearance. Read procedures carefully before
proceeding.
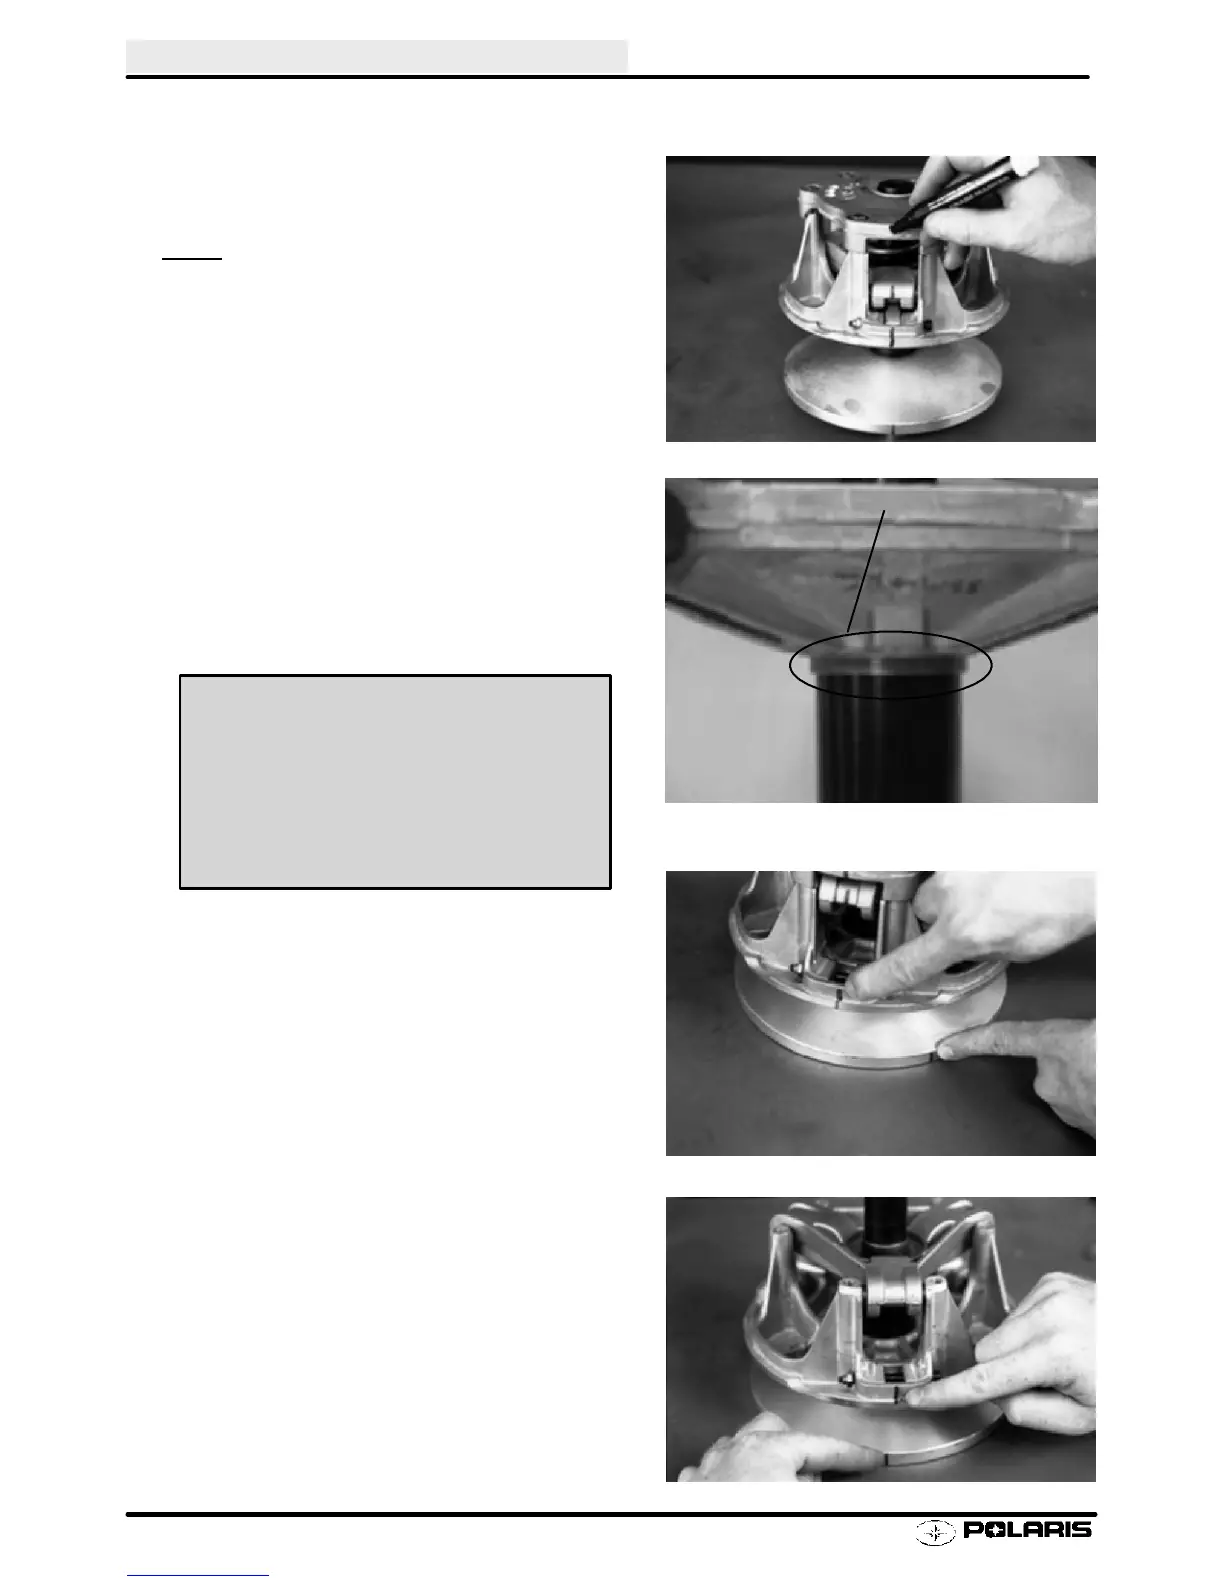
1. Before
disassembling drive clutch, mark spider,
cover, moveable sheave, and stationary sheave in
line with a permanent marker as shown.
2. Disassemble drive clutch as described on page
4.20-4.21. Take care to note the amount and
thickness of the shim washers under the spider.
3. Add or remove spider washers as required to
achieve desired belt to sheave clearance.
S For example: If belt to sheave clearance is .020s
too large, removing one .020s shim will position
the movable sheave closer to the fixed sheave
reducing belt to sheave clearance by .020s.
NOTE: The following washers are available for fine tuning:
4. Install spider washer(s) and spider aligning Xs.
Notice as the spider seat location is changed, the
sheave marks made before disassembly no longer
align. There are two ways to bring the sheave marks
into alignment.
S Vary the amount and thickness of spacer washers
(Washer thickness may vary slightly).
S Re-index marked spider leg to another tower.
This can be done because spider has little effect
on overall clutch balance.
Re-indexing the spider 1/3 turn clockwise, or 1 leg, will
allow the realignment of the moveable and stationary
sheaves as previously marked. For example:
S .020s or .032s washer removed - re-index
spider clockwise 1/3 turn
S .050s or .064s washer removed - re-index
spider clockwise 1/3 turn
S Two .050s or .064s washers removed -
re-index clockwise 2/3 turn
NOTE: Alignment marks should be within 1s (25 mm) af-
ter final assembly and torquing.
PN 5132542
PN 5210754 .050s
PN 5210753 .030s
PN 5210752 .020s
PN 5132542 Stepped washer in addi-
tion to one of the above shims for pre-
cise shimming
Washers:
Enfocus Software - Customer Support
 Loading...