4.20
Cleanfire Fuel Injection
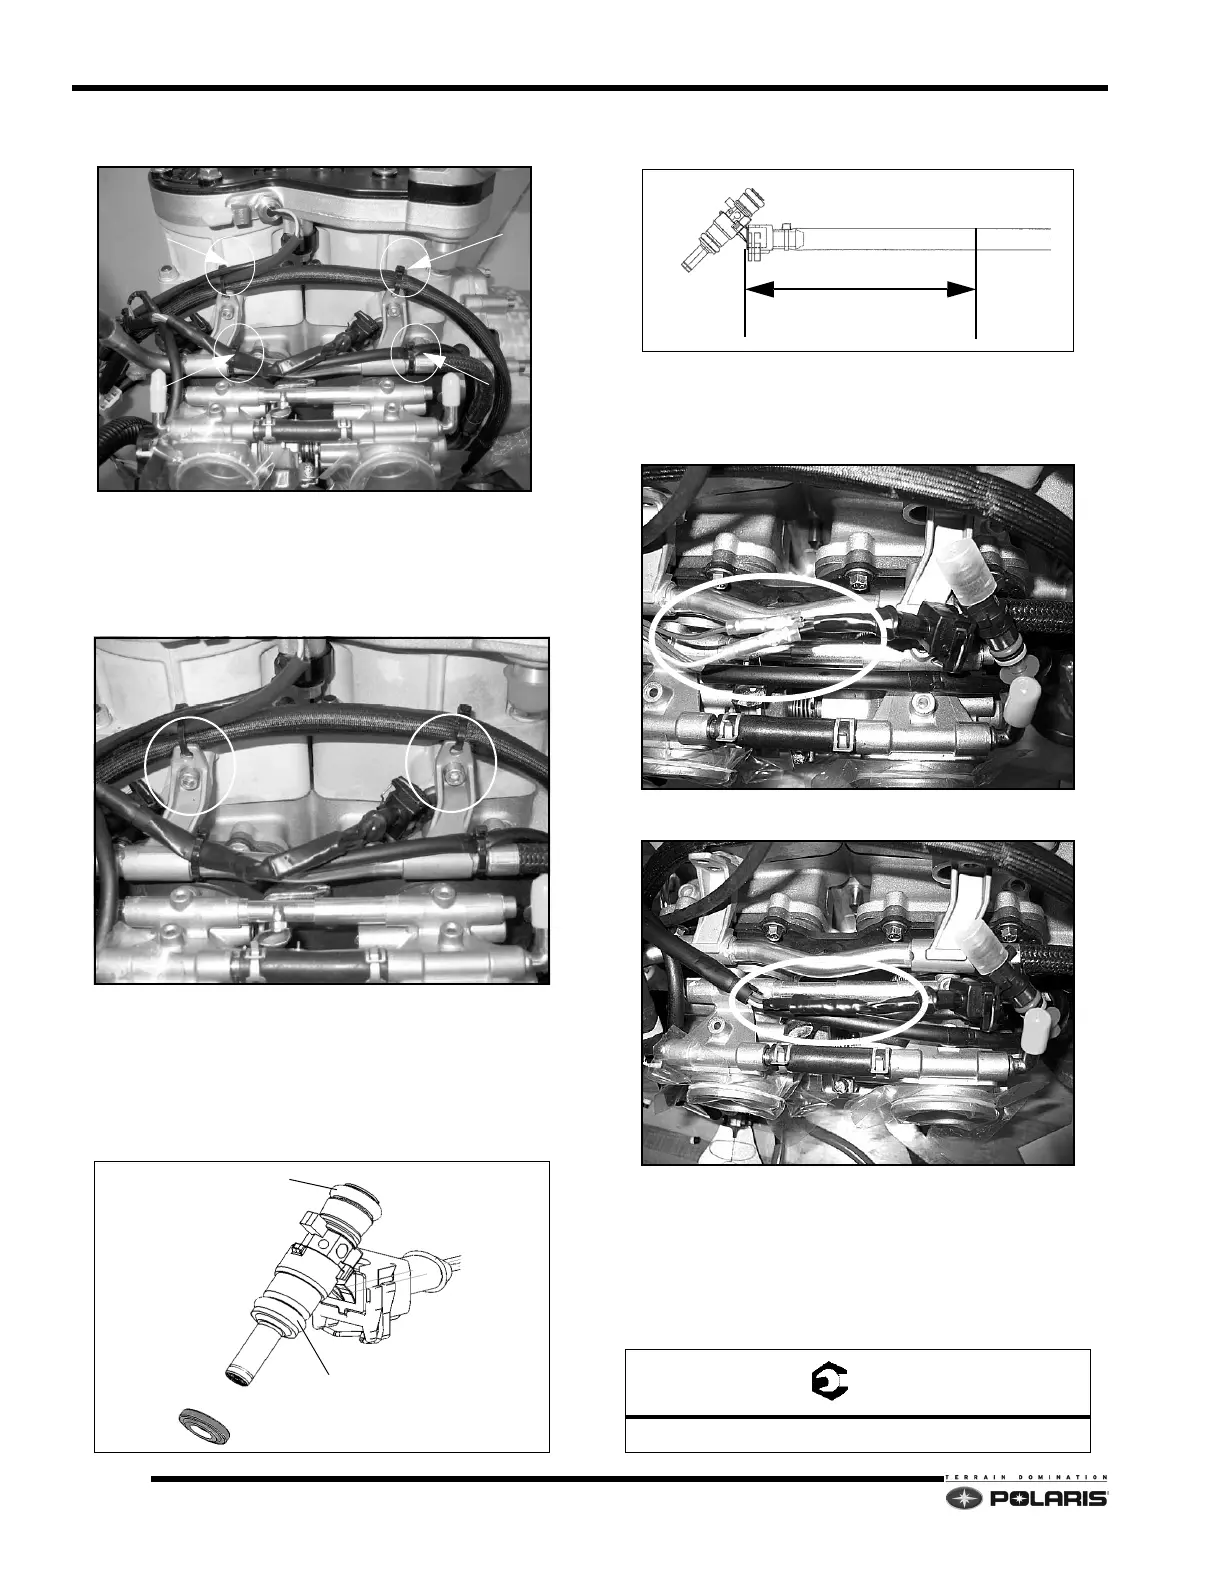
2. Remove the panduit straps as shown.
NOTE: The engine must be removed from the engine
c
ompartment to access the lower two fuel injectors.
3. Remove the hex screws securing the fuel rail to the
cylinde
rs.
4. If replacing a lower injector, remove the two bottom
scre
ws bolts from the lower fuel rail.
5. Remove the failed injector(s).
NOTE: Make sure that the green bushing comes out
wi
th the injector. If it does not, look inside the
injector bore.
6. Measure from the end of the injector (as shown below)
3" (76.2mm) and cut the injector off.
7. Strip the harness end injector
wire covering .25" -
.375" (6.35 - 9.525mm).
8. Crimp the ends of the new injector firmly on to the wire
har
ness.
9. Tape exposed wire and splices.
10. Apply oil to the fuel injector o-rings.
11. Remove the protective caps. Install the injector(s)
into
the fuel rail. Verify the injector(s) are fully seated.
12. Insert the fuel rail, with injectors into the engine.
13. Apply a light amount of 262 Loctite® to the fuel rail
fa
steners and torque to specification.
GREEN BUSHING
BROWN OR GREEN O-RING
BLUE OR BLACK O-RING
Fuel Rail Hex Screw Torque: 9 ft-lbs (12Nm)
 Loading...


