6.23
PVT System
6
Re-indexing the spider 1/3 turn clockwise, or 1 leg, will
allow the realignment of the moveable and stationary
sheaves as previously marked (D). For EXAMPLE: 0.020"
or 0.032" (0.5 - 0.8mm) washer removed - re-index spider
clockwise 1/3 turn.
NOTE: Alignment marks on the sheaves should be
wi
thin 1" (25.4mm) after final assembly and torquing.
When assembling a new clutch with all of the same
c
omponents, it is not uncommon for the marks not to
line up.
Drive Clutch Installation
NOTE: Always clean the clutch taper before re-
installing clutch on engine.
1. Place the specified clutch taper reamer in a vise and
lu
bricate the cutting edges with cutting oil. Clean the
clutch taper by manually rotating the clutch clockwise
on the reamer one or two revolutions. Only use the
weight of the clutch and do not push down on the
clutch while turning.
2. Check crankshaft taper for galling or
scoring. If
necessary clean the taper evenly with 200 grit emery
cloth.
3. The clutch taper and the crankshaft taper should be
clea
n and dry. Do not use harsh cleaners which may
cause clutch taper to corrode, or damage the crank
seal.
4. Clean clutch taper with lacquer thinner or isopropyl
al
cohol.
5. Slide clutch onto crankshaft taper.
6. Install the retaining
bolt with all spacers and washers
or o-rings that were on the bolt when it was removed.
7. Hold the clutch with the h
olding wrench PN 931417-A.
8. Torque bolt to specification.
9. Run engine then re-torque the retaining bolt to
spec
ification.
DRIVEN CLUTCH
Driven Clutch Removal
1. Remove the drive belt.
2. Apply and lock the parking brake.
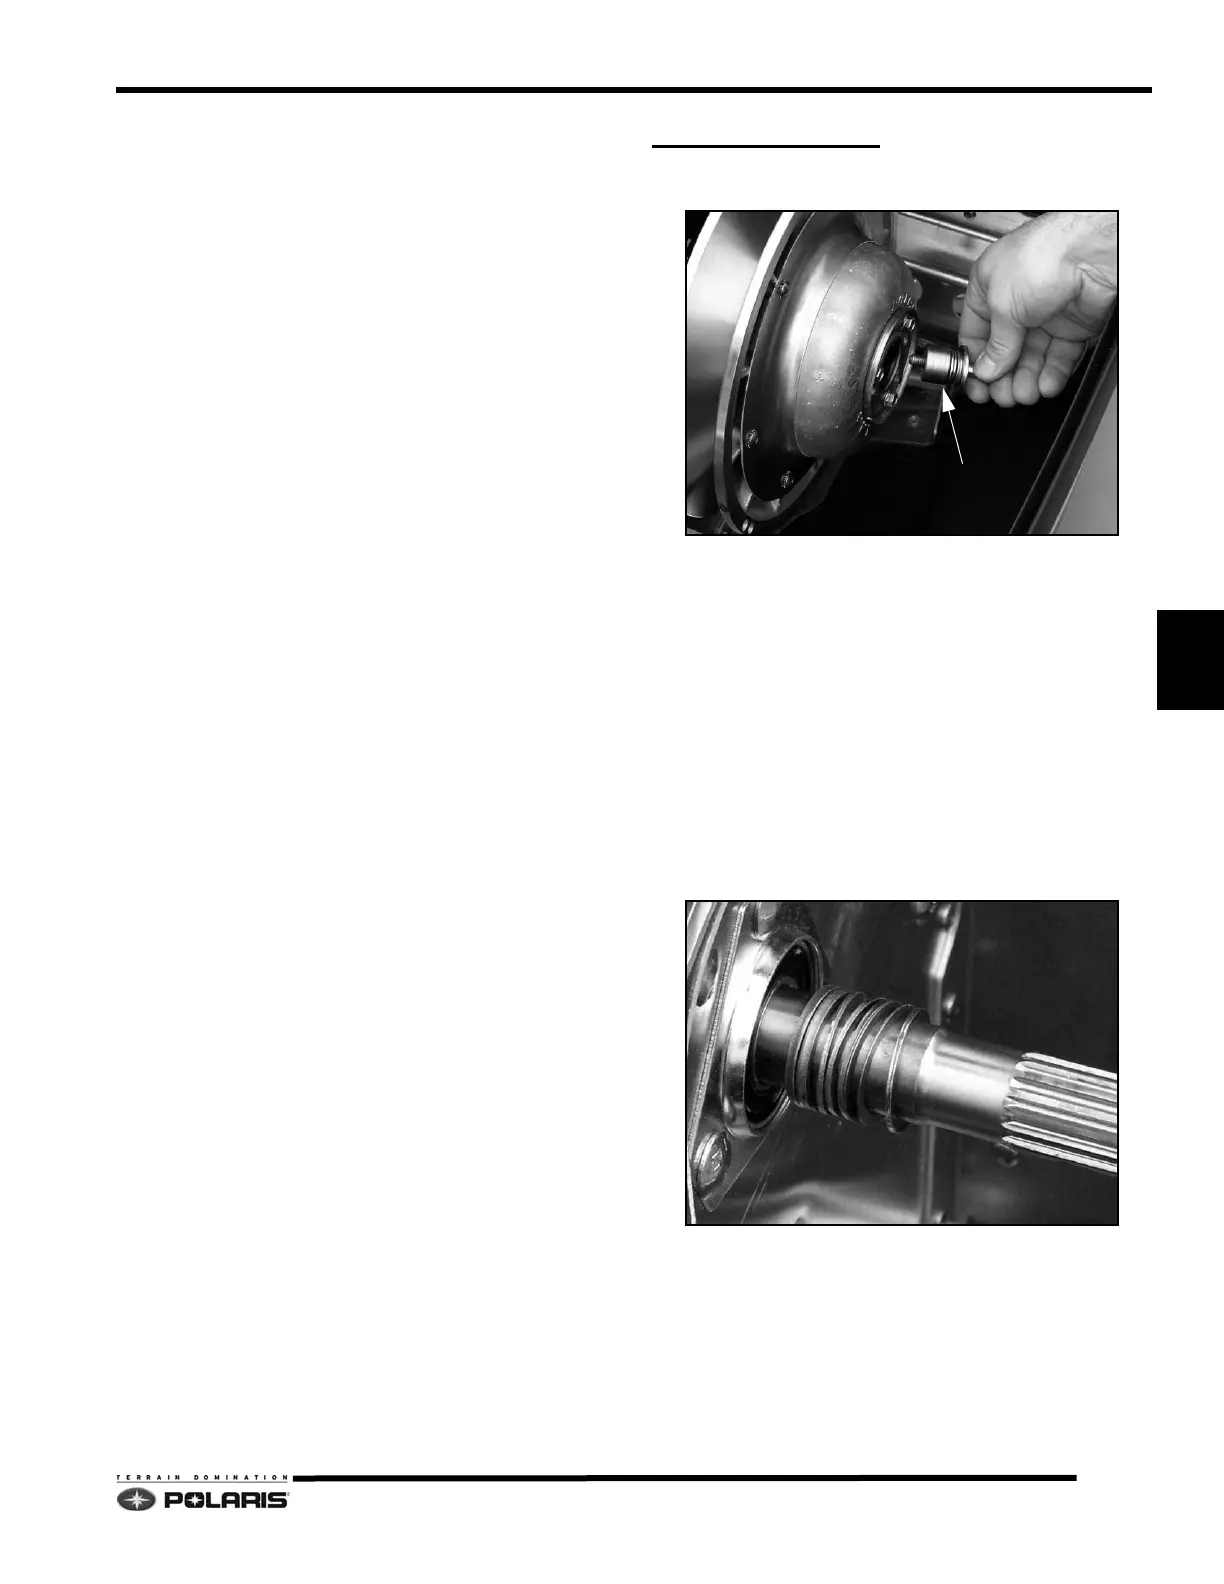
3. Remove the driven clutch bolt and washers (A).
NOTE: Count the number and location of the spacer
was
hers located on the fastener and behind the
clutch.
4. Slide the driven clutch off the jackshaft.
5. Inspect the splines and replace jackshaft if damage is
fo
und.
Driven Clutch Installation
1. Install the driven clutch bolt with the same amount of
washers at removal.
2. Torque the bolt to specification.
3. Check for correct belt deflection, and the clutch floats
on
the shaft.
 Loading...