4.27
Cleanfire Fuel Injection
4
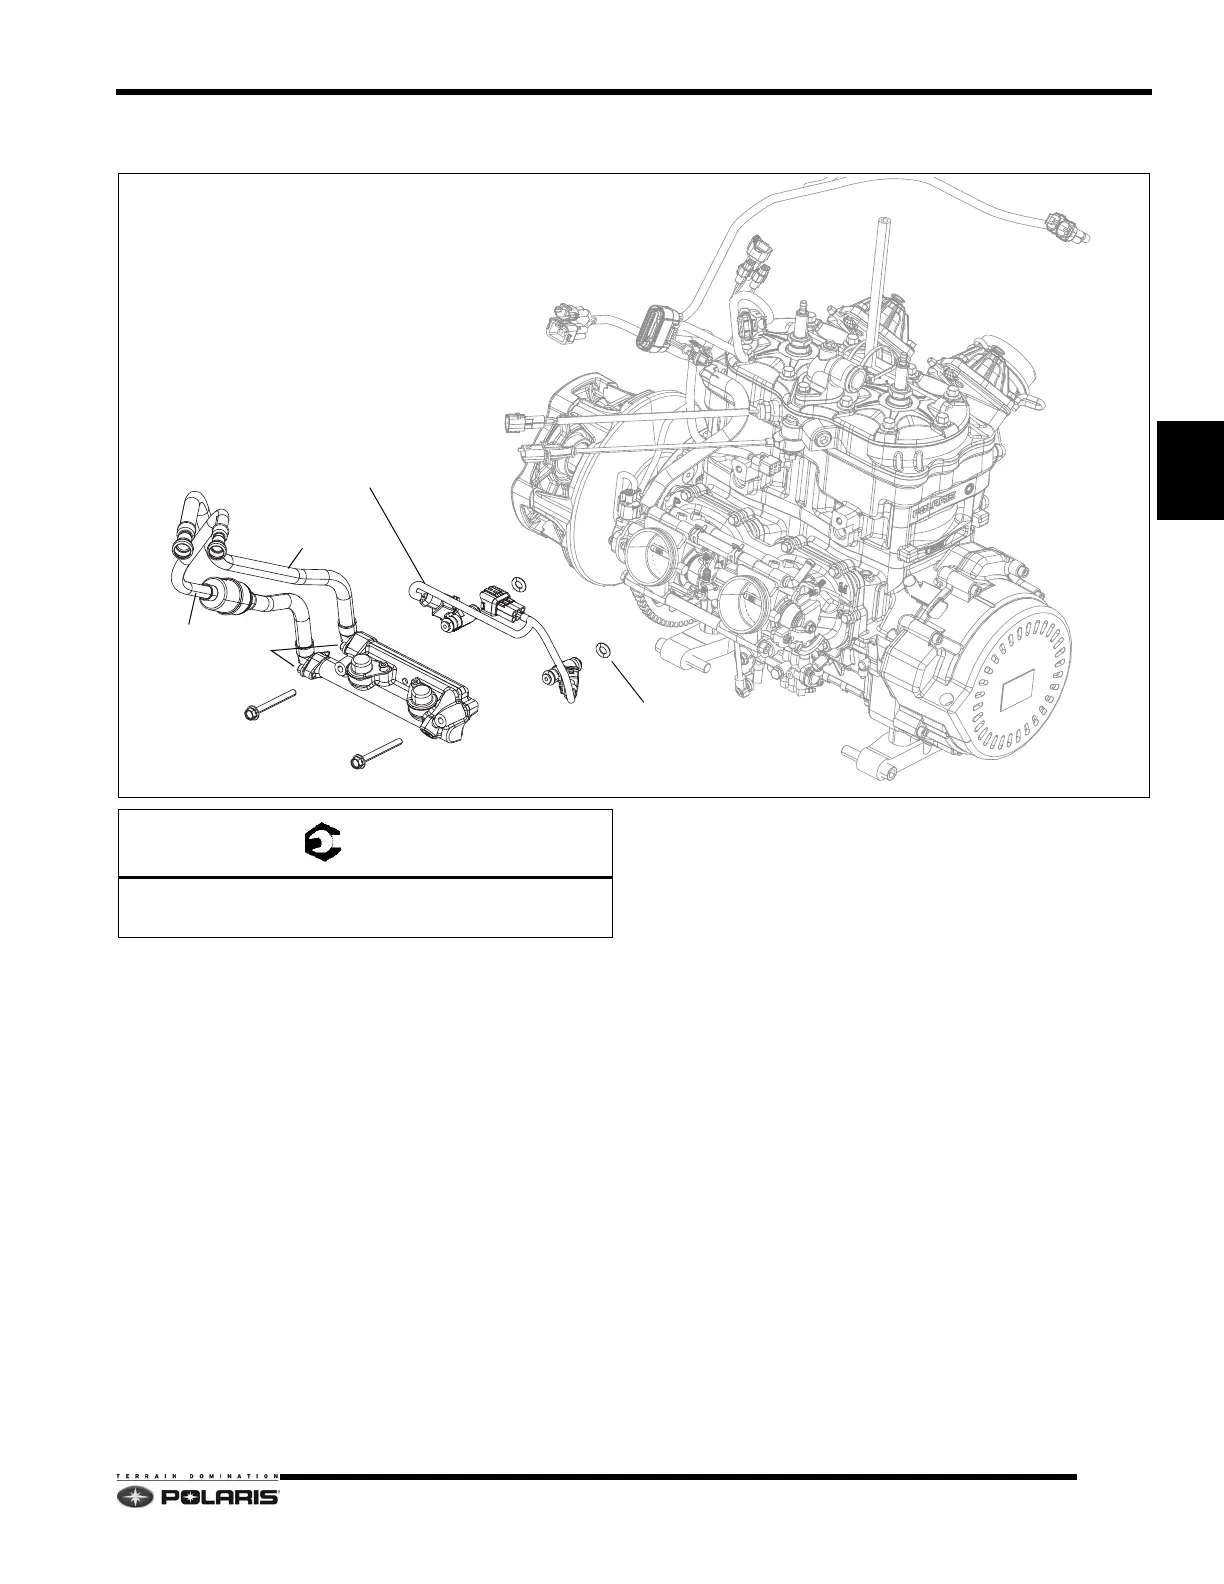
Fuel Rail/Injector Removal and Installation
Removal/Installation Process
NOTE: Do not touch fuel injector inlet/
outlet. Leave
protective caps in place while handling.
1. Open the door panels and remove the hood
as
sembly.
2. Relieve fuel system pressure.
3. Disconnect the fuel supply and return hoses from the
fu
el pump.
4. Remove the ECU, ECU bracket, and oil tank from the
clutch c
over assembly.
5. Remove the air box intake tube and top to gain access
to the fuel
rail.
6. Disconnect the fuel injector assembly wiring harness
con
nector.
7. Remove the two screws that mount the fuel rail to the
cylinde
r.
8. Carefully pull the rail away from the engine and
i
njectors. Remove the injectors from the cylinder.
NOTE: Always use new o-rings/i
solators after fuel
injectors have been removed.
9. Using a pick, remove the two fuel injector isolators or
b
ushings from the injector ports in the cylinder.
Discard the isolators/bushings.
10. Remove the fuel injector o-rings from fuel injectors.
Discard the fuel injec
tor o-rings.
11. To reinstall the fuel rail assembly, lightly
coat two new
fuel injector isolators with two-stroke engine oil. Install
the new isolators or bushings into the cylinder injector
ports.
12. Install four new oil-coated fuel injector o-rings.
13. Install both fuel injectors into the c
ylinder. Carefully
install the fuel rail assembly.
14. Tighten fuel rail screws evenly. Once both screws are
se
ated, torque to specification.
15. Reconnect the fuel injector harness wiring connector.
16. Reinstall the air box components.
17. Install the oil tank, ECU bracket, and ECU.
18. Reconnect the fuel supply and return fuel hoses on
th
e fuel pump.
FUEL RAIL ASSEMBLY
FUEL INJECTOR ASM.
2011-ISOLATOR O-RING
B
A
FUEL RETURN
FUEL SUPPLY
2012-2013-GREEN BUSHING
A
A: 9 ft-lbs (12 Nm)
B: 3.3 ft-lbs (4.5 Nm) Apply Loctite® 24
3.
 Loading...


