EasyManuals Logo

Polaris 600 RUSH 2010 User Manual

Polaris 600 RUSH 2010
512 pages
To Next Page IconTo Next Page
To Previous Page IconTo Previous Page
Page #395 background imageLoading...
Page #395 background image
8.75
Steering and Suspensions
8
PROGRESSIVE REAR SUSPENSION
REMOVAL AND INSTALLATION
Removal
1. Place a large mat, shop blanket, or piece of
cardboard on the floor next to the snowmobile. The
piece should be large enough to protect the plastics
when the unit is laid on its side.
2. Remove the rear bumper assembly from the rear
crank.
3. Loosen, but do not remove, the rear idler wheel
fastene
rs.
4. Loosen the track tension adjuster jam nuts. Back out
th
e threaded adjusters until flush with adjuster blocks.
5. Using a snowmobile lift, raise the vehicle high enough
o
ff the ground to remove the vehicle weight from the
rear suspension.
6. Remove the upper carrier wheel assembly from the
re
ar crank.
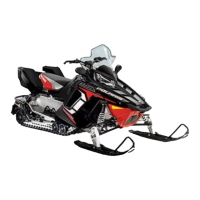
7. Remove the two fasteners and nuts securing the rear
pivot to
the rear crank.
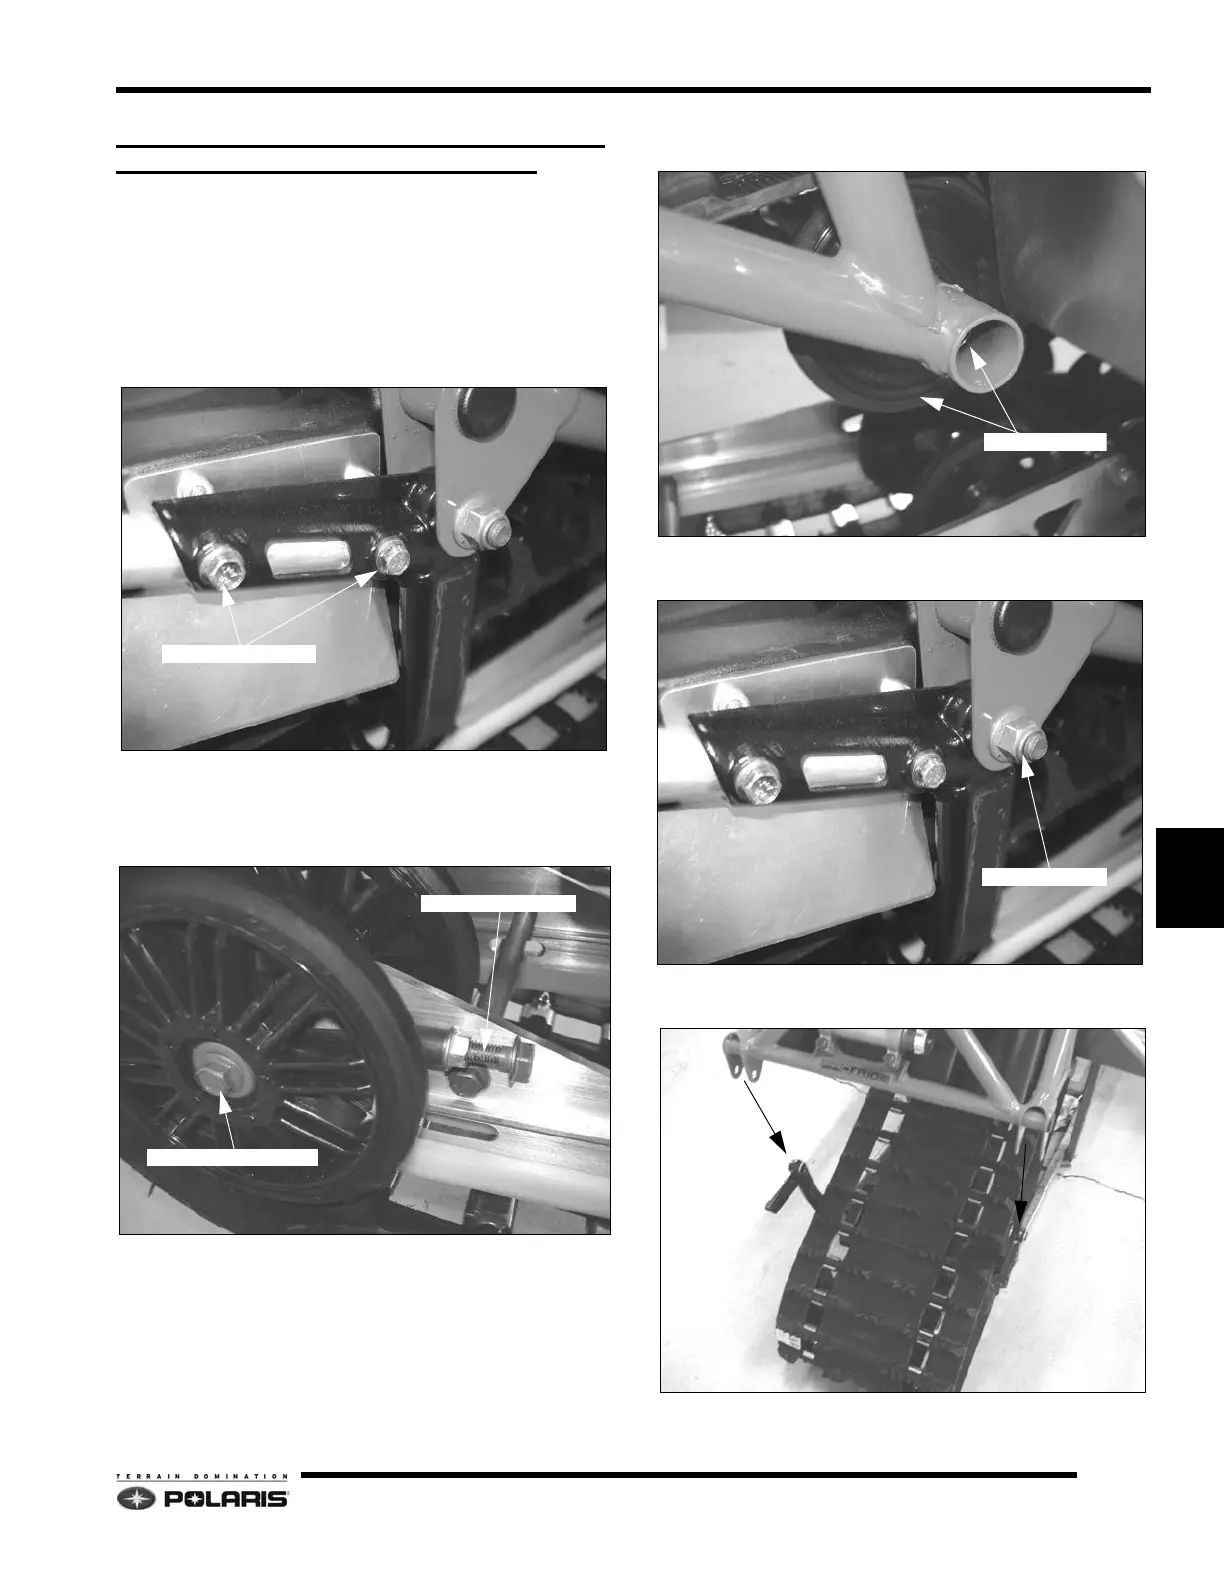
8. The rear of the suspension is now free to drop out of
th
e tunnel if required.
BUMPER FASTENERS
REAR IDLER FASTENER
REAR IDLER FASTENER
TRACK TENSION ADJ.
UPPER CARRIER
PIVOT FASTENER

Table of Contents

Questions and Answers:

Question and Answer IconNeed help?

Do you have a question about the Polaris 600 RUSH 2010 and is the answer not in the manual?

Polaris 600 RUSH 2010 Specifications

General IconGeneral
Horsepower120 HP
Engine Displacement599 cc
Cylinders2
CoolingLiquid
Bore x Stroke77.25 mm x 64 mm
Fuel SystemCleanfire Injection
IgnitionDigital CDI
Front SuspensionPRO-RIDE
Rear SuspensionPRO-RIDE
Track Width15 in
Track Lug Height1.25 in
Front Travel9 in
Ski Stance42.5 in
BrakeHydraulic Disc
Width48 in
StarterElectric
Drive ClutchP-85
Track Length121 in
Rear Travel14 in
Ski TypeGripper
Driven ClutchTEAM

Related product manuals