9.27
Chassis
9
3. While holding the mixer needle over a piece of scrap
material, slowly compress the caulk gun trigger to fill
the mixer needle. The needle will automatically mix
and dispense the correct volumetric ratio of adhesive
and accelerator.
4. Continue squeezing the trigger until a needle’s length
o
f adhesive is expelled.
5. Quickly apply a 4mm bead of adhesive to the
comp
onent as shown on the following pages. Apply
adhesive to one component at a time.
6. Carefully install the component and torque the
fastene
rs to specification immediately. Do not break
the bond once the components are mated.
7. When not using the adhesive, leave the mixer needle
at
tached to the cartridge.
8. If the needle has sat idle for any amount of time,
simply re
move the needle, and repeat steps 2 through
4 to apply adhesive to additional components.
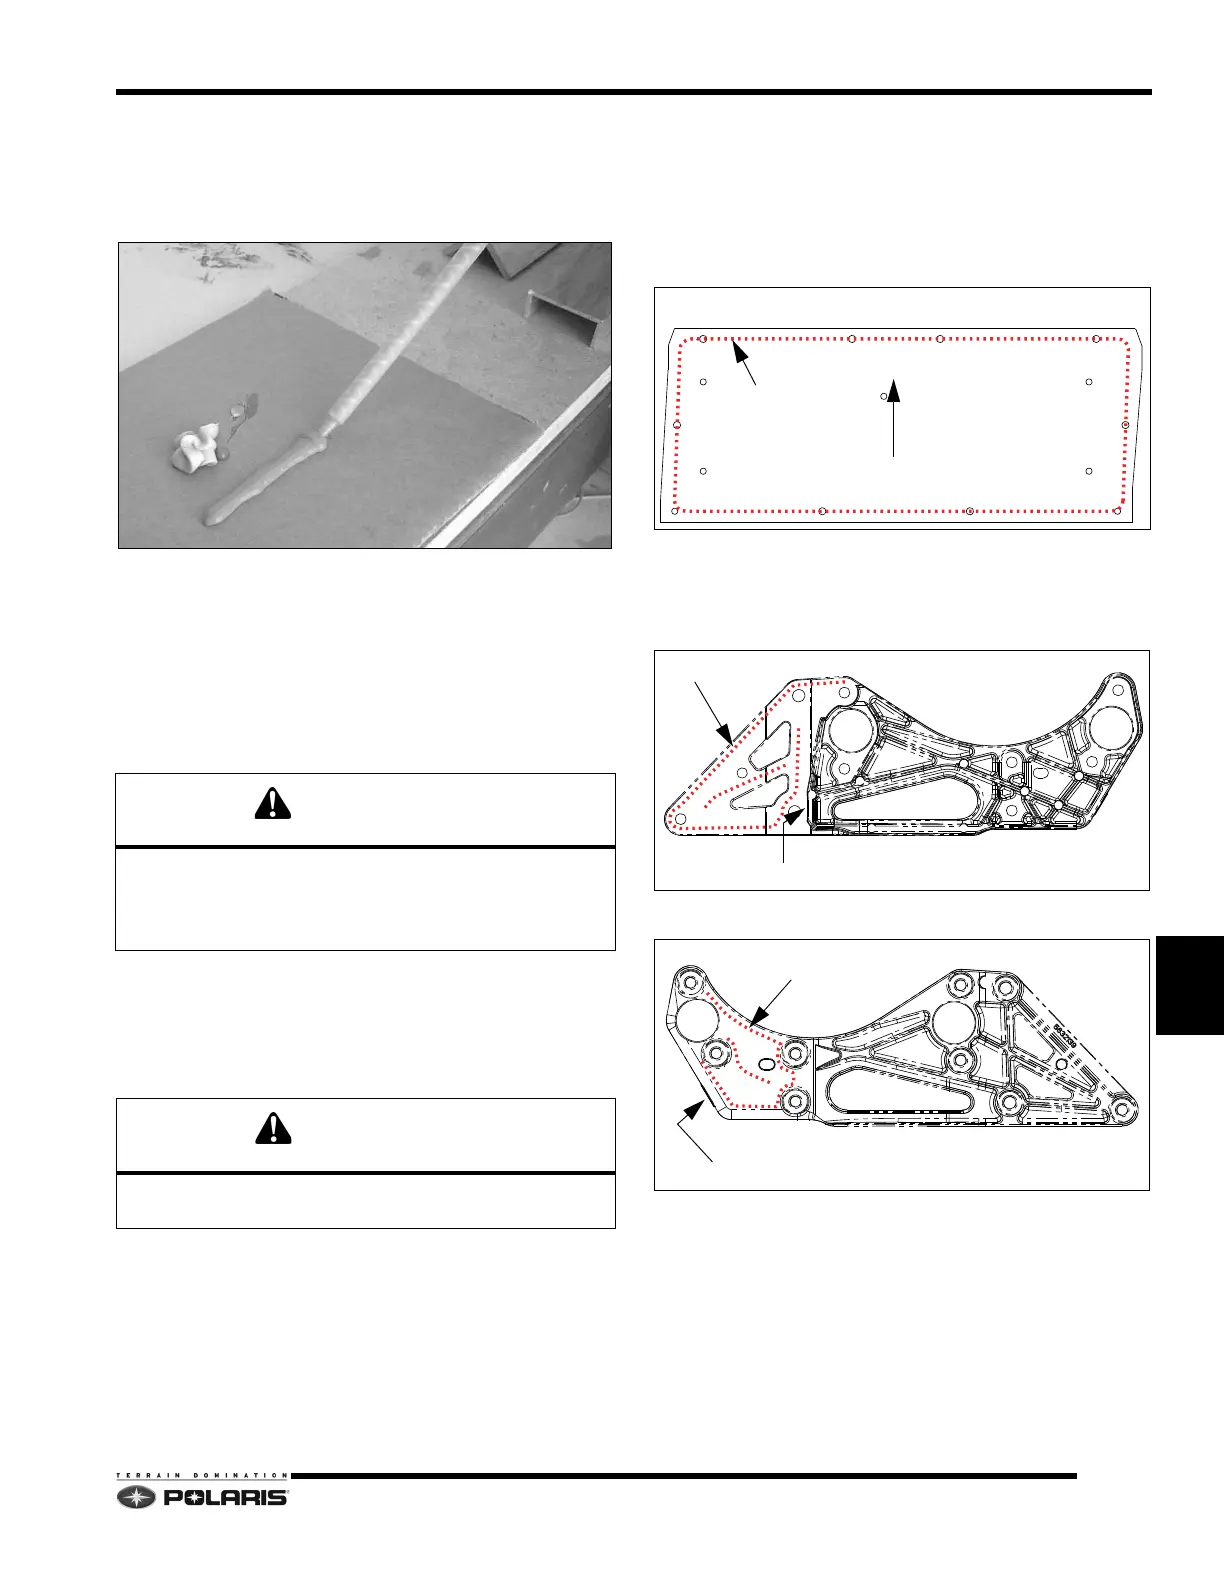
Adhesive Application Patterns
Reference the following illustrations showing the exact
patterns for each bonded component when applying the
adhesive.
BULKHEAD FLOOR
LH (PTO) SIDE BRACE
(BULKHEAD MATING SURFACE)
(FRONT CLIP MATING SURFACE)
The bonded parts can be repositioned by gently sliding
them into position. Never pull the parts apart. Doing so
will introduce air gaps and will require removing the
parts, and removing all adhesive.
Do not manually mix the adhesive and accelerator.
Always use a mixing needle to apply the adhesive.
ADHESIVE
LINE
APPLY ADHESIVE TO COOLER/PLATE MATING SURFACE
ADHESIVE
LINE
APPLY SMALL AMOUNT OF ADHESIVE HERE
 Loading...


