84
Slide Scanner Repair Manual Parts Replacement
AC Inverter PC Board
Note: The AC inverter PC board contains its own fuse to protect it from electrical surges.
Refer to the replacement procedures in this Section of the Repair Manual for
details on how to remove and replace it.
Removal
1. Remove the top housing.
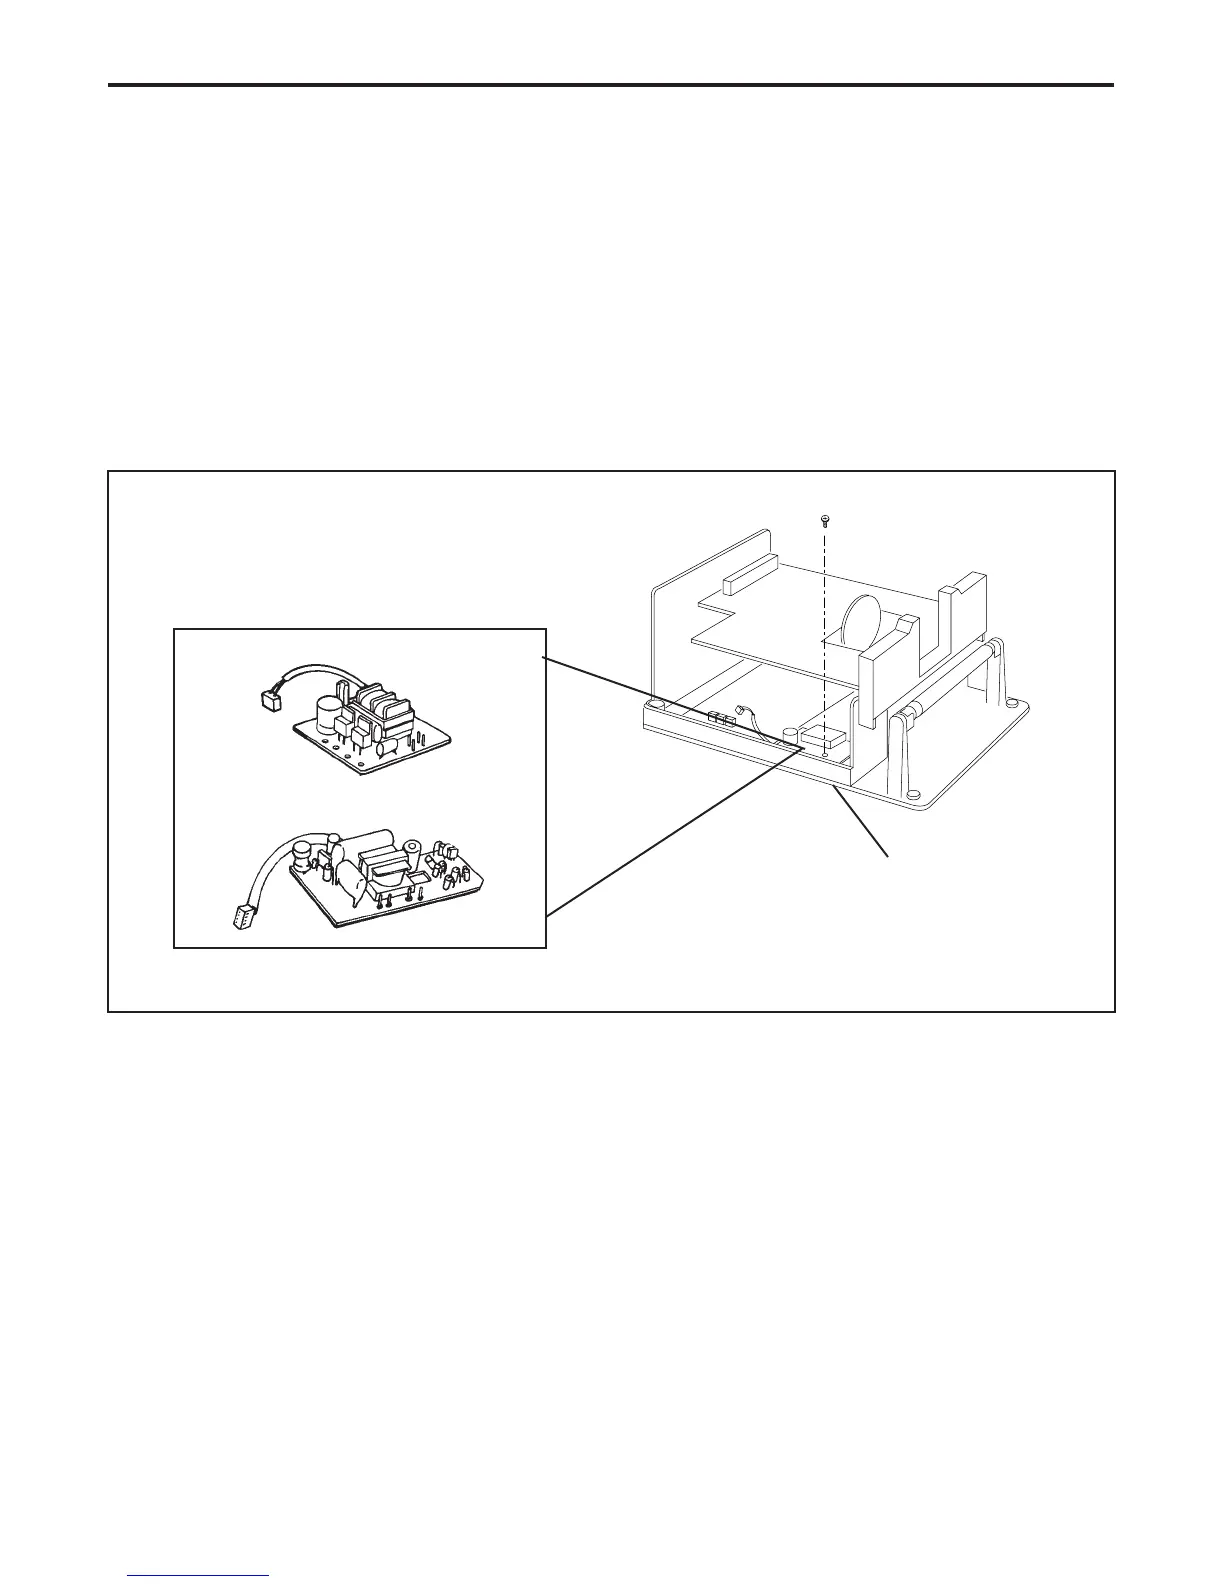
2. Remove the screw that secures the AC inverter PC board to the bottom case (Figure 4-9).
Figure 4-9. Removing AC inverter PC board
3. Disconnect all electrical connectors/cables from the AC inverter PC board.
Electrical cables to be disconnected:
• Four (4) push pin (Blue - BL, White - WH, Red - RE, Orange - OR) to scanning lamp
• AC inverter cable to power supply PC board
4. Lift out the AC inverter PC board.
AC Inverter PC Board
Bottom Case
Type 2
Type 1
 Loading...