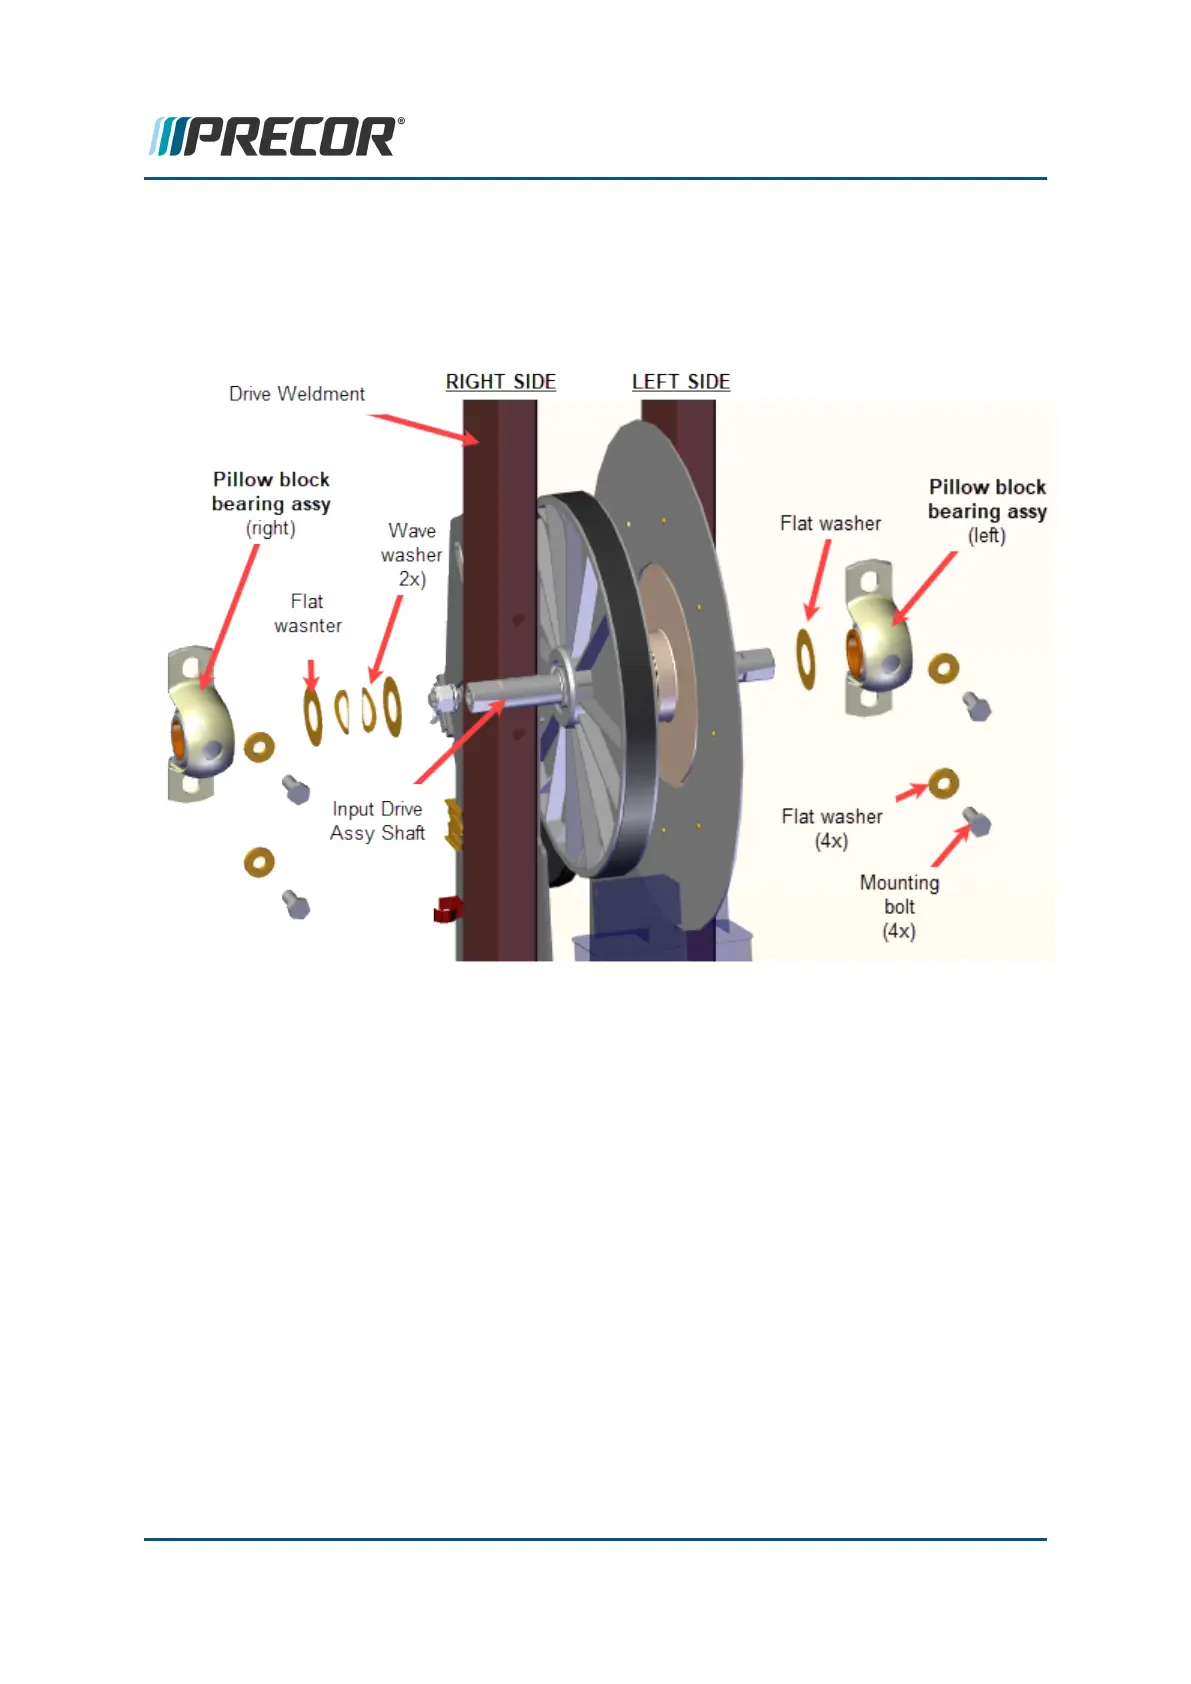
b. Remove the LEFT pillow block assembly by removing the two ½” hex head
mounting bolts (2x) and flat washers (2x). Then slide the pillow block assembly
off the input drive shaft. If you are removing the input drive assembly, remove
the flat washer (1x) off the input drive shaft. Discard the pillow block bearing
assembly if it is being replaced. Retain part(s) and/or fastener(s) for installation.
Installation
1. Reinstall the flat washer followed by the replacement (or good condition) pillow block
bearing assembly onto the LEFT side of the input drive shaft. Do not mount the pillow
block onto the drive weldment.
2. Reinstall the flat washer (1x) , two wave washers (2x), and flat washer (1x) in that
order onto the RIGHT side of the input drive shaft. Next install the replacement or
good condition) pillow block assembly onto the right side input drive shaft. Do not
mount the pillow block onto the drive weldment.
Contact Precor Customer Support at support@precor.com or 800.786.8404 with
any questions.
Page 158
6 Available Replacement Procedures
Pillow Block Bearing Replacement

 Loading...