Eddy Current Magnet Assy Replacement
This procedure provides instruction to replace the Eddy Current Magnet Assembly..
Procedure
Review entire procedure before starting.
WARNING:Care must be taken when work is being performed in the area of the
stairarms. Pinch points exist between the stairarm and ramp and between the
stairarm and crankarm, when the rear covers are removed.
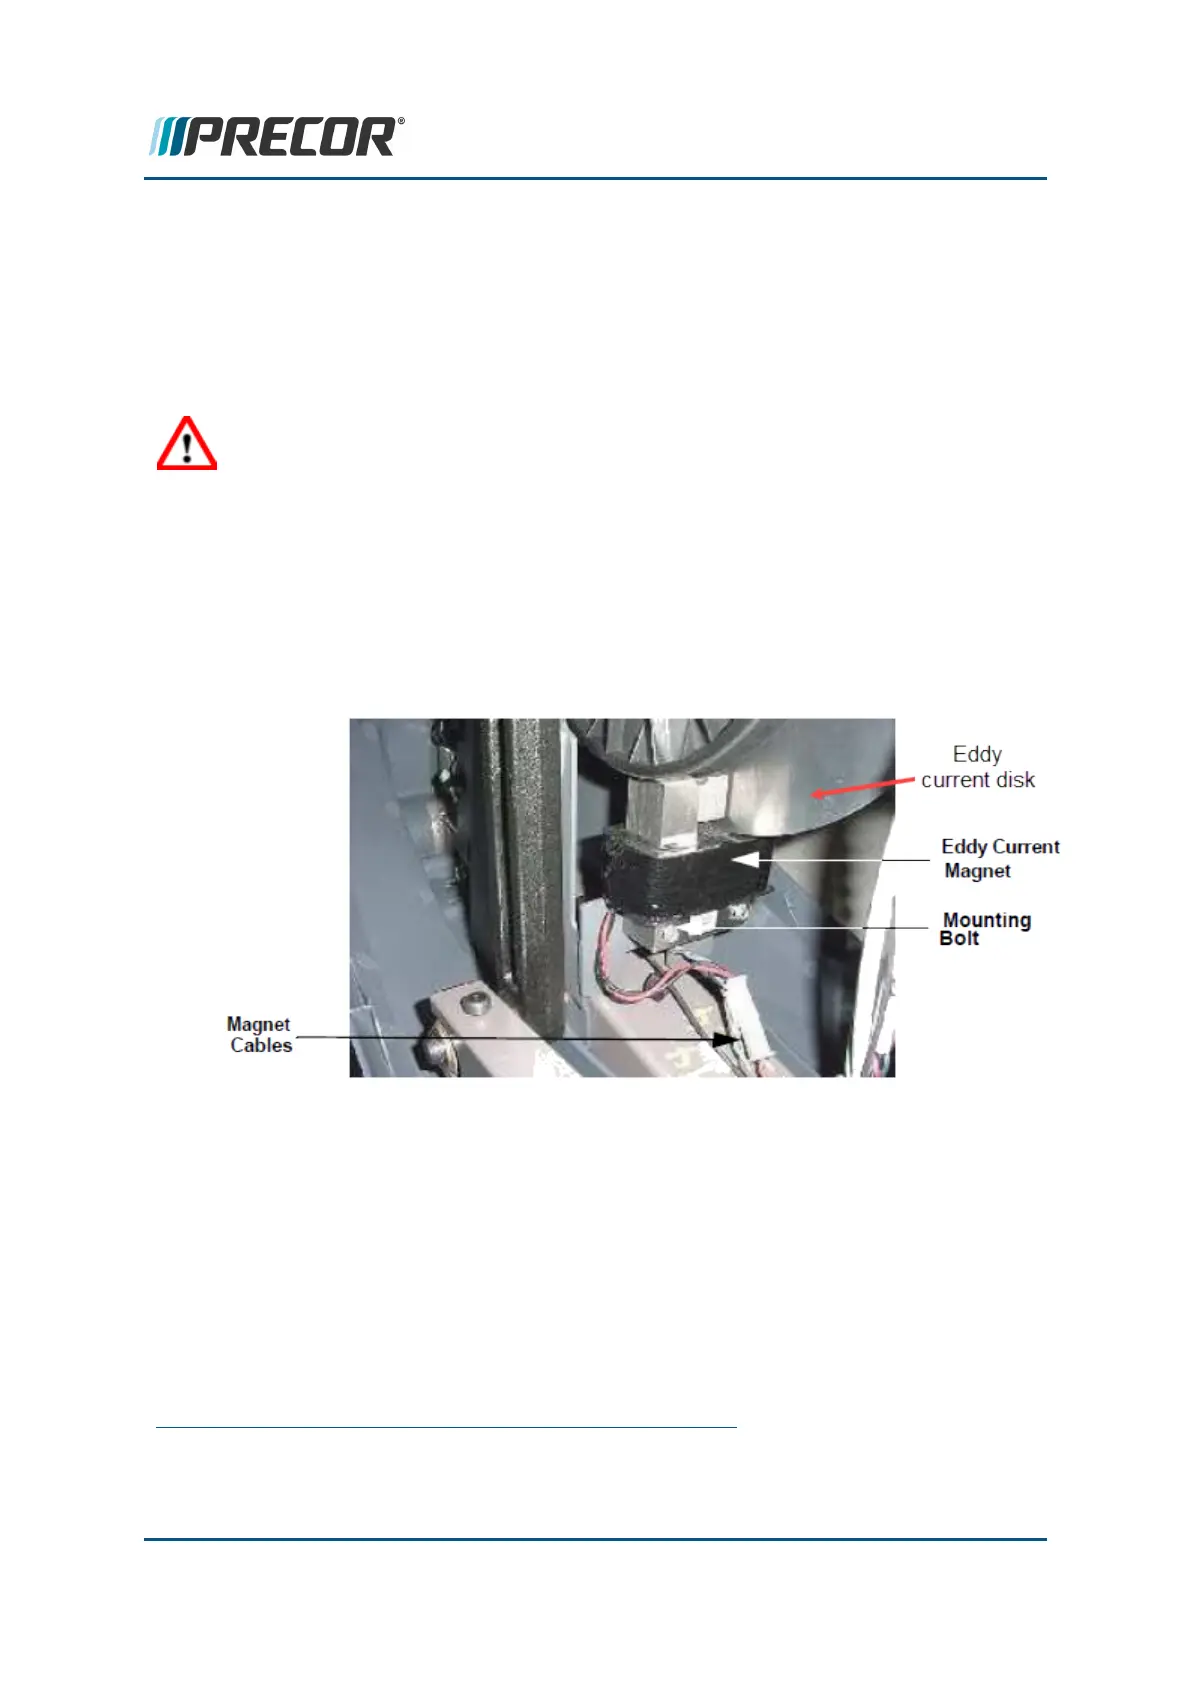
Removal
1. Switch the power OFF and unplug
1
the power cord.
2. Remove these rear drive covers: the drive cover access panel, top, left, and right
drive covers (see "Covers and Panels Replacement" on page75).
3. Disconnect the magnet interface cable from the eddy current magnet assembly.
4. Remove the two bolts that secure the magnet assembly to the drive unit. Remove the
magnet from the drive unit..
Installation
5. Position the replacement magnet assembly at its mounting position and hand thread
the mounting bolts until snug.
1
Disconnect a device power cord plug or cable connector from the power receptacle or out-
let.
Contact Precor Customer Support at support@precor.com or 800.786.8404 with
any questions.
Page 144
6 Available Replacement Procedures
Eddy Current Magnet Assy Replacement