Console Replacement
This procedure provides instruction to replace the R20 and R40 Consoles.
There are no internal console replaceable parts. If there is a confirmed console component
failure, such as, the softkeys, hardkeys, metric displays, heart rate indicators, or UPCA
1
board failure, replace the console.
Procedure
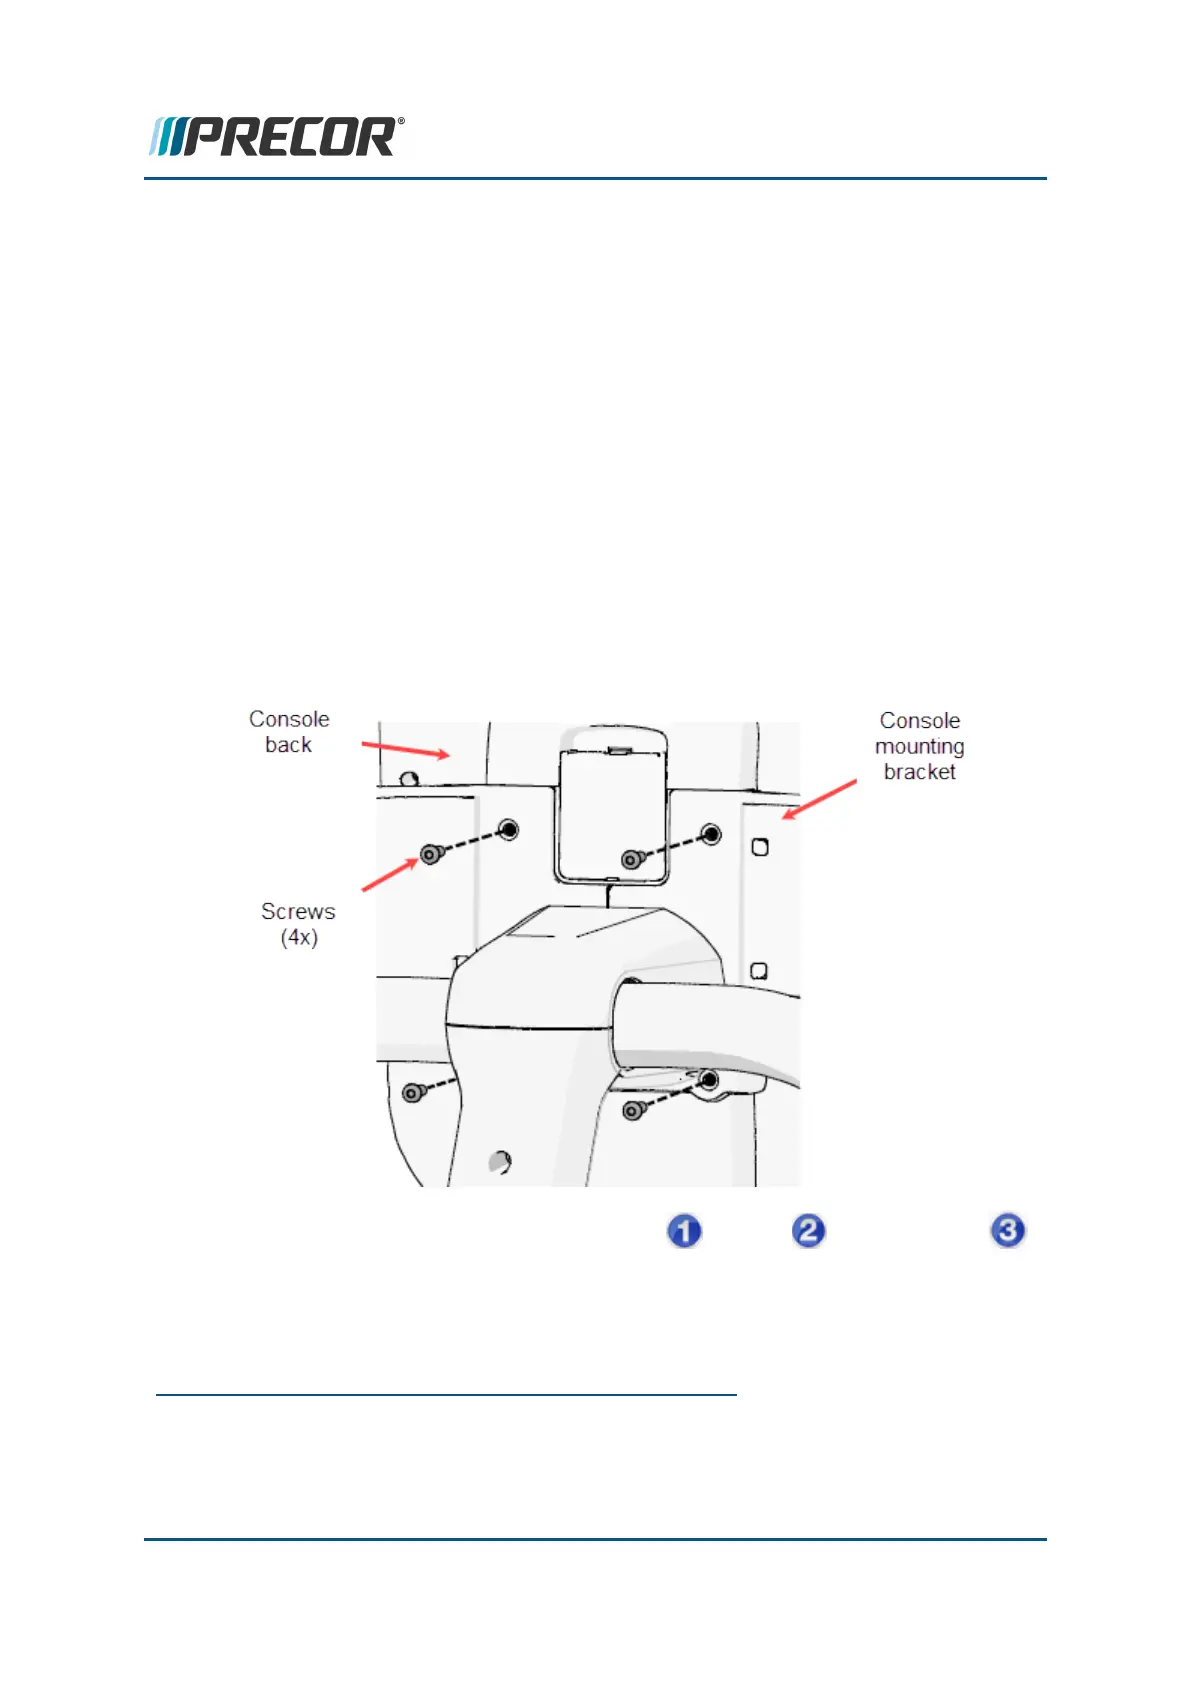
Review entire procedure before starting.
Removal
1. Switch the power OFF and unplug
2
the power cord.
2. Remove the four mounting screws and hold the console above the console bracket.
Be careful to not damage the interface cables while lifting the console. Retain part(s)
and/or fastener(s) for installation.
3.
While holding the console, disconnect the data , Ground , and Heart Rate
cables. Make a mental note, or better yet, take a picture of how the cables are routed
1
Upper PCA board
2
Disconnect a device power cord plug or cable connector from the power receptacle or out-
let.
Contact Precor Customer Support at support@precor.com or 800.786.8404 with
any questions.
Page 93
6 Available Replacement Procedures
Console Replacement