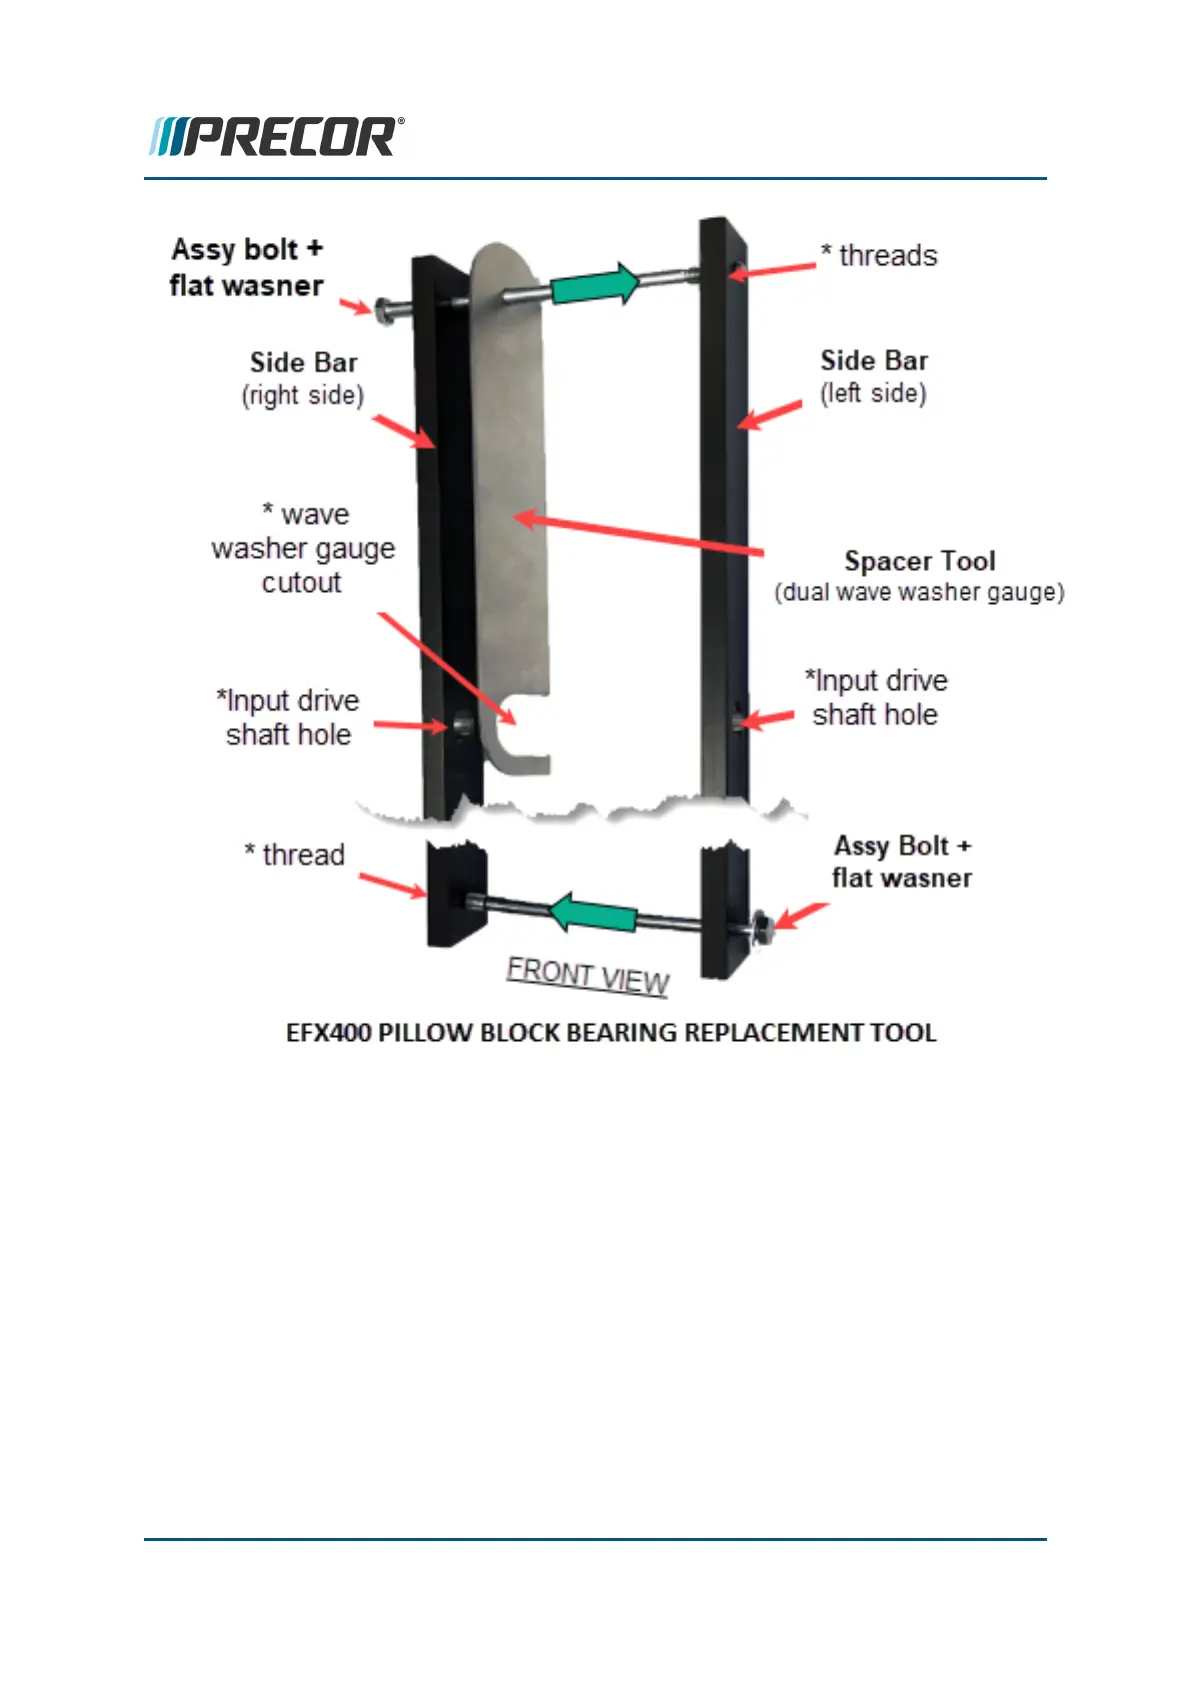
a. Assemble the pillow block bearing replacement too:On a flat surface, place one "drive
assy compression tool side bar" on the right side with the bolt hole positioned at the
top and the second side bar positioned on the left side with the threads at the top.
b. Assemble the top of the tool side bar first. Insert the assembly bolt with flat washer
through the top of the right side bar bolt hole and then slide the top of the compression
tool spacer (with the wave washer cutout open to the back) onto the bolt. Next thread
the bolt into the left tool side bar threads but do not tighten.
c. Install the tool and input drive onto the input drive weldment. Install the left and right
tool side bars onto the ends of the input drive shaft. Then slide the second assembly
bolt with flat washer through the bottom left side bar bolt hole continuing through the
slots located at the bottom of the drive weldment. Hand thread the bolt into the bottom
Contact Precor Customer Support at support@precor.com or 800.786.8404 with
any questions.
Page 160
6 Available Replacement Procedures
Pillow Block Bearing Replacement

 Loading...