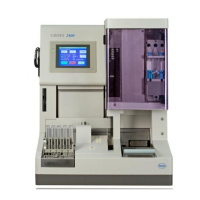
Roche Diagnostics
C-10 Operator’s Manual · Version 1.0
5 Daily operation URISYS 2400
Sample preparation
5 Ensure that the rack tray is aligned horizontally with the rack input line.
Move the racks with care in order not to spill the samples.
a To load racks directly onto the rack input line, without a rack tray
1 Place the sample tubes in the racks.
2 Place the racks directly into the guide rail of the rack input line.
Start analysis of samples
Before starting analysis, check that the 14 days on-board stability of the
cassette has not expired. The loading date of the cassette is displayed on the
[Routine Monitor] screen in the line “Remaining TS”.
Press <Start> on the [Routine Monitor] screen, to start the analysis of
samples.
The status of the analyzer changes from Stand-By to Reset. The analyzer
performs a reset (clearing racks from the cross-feed line, resetting the
pipetting system, clearing test strips from the TS transfer base) and then starts
sampling and measurement of samples, indicated by change of the status to
Operation.
During analysis, the sequence number on the [Routine Monitor] screen
increases by one for each routine or STAT sample. At the same time, the rack
and position number of the pipetted sample is displayed, and the number of
remaining strips decreases by one with each processed test strip.
If the sample sequence number comes close to sequence numbers that have
already been measured and are stored in the result memory, an alarm message
Figure C-4 Loading a rack directly into the guide rail of the rack input line
A
Rack
B Sample tube
C Guide rail
D Rack input line
A
B
D
C
Figure C-1 on page C-4

 Loading...