DK00027.fm
REPAIR MANUAL
BRP-Powertrain
Effectivity: 125 MAX/125 Junior MAX/125 Mini
MAX/125 Micro MAX
Edition 2 / Rev. 0
Chapter 5
Page 17
December 01/2010
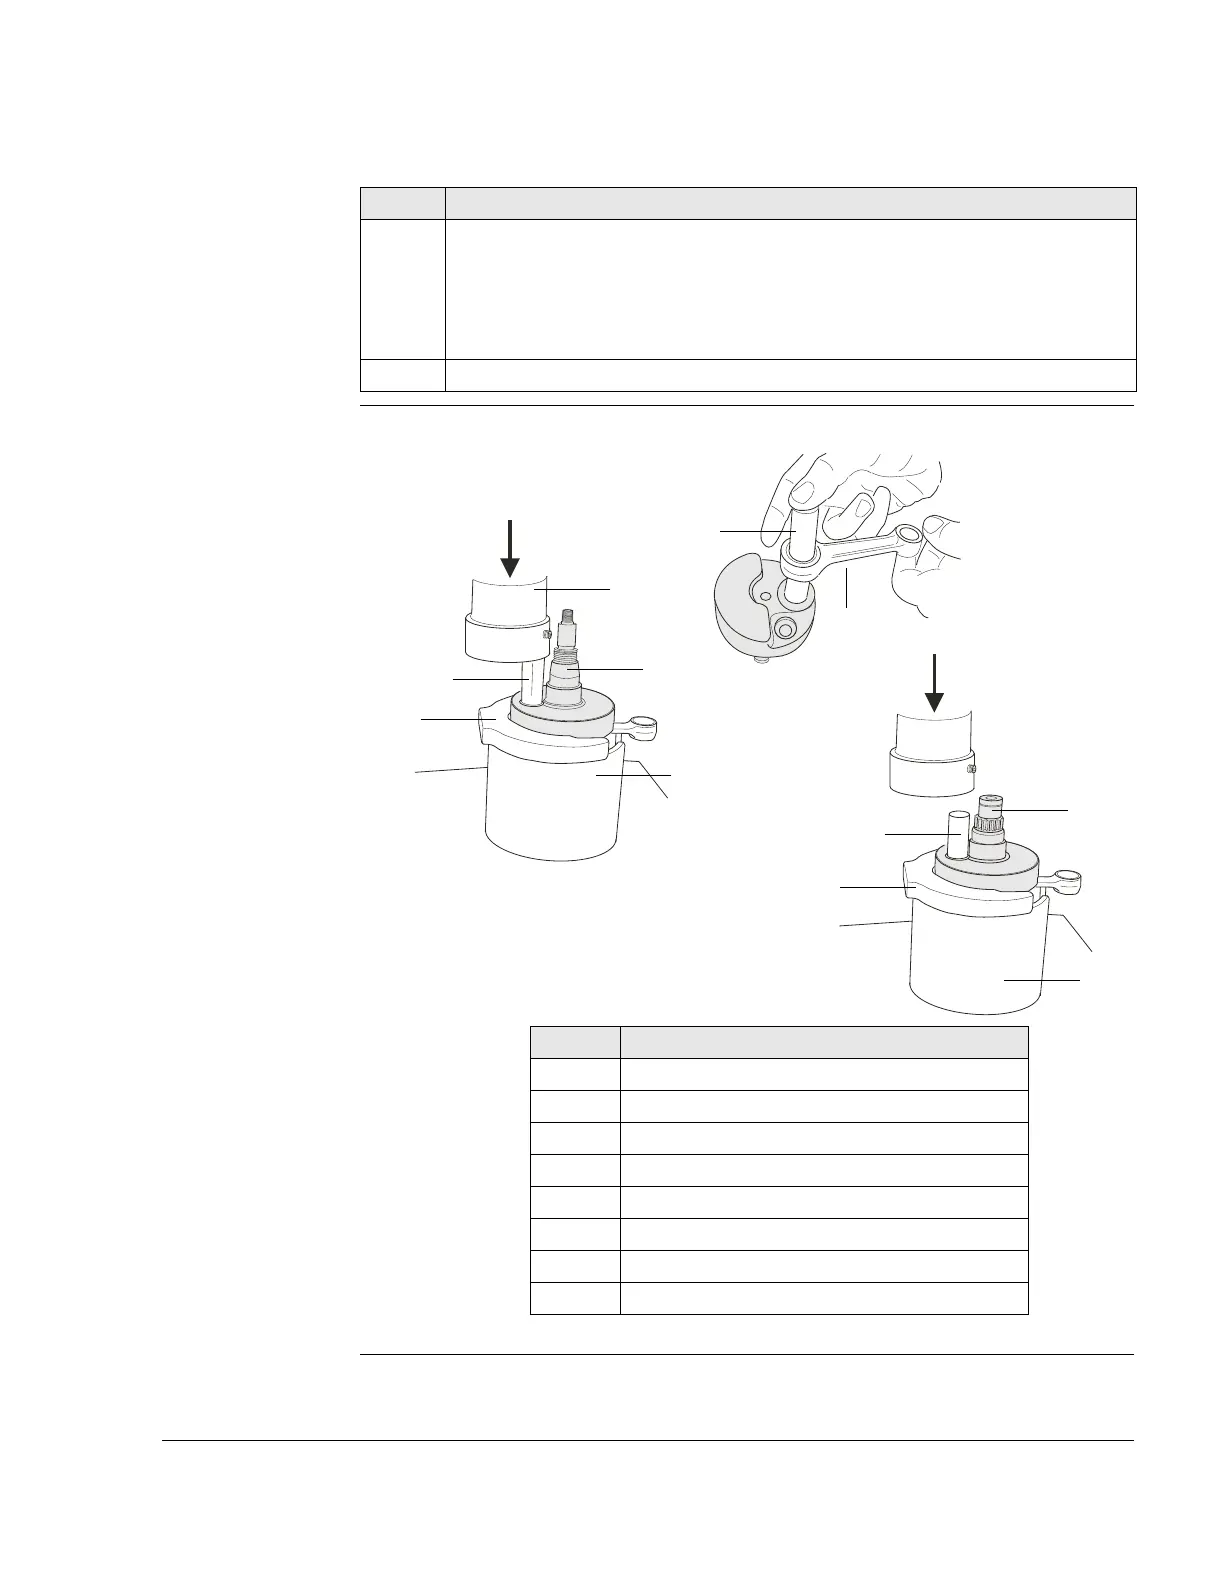
Graphic Disassemble crankshaft
Figure 10 K00082, K00083, K00084
Step Procedure
3 Position the thrust pin (5) on the connecting rod pin and press the crankshaft
apart.
NOTES: Take an available connecting rod pin (6) and push the old
con rod (7) with needle bearing and thrust washer onto the
connecting rod pin. This procedure is only required it the
old part will be re-used. Note the installation direction.
4 Take the gearbox-end crankshaft half (8) and repeat the above procedure.
Part Function
1Press
2 Thrust plate
3 Drive end crankshaft half
4 Bottom section of tool
5 Thrust pin
6 Connecting rod pin
7Con rod
8 Drive side crankshaft half
 Loading...


