DK00026.fm
REPAIR MANUAL
BRP-Powertrain
Effectivity: 125 MAX/125 Junior MAX/125 Mini
MAX/125 Micro MAX
Edition 2 / Rev. 0
Chapter 4
Page 14
December 01/2010
3.2) Inspection of piston and piston ring
Instructions See Figure 7.
Graphic Piston and piston ring
Figure 7
K00137,K00052
Step Procedure
1 Inspect the piston for cracks and signs of piston seizure.
2 Inspect the bore of the piston pin for damage and wear.
3 Inspect the piston pin circlip groove for defects.
4 Check free of movement of the piston ring in the ring groove.
NOTES: If carbon prevents free movement of the piston ring, the
ring groove can be cleaned out with a discarded piston ring.
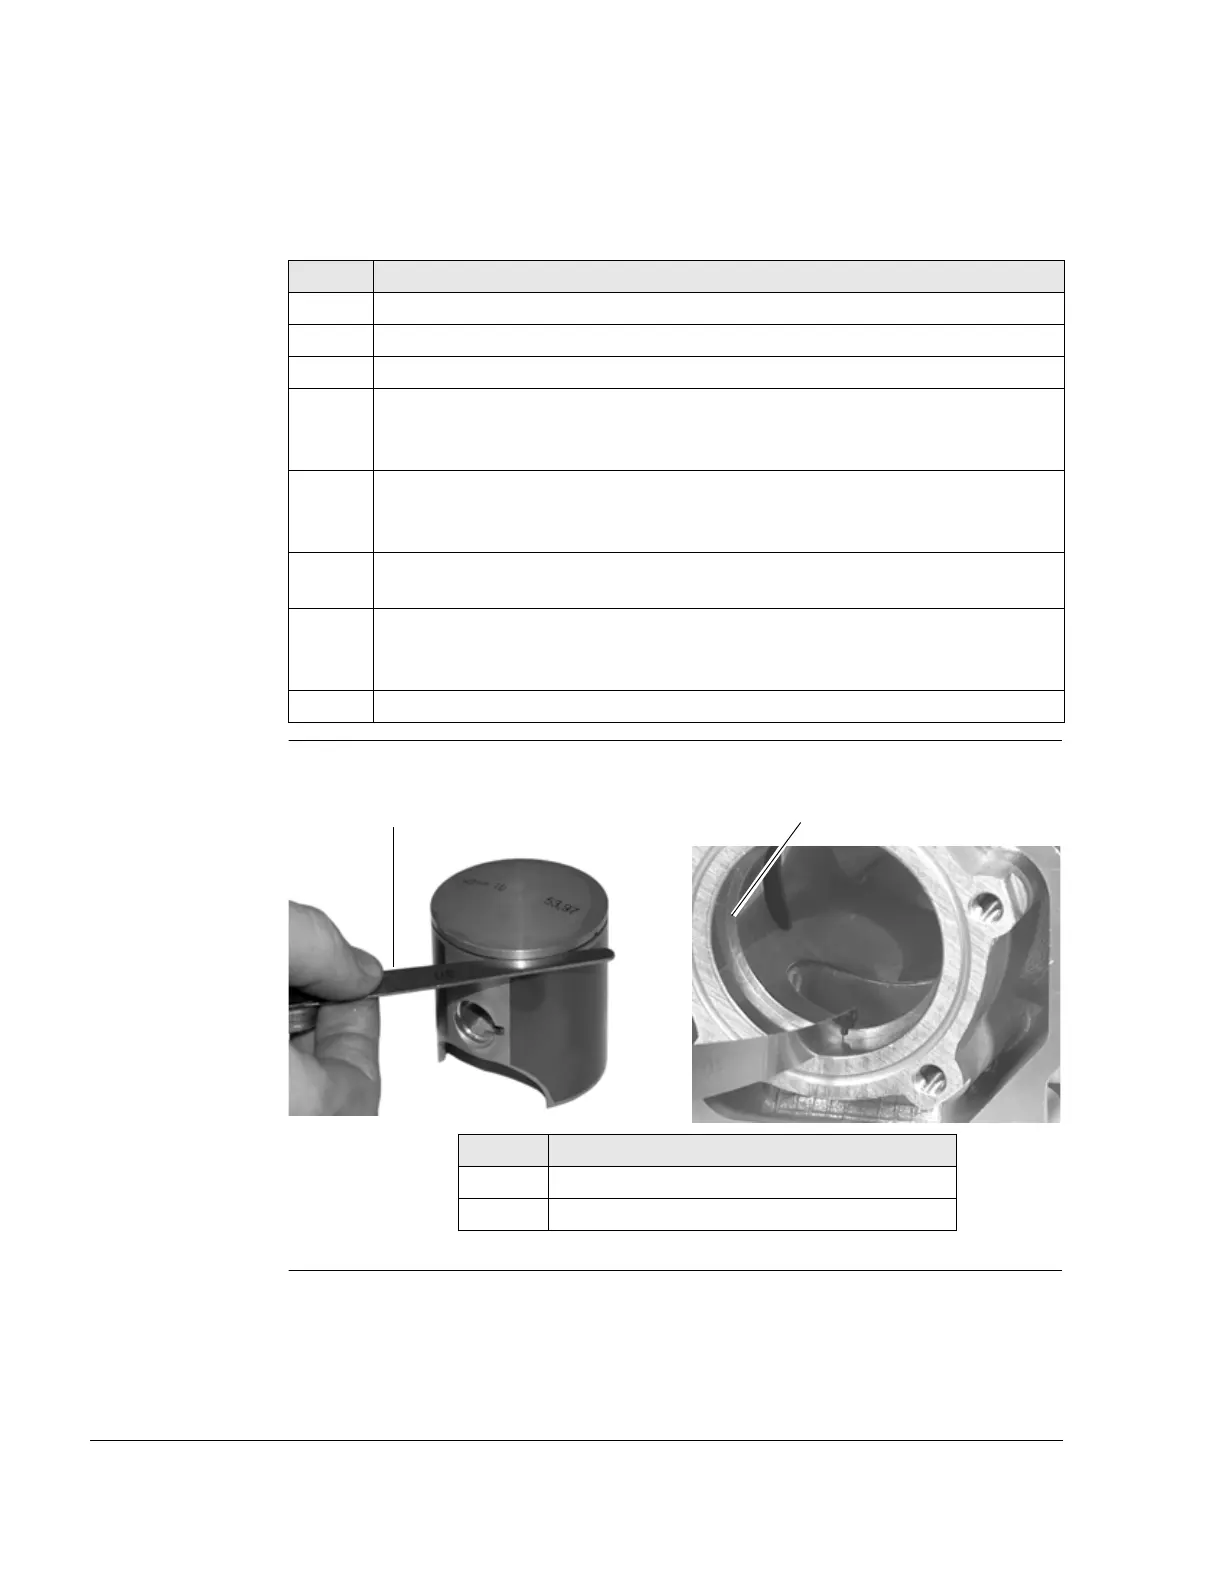
5 Measure the piston ring clearance in the ring groove with a feeler gauge (1).
NOTES: If the piston ring clearance has reached the wear limit of
0.1 mm, the piston must be replaced.
6 Remove the piston ring and insert a feeler gauge into the cylinder parallel to
the head sealing surface (approx. 10 mm from the top of the cylinder).
7 Measure clearance with a feeler gauge.
NOTES: If the wear limit of 0.8 mm has been reached the piston ring
must be replaced.
8 Check the piston ring locking pin for wear.
Part Function
1 Feeler gauge
2Piston ring