72
Multi
Video Wall Setting
With this software, the image from the connected projectors can be
divided from 2 × 2 to up to 8 × 8 to create a video wall.
● This function is not available when UXGA signals are displayed.
● This function can only be used with the XG-V10 Series, the XG-P20X
and the XG-P25X.
● The projector forming a video wall must belong to a group. To assign
a projector not belonging to a group, add the projector to one of the
groups. (See page 35.)
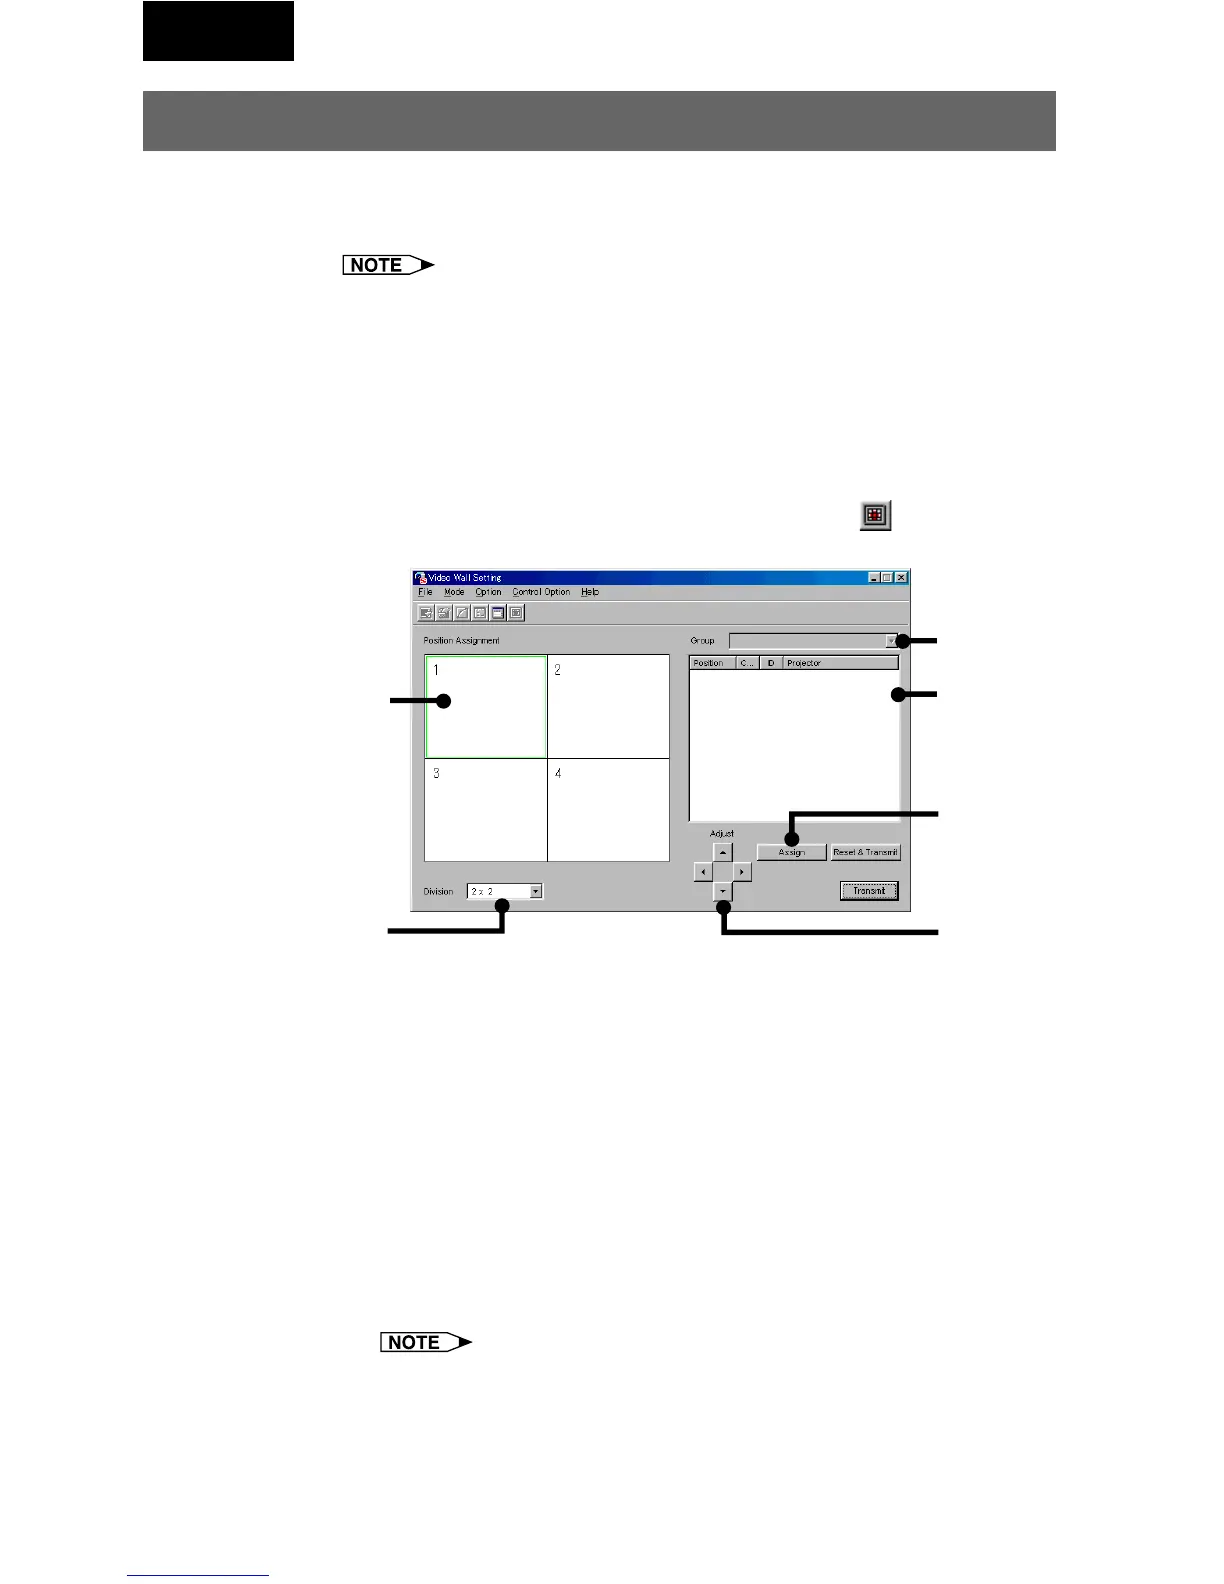
1 Click “Video Wall Setting” in the “Mode” menu.
You can also select “Video Wall” by clicking the icon.
| The “Video Wall Setting” window will open.
1 Area assigned to the selected projector
2 Select “Division”.
3 Select “Group Name”.
4 Projector selection area
5 Assign the projector.
6 Adjust: The position of the assigned projector can be adjusted in the
horizontal (H) and vertical (V) directions by clicking ', ", \
and |.
2 Select the group.
3 Select “Division”.
4 Select the position to assign in “Position Assignment”.
For the relationship between the position assigned here and the
actual position of the projector, see “Projector image assignment
with the Video Wall Setting” on page 74.
1
6
3
2
4
5