35
Adjusting and
Controlling
Multi
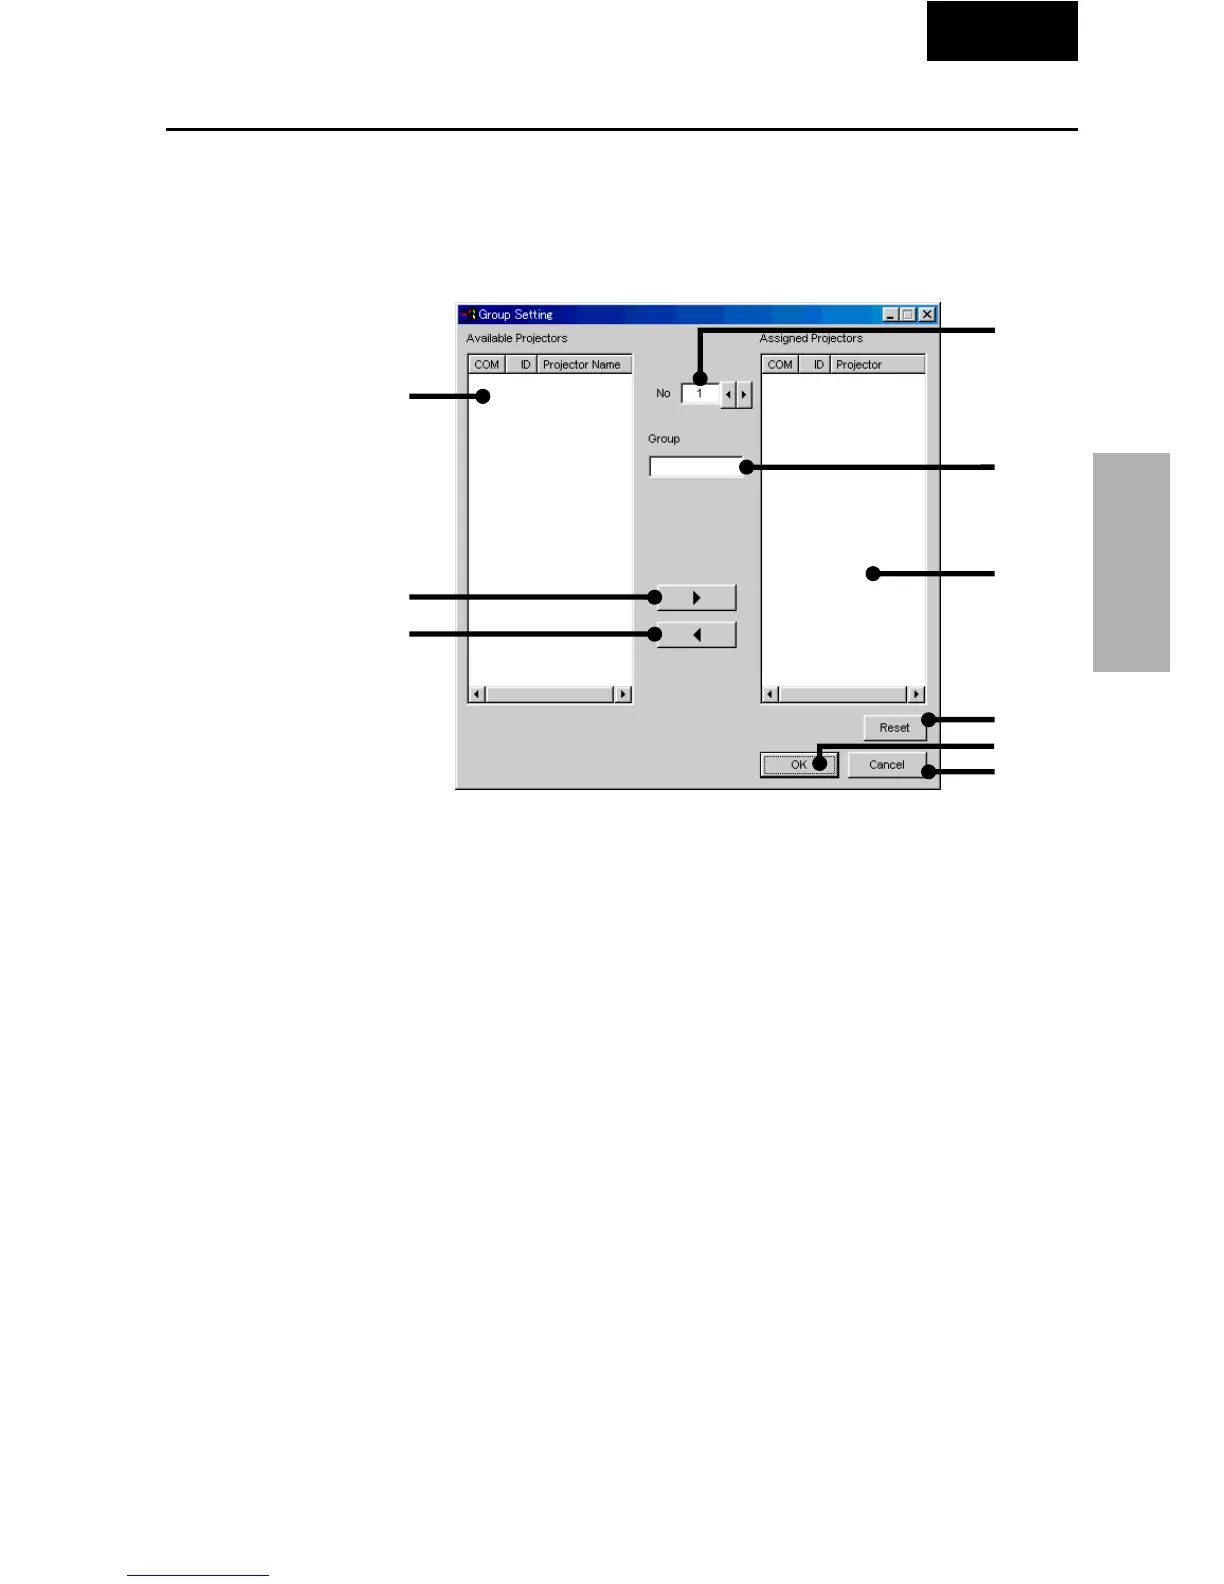
Group Setting
Individual projectors not belonging to groups can be added to groups,
and projectors belonging to groups can be removed from groups.
1 Select “Group Setting” from the “Control Option” menu.
| The “Group Setting” dialog box will open.
1 List of available projectors
Not displayed when projector names have not been set.
2 Select Group No.
3 Input Group Name.
32 characters can be input at maximum.
4 List of assigned projectors
5 Right arrow
Adds the projector selected in the list of connected projectors to the
group.
6 Left arrow
Removes the projector selected in the list of projectors belonging to
the group from the group.
7 Clears all the projectors belonging to the selected group.
8 Applies the setting.
9 Cancels the setting.
2 Select the group to be registered in the Group Number
and Group Name input area.
3 Select the projector in the list of available projectors.
4 Click the right arrow button.
The selected projector is displayed in the list of assigned projectors.
2
1
5
6
7
8
9
3
4