91
Saving a Custom
Image
Single
1 Select “Custom Image Transfer” in “Transfer Mode”.
Refer to “Transferring Images” (page 82) for how to transfer the
image.
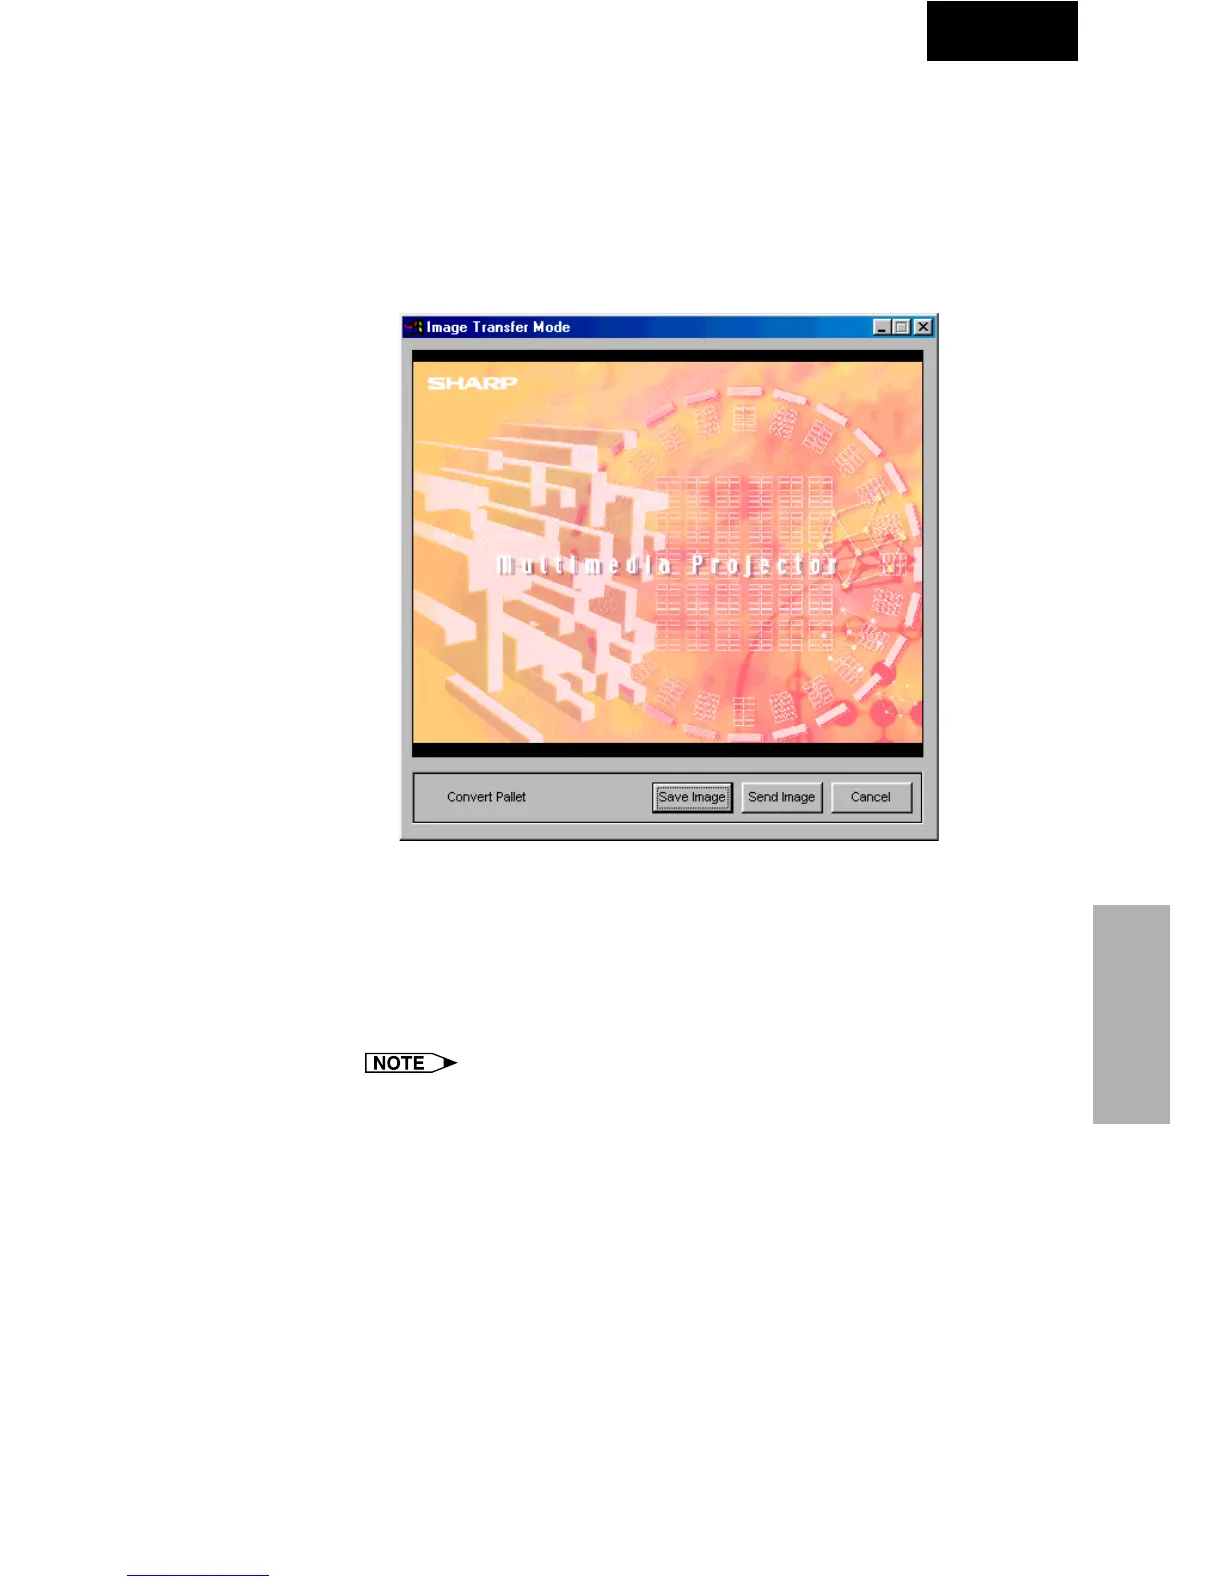
2 Click “Current” in the “Presentation Transfer” window or
click “Capture & Transfer” in the “Capture & Transfer”
window to transfer images.
| The preview window is displayed.
If the original image goes over 240 colors, an image reduced to 240
colors will be displayed.
If you want to save color reduced images, click the “Save Image”
button.
3 Click “Send Image”.
The image is transferred to the projector.
● When you want to clear the custom image stored in the projector,
cancel the transmission during custom image transfer. The custom
image stored in the projector will be cleared.
● The “Custom Image Transfer” mode saves one image file only and
overwrites the previously transferred image if you send another image
file.
● To avoid erasing the custom image, you should change the transfer
mode to “Image Transfer” after sending the custom image.