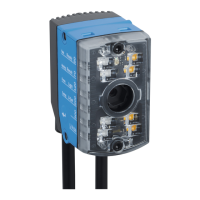
5.4 Mounting the product
Important information
NOTICE
Product damage due to incorrect mounting
Screw M3 screws through the through hole. Screws with a larger thread diameter
damage the product.
•
Do not screw the M4 screws right through to the other side of the product.
•
To mount the product, carefully screw only M3 screws (length: min 35mm) into
the through holes on opposite sides of the product.
Procedure
1. Mount the product in a suitably prepared mounting system using the threaded
mounting holes provided.
°
Mount the product on a mounting system using M4 screws. Screw the screws
no more than 5mm into the threaded mounting holes or sliding nuts. Use the
threaded mounting holes in pairs on the left and right side of the product.
°
For alternative mounting, carefully screw the 2 M3 screws (length: min
35mm) into the through holes on opposite sides of the product. Use the
threaded mounting holes in pairs on the left and right side of the product.
°
Optional: attach the separately ordered SICK mounting system to the product.
Mounting equipment is available as an accessory.
2. Align the product taking into consideration the field of view and the application
circumstances.
3. Connect the product to interfaces and supply voltage when disconnected from
voltage.
✓
The Ready status LED lights up green.
4. Perform fine adjustment.
Further topics
•
see "Field of view", page 56
•
see "Mounting instructions", page 20
•
see "Connecting", page 36
5.5 Mounting the read cycle sensor (optional)
Prerequisites
•
The product is triggered via an external trigger sensor.
MOUNTING 5
8024830/1MBT/2024-05-22 | SICK O P E R A T I N G I N S T R U C T I O N S | Lector61x
25
Subject to change without notice