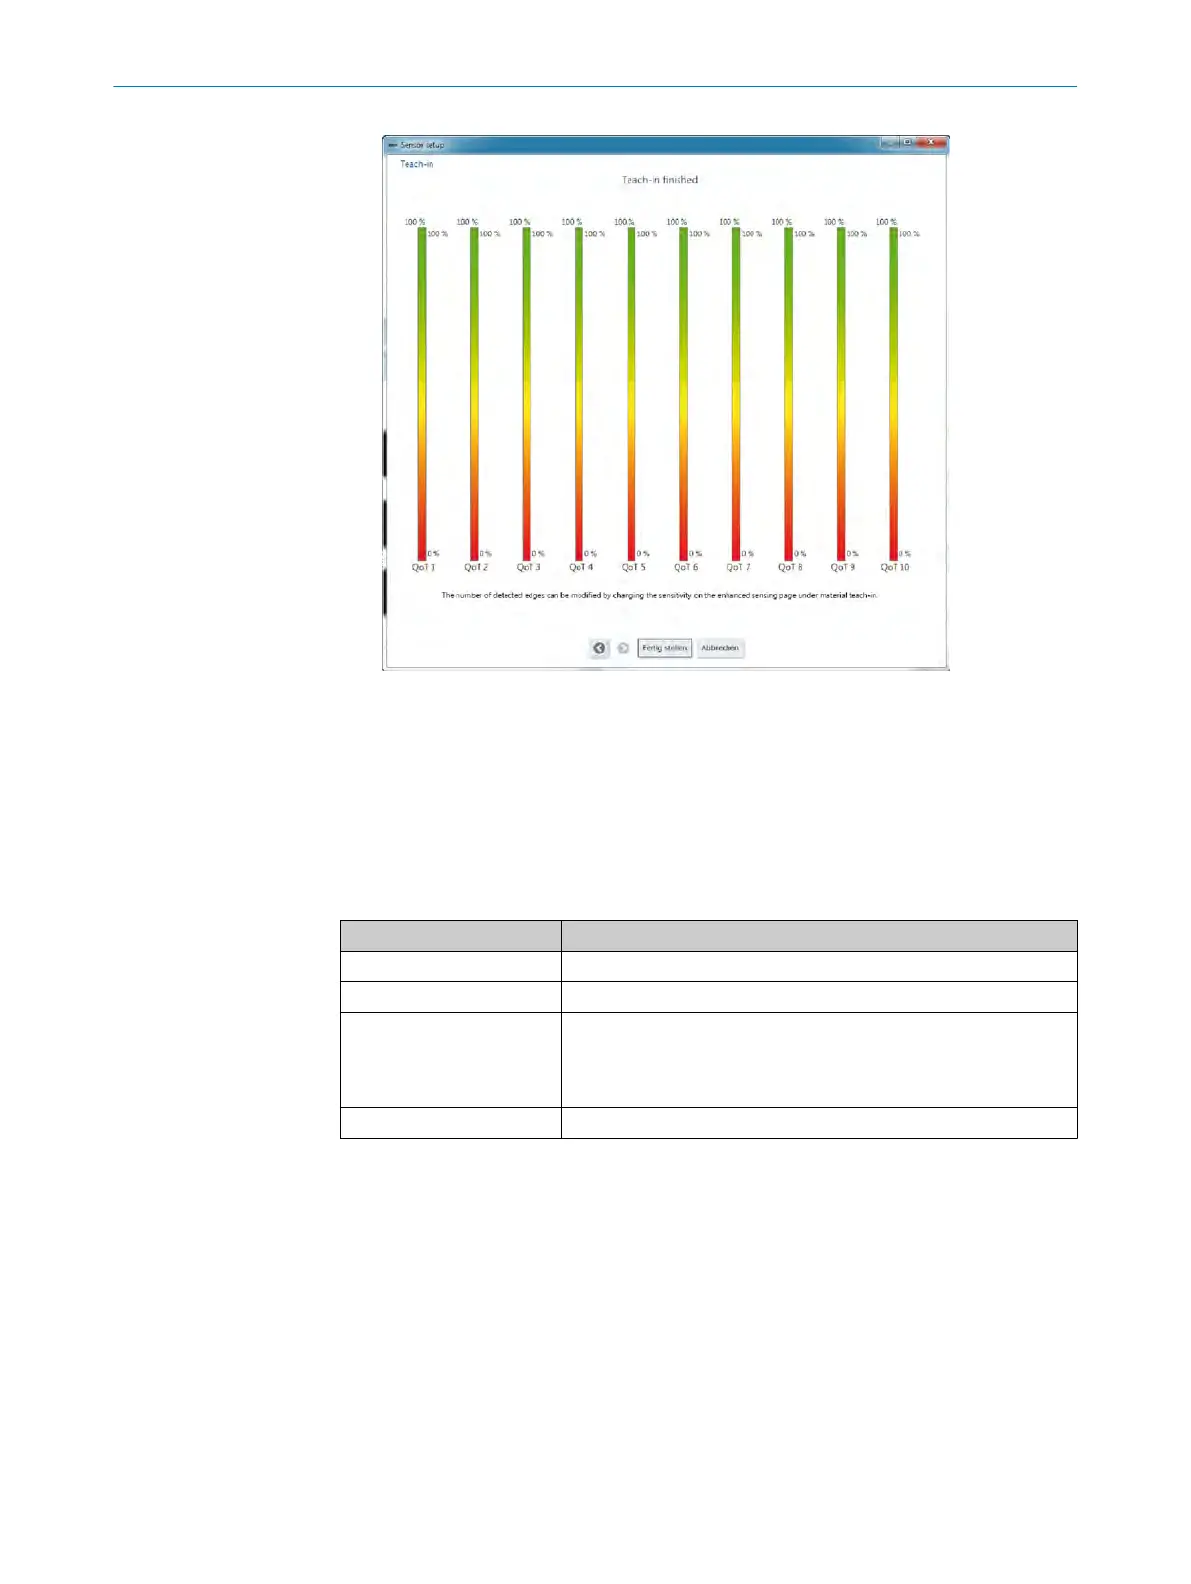
Figure 50: "Installation assistant” wizard, material teach-in successful (for 10 edges)
Sensor teach-in failed
More inf
ormation:
•
see "Troubleshooting", page 106
•
see "“Blanking” menu", page 96
If the sensor teach-in process has been unsuccessful, the wizard offers various options.
Table 24: Options for sensor teach-in failed
Option (button) Description
Repeat teach-in Opens the “Sensor teach-in” wizard.
Sensor alignment Opens the “Sensor alignment” wizard.
Blanking Opens the “Configuration blanking” window. The setting options
corr
espond to the “Blanking” menu on the “Enhanced Sensing”
page. You can limit the measurement field width of the MLG-2
option.
Cancel Cancels the process.
Parameterizing “blanking”
✓
The "Ins
tallation assistant” wizard shows that sensor teach-in has failed.
1. Click the “Blanking” button.
✓
The “Configuration blanking” window appears.
2. Limit the measurement field width so that the disturbing objects are outside the
measurement field.
3. Click the “OK” button.
✓
The "Installation assistant” wizard shows that sensor teach-in has failed.
4. Click the “<” button.
✓
The "Installation assistant” wizard shows the first step for sensor teach-in.
5. Perform sensor teach-in.
9 COMMISSIONING VIA SOPAS
60
O P E R A T I N G I N S T R U C T I O N S | MLG-2 WebChecker 8025190/2020-01-13 | SICK
Subject to change without notice