LITHOSTAR MODULARIS 4 - 3
Siemens AG SPL1-130.840.02 Page 3 of 34 MODULARIS Uro Plus
Medical Solutions Rev. 03 04.05 CS PS 24
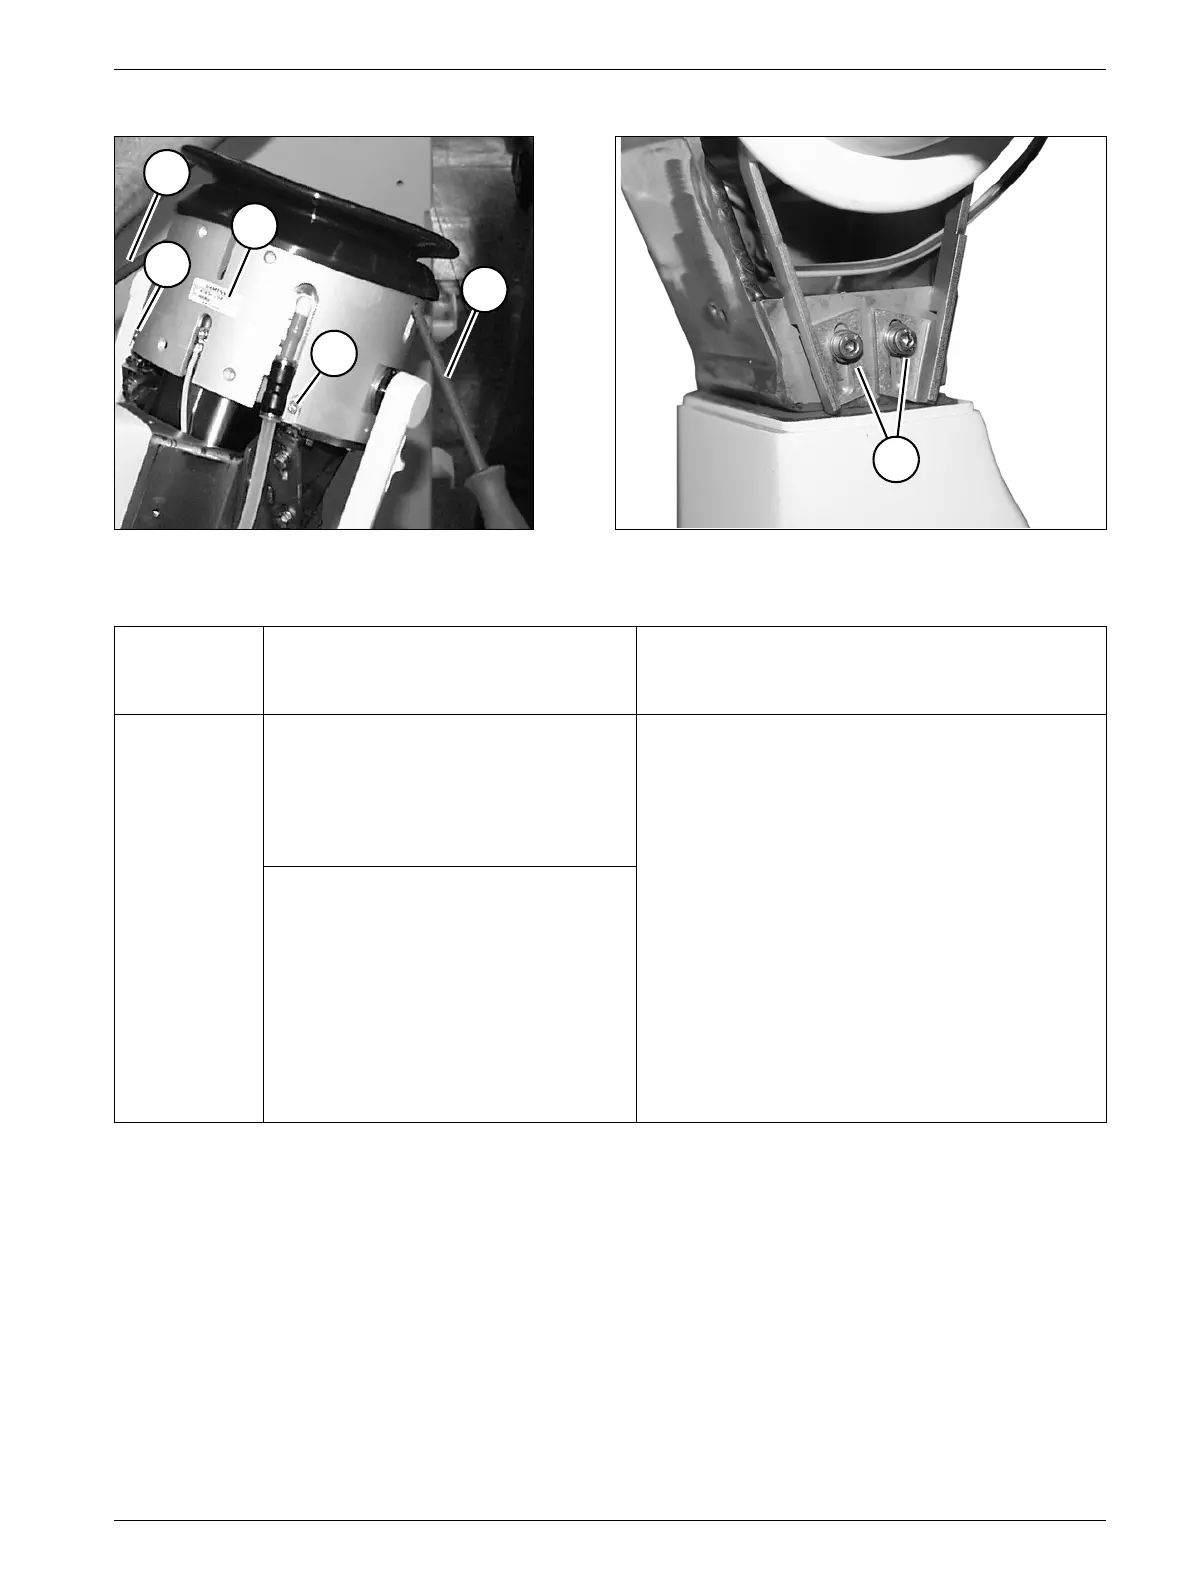
Removing the shock wave head 4
• Remove the covers of the shock wave head (refer to "Shock wave head covers").
• Remove the coupling bellows, carefully pulling the small pin out of the air suction hose
inside the coupling bellows (refer also to Fig. 8 and Fig. 9).
• Loosen the four screws (V/Fig. 3) on the iso-center phantom using an Allen key with a
guide pin, but do not remove them.
• Flip the iso-center phantom toward the front and completely remove it (this may be
difficult).
- If the iso-center phantom has a serial number (2/Fig. 3) it can be removed by using two
screw pulleys (1/Fig. 3) on the shock wave head.
Fig. 3 Fig. 4
System con-
figuration
n = several
1 LITHOSTAR MODULARIS
and
1 SIREMOBIL Iso-C
1 LITHOSTAR MODULARIS
and
n SIREMOBIL Iso-C
Replace
shock wave
head
To support arm S0050
Adjustment of iso-center on the shock
wave head; refer to chapter "Iso-cen-
ter with X-ray - to support arm serial
number 0050".
It is important to follow this workflow to
avoid having to readjust the iso-center on all
SIREMOBILE!
• Prior to replacing the shock wave head, view
the iso-center (the three C-arm positions) and
if possible, save it or make a hardcopy.
• Replace shock wave head.
• Check iso-center; the setting must be
identical to that of the defective shock wave
head.
If an adjustment is necessary, it must be made
via the shock wave head setting; refer to
chapter "Iso-center with X-ray - to support
arm serial number 0050".
From support arm S0051
Adjustment of iso-center on the
SIREMOBIL Iso-C; refer to chapter
"Iso-center with X-ray - from support
arm serial number 0051".
1
2
V
V
1
U