Iso-center with ultrasound 6 - 3
Siemens AG SPL1-130.840.02 Page 3 of 16 MODULARIS Uro Plus
Medical Solutions Rev. 03 04.05 CS PS 24
Check of image tilt 6
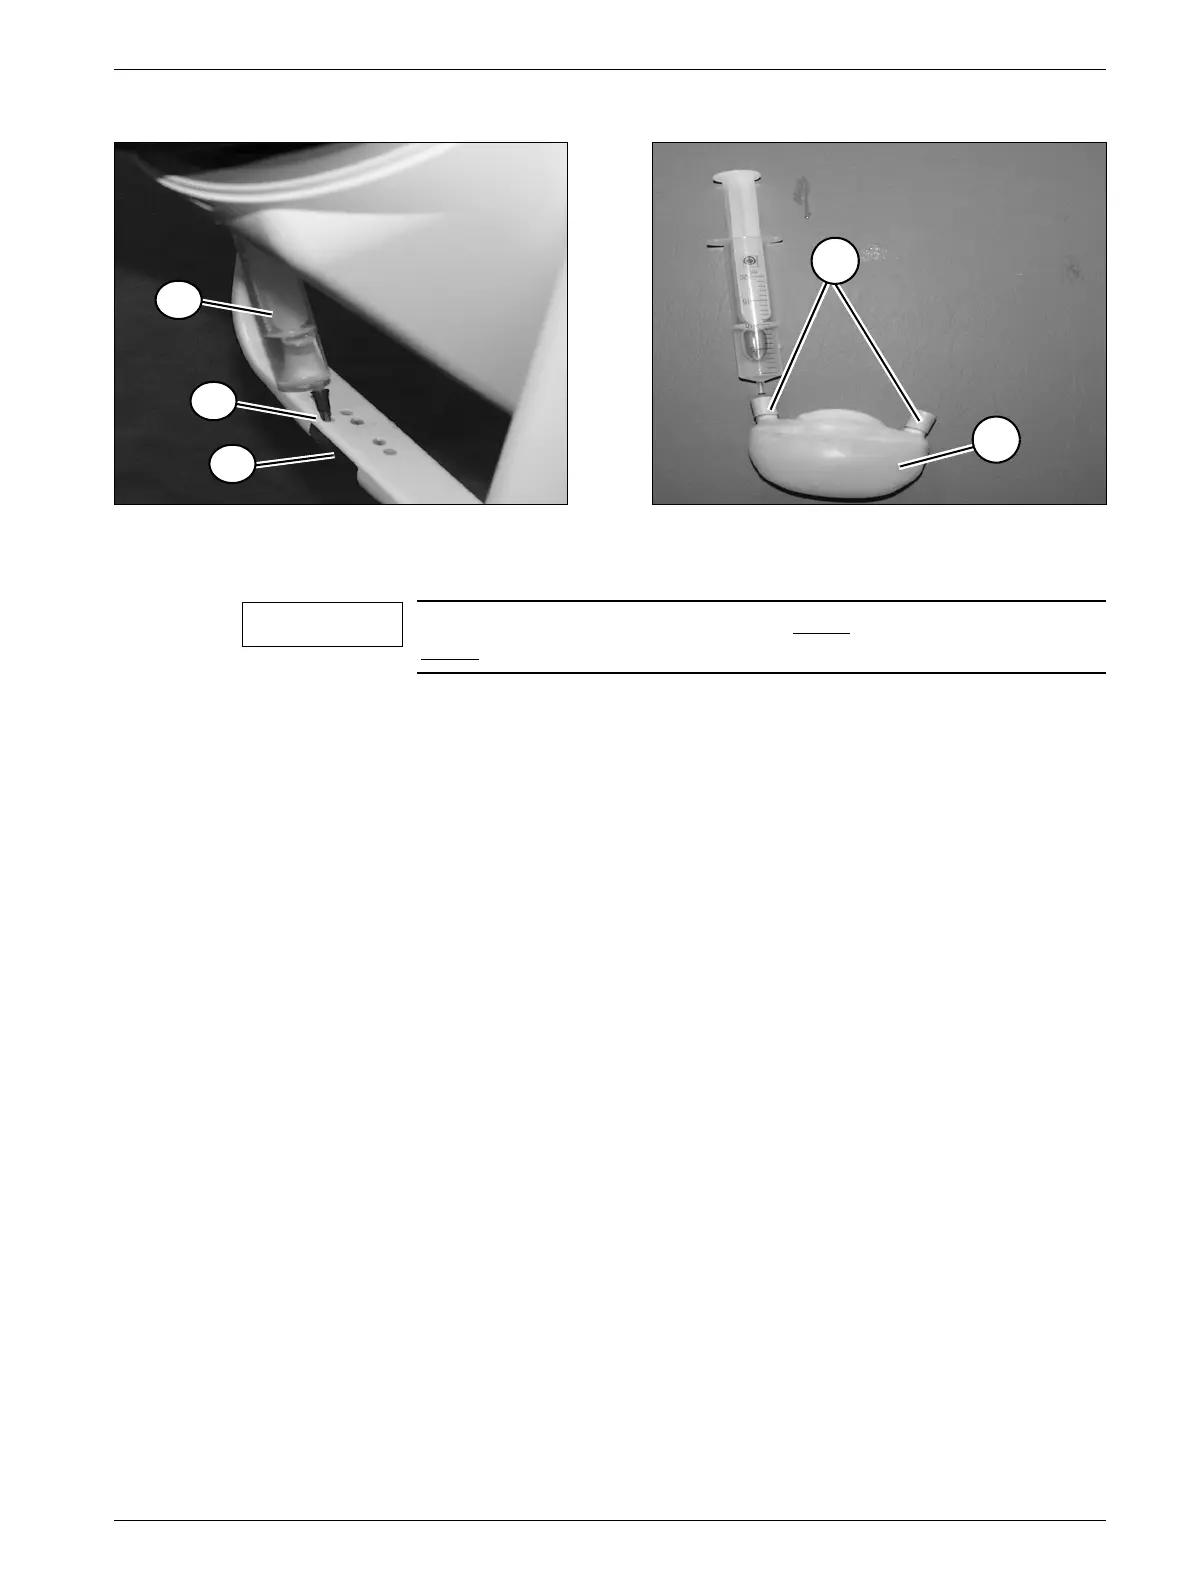
• Check that the isocenter phantom (1/Fig. 5) is filled with water, if not remove the screw
(2/Fig. 5) and fill water with a syringe (3/Fig. 5).
No air bubbles may be present. Screw the screw back in.
• Hinge the isocenter phantom up.
• Fill the water bladder with water (approx. 100 - 120 ml, i.e. 5 - 6 syringes a 20 ml)
(1/Fig. 6):
- Fill a syringe with distilled water. Remove the air remaining in the syringe.
- Push the syringe needle through one of the valves (2/Fig. 6) and empty the contents of
the syringe into the water bladder. The valve has a self-closing membrane.
- Repeat the filling process until the water bladder if filled with approx. 200 - 120 ml
water.
- After filling there must not be any air bubbles in the water bladder; withdraw air bubbles
with the syringe.
• Apply contact gel to the isocenter phantom.
• Fasten the water bladder (5/Fig. 1) with the holding part (6/Fig. 1) to the isocenter
phantom.
• Apply contact gel to the ultrasound probe.
• With the "Image field/zoom" knob set the value "50" (Fig. 7) - bottom left in the ultrasound
image.
• Push the probe so far forwards (3/Fig. 1) until the isocenter cross is approximately in the
center of the SONOLINE Prima screen.
• Press the menu key and display this.
Fig. 5 Fig. 6
The isocenter must be checked mit every type of probe and after
every
probe change
2
1
3
2
1
NOTE