MODULARIS Uro Plus SPL1-130.840.02 Page 32 of 34 Siemens AG
Rev. 03 04.05 CS PS 24 Medical Solutions
4 - 32 LITHOSTAR MODULARIS
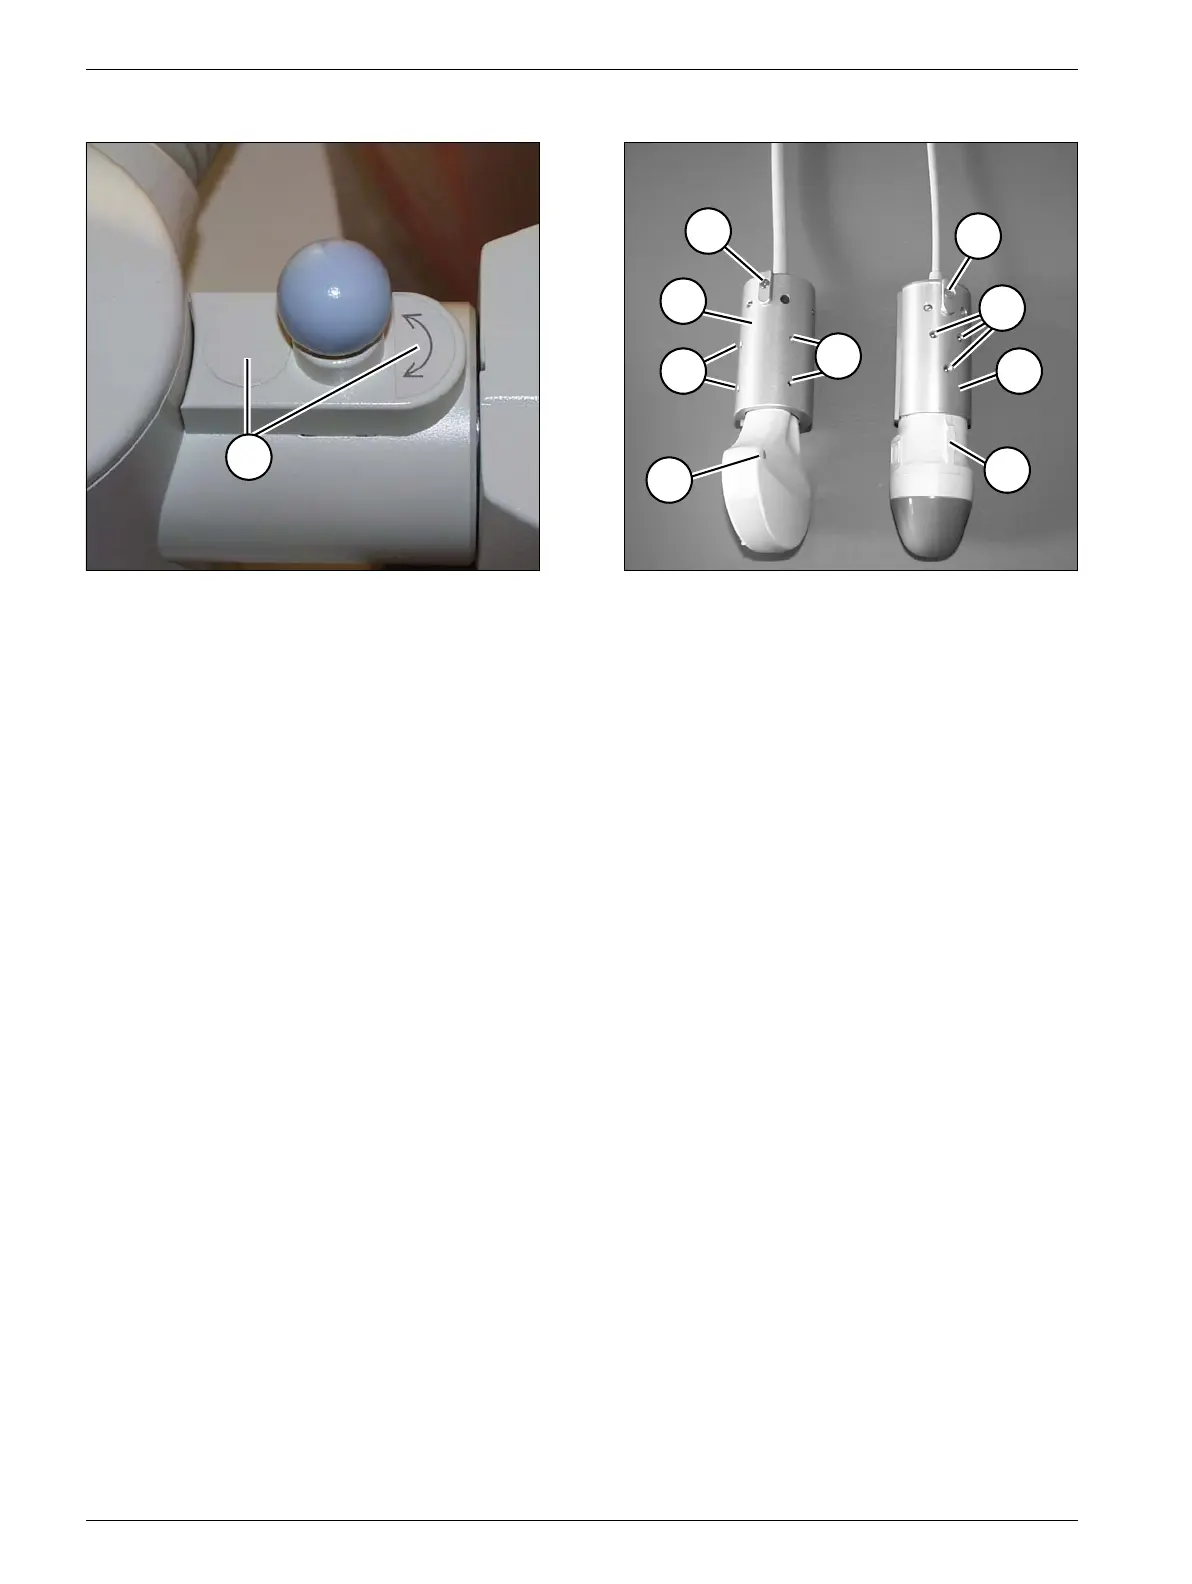
Replacement of rotary joint lock 4
• Remove the two labels (1/Fig. 39).
• Loosen the screws located below and remove the rotary joint lock.
• Loosen the brake screw.
• Pull out the arm with the shaft (2 men).
• Remove any burr which may be present on the catch holes.
• Replace brake pad.
• Reinsert shaft.
• Fasten the new rotary joint lock.
• Tighten and counter brake screw. (The support arm must not move out of the verticle
position on its own).
• Affix the labels again.
• Check the lock in all positions.
Replacing the probe 4
Sector Probe 4
• Loosen the 6 screws (3 are not visible) (1/Fig. 40) and remove the sleeve (2/Fig. 40).
• Attach the sleeve on the new probe. Pay particular attention to the positioning,
the marking (3/Fig. 40) and (4/Fig. 40) must form a line.
• Tighten the 6 screws.
• Check the ultrasound iso-center.
Fig. 39 Fig. 40
4
1
2
3
5
7
8
8
6
1