MODULARIS Uro Plus SPL1-130.840.02 Page 12 of 16 Siemens AG
Rev. 03 04.05 CS PS 24 Medical Solutions
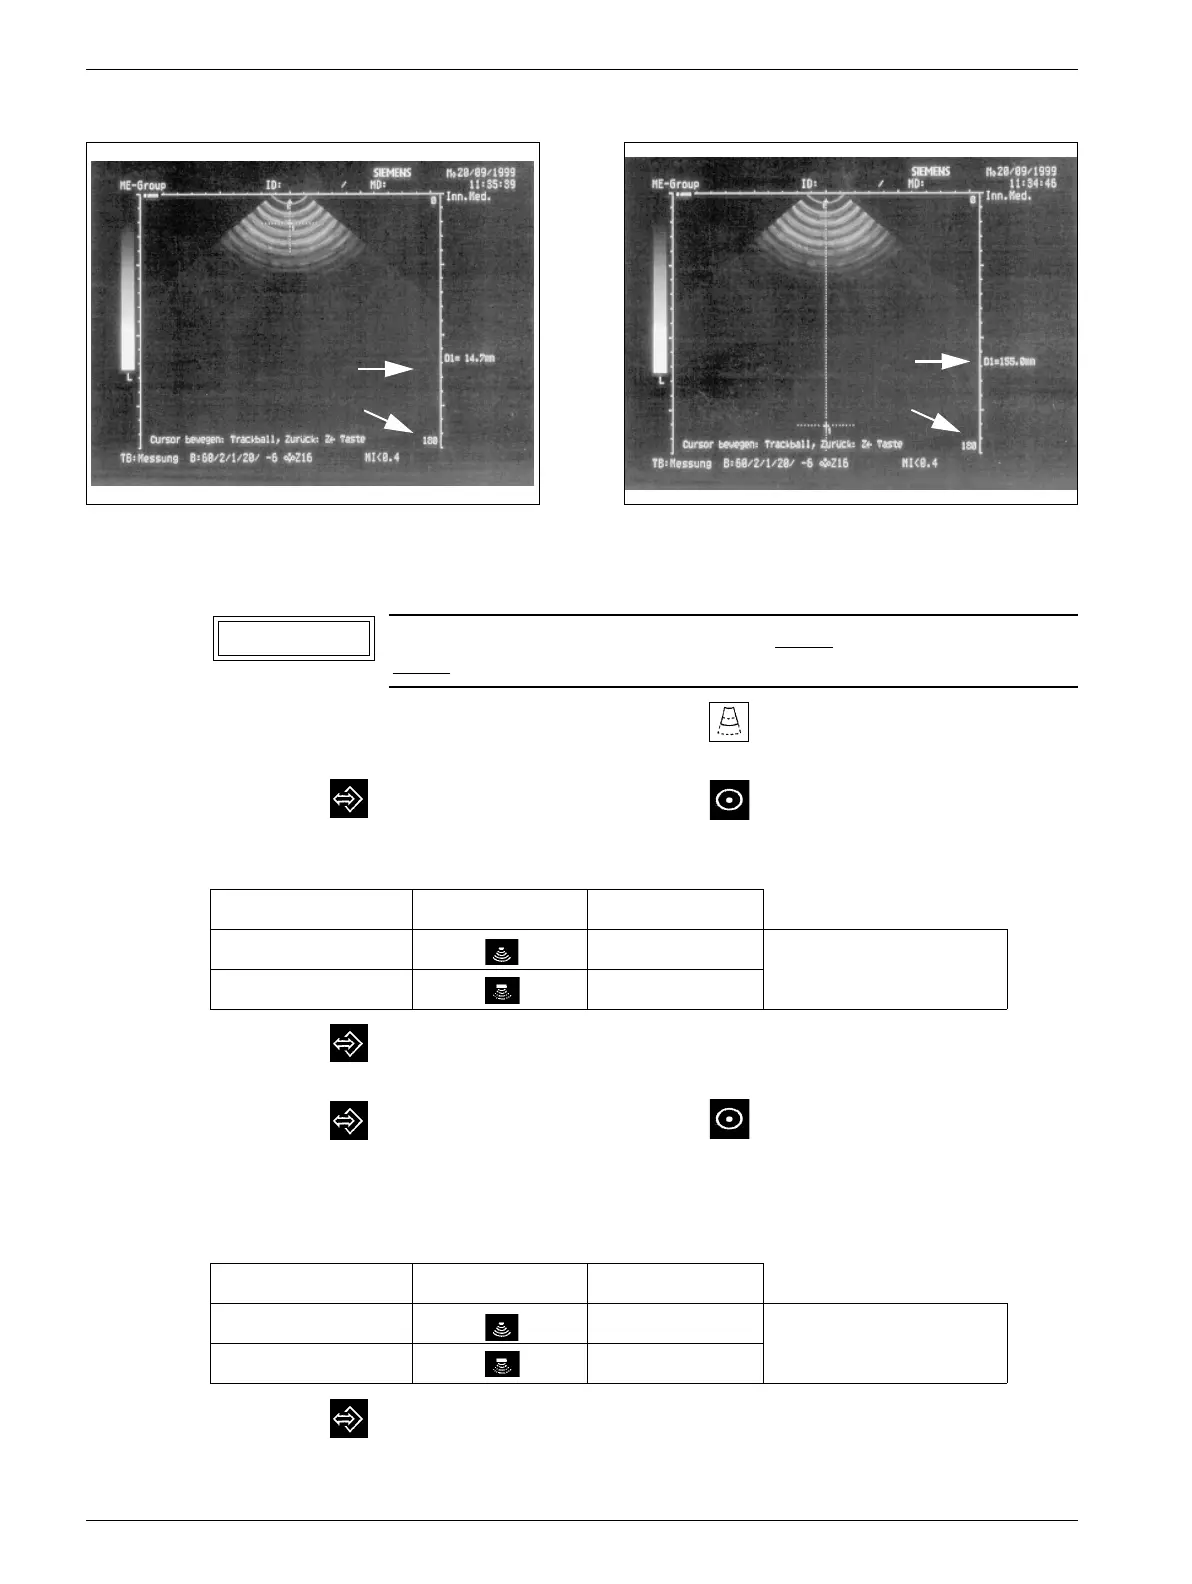
6 - 12 Iso-center with ultrasound
Checking the target on the Sonoline Prima
• Set the value (D/Fig. 17,18) to 180 using the knob .
• Slide the ultrasound probe all the way forward to the shock wave head.
• Press the key and select the measuring point .
• Use the track ball to move to the center of the crosshairs. In the display (F/Fig. 17), a
value of - see Table - must appear that is relative to the probe.
• Press the key ("Freeze" is deselected).
• Move the ultrasound probe all the way in the other direction.
• Press the key and select the measuring point .
• Use the track ball to move to the center of the crosshairs. In the display (F/Fig. 18), a
value of - see Table - must appear that is relative to the probe. If this is not the case, the
adjustment procedure must be repeated for the potentiometer in the ultrasound arm or
the ultrasound arm must be replaced.
• Press the key ("Freeze" is deselected).
Fig. 17 Fig. 18
The isocenter must be checked with every probe type and after
every
replacement of a probe.
Probe Select using Value for D1
Sector (1/Fig. 2) 15 ± 1 mm with default values,
see SPL1-130.038.01
Array (2/Fig. 2) 13 ± 1 mm
Probe Select using Value for D1
Sector (1/Fig. 2) 153 ± 1 mm with default values,
see SPL1-130.038.01
Array (2/Fig. 2) 151 ± 1 mm
F
D
F
D
NOTICE